Hola, hola. Espero que este grupo de personas talentosas, exitosas y hermosas estén bien y bendecidas. ¿A cuántos les gusta una flor? Es algo hermoso ¿verdad? Su color, aroma, textura, forma y belleza son incomparables y la hacen única y especial. Bueno en base a esto, esta vez quiero mostrarles como hacer una de ellas pero con una cinta de raso, sencilla, hermosa, fácil y para combinar o decorar con cualquier pieza.
Hello, hello I hope this group of talented, successful and beautiful people are well and blessed. How many like a flower? It is a beautiful thing isn't it? Its color, scent, texture, shape and beauty are incomparable and make it unique and special. Well based on this, this time I want to show you how to make one of them but with a satin ribbon, simple, beautiful, easy and to combine or decorate with any piece.

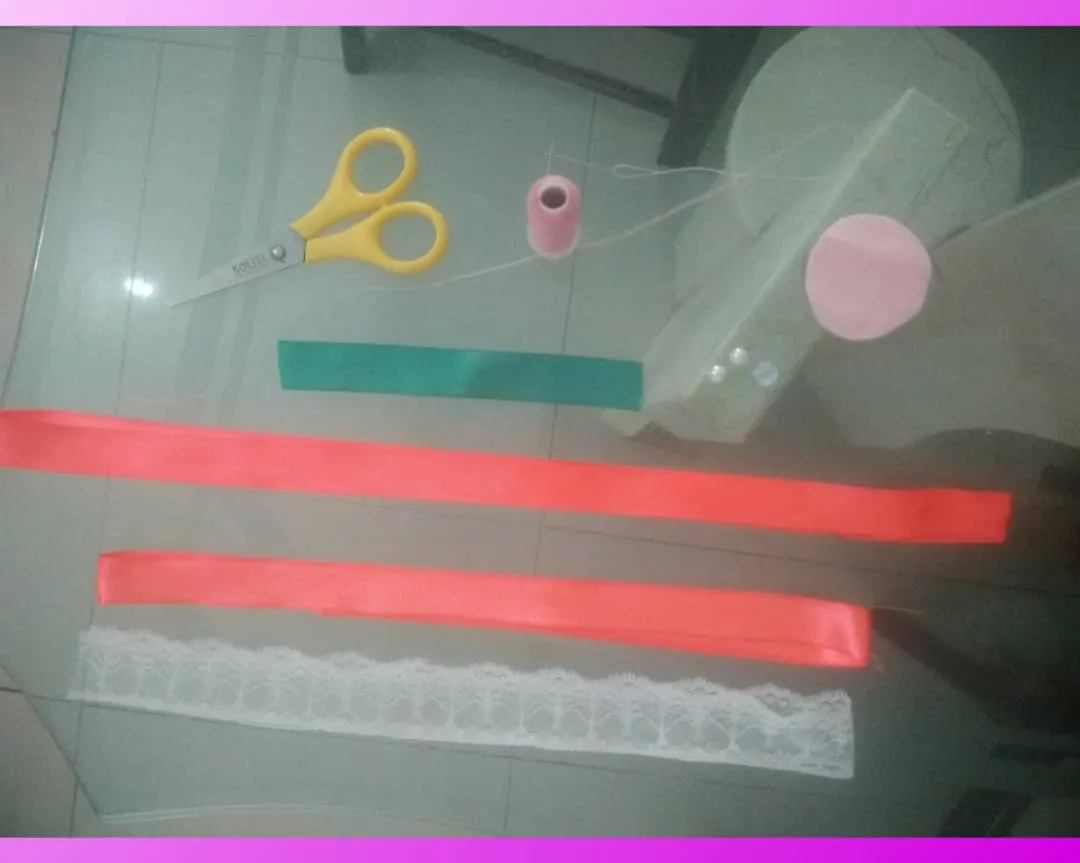
Estos son los materiales a utilizar:
- Cinta de raso.
- Tijeras.
- Hilo y aguja.
- Fieltro.
- Encaje y una perlita.
These are the materials to be used:
- satin ribbon.
- Scissors.
- Thread and needle.
- Felt.
- Lace and a bead.

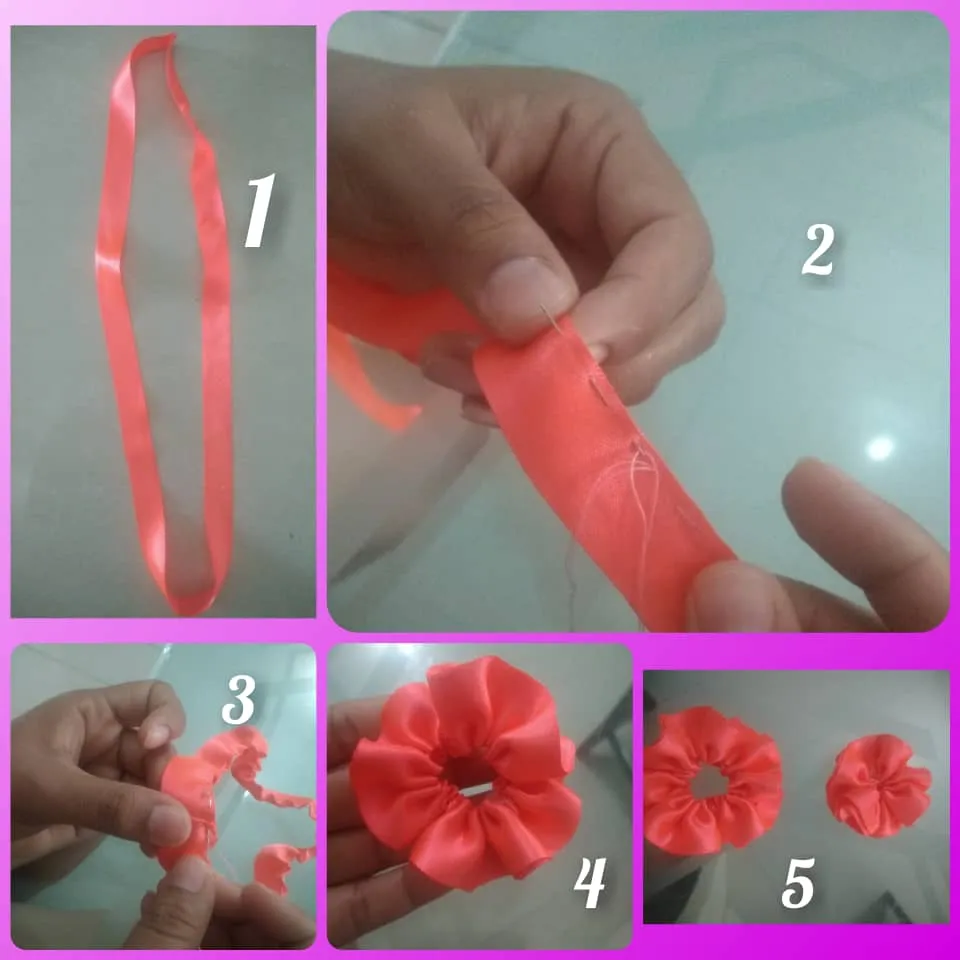
Paso 1
Como podemos ver tenemos dos trozos de cintas de una mismo color, uno es de 90cm y el otro es de 60cm. Lo primero que vamos a hacer es tomar la cinta más larga, doblarla u unir sus puntas para que quede doble, luego iniciamos a coser la cinta con la aguja e hilo, solamente cosiendo por la orilla de la cinta como se muestra en la imagen hasta llegar a la otra punta haciendo así un círculo y luego halar el hilo hasta encoger toda la cinta. Luego repetimos la mismo mismo con la cinta más pequeña.
Step 1
As we can see we have two pieces of ribbons of the same color, one is 90cm and the other is 60cm. The first thing we are going to do is to take the longer ribbon, fold it or join its ends so that it is double, then we start sewing the ribbon with the needle and thread, only sewing along the edge of the ribbon as shown in the image until we reach the other end making a circle and then pull the thread until the ribbon shrinks all the way. Then repeat the same with the smaller ribbon.
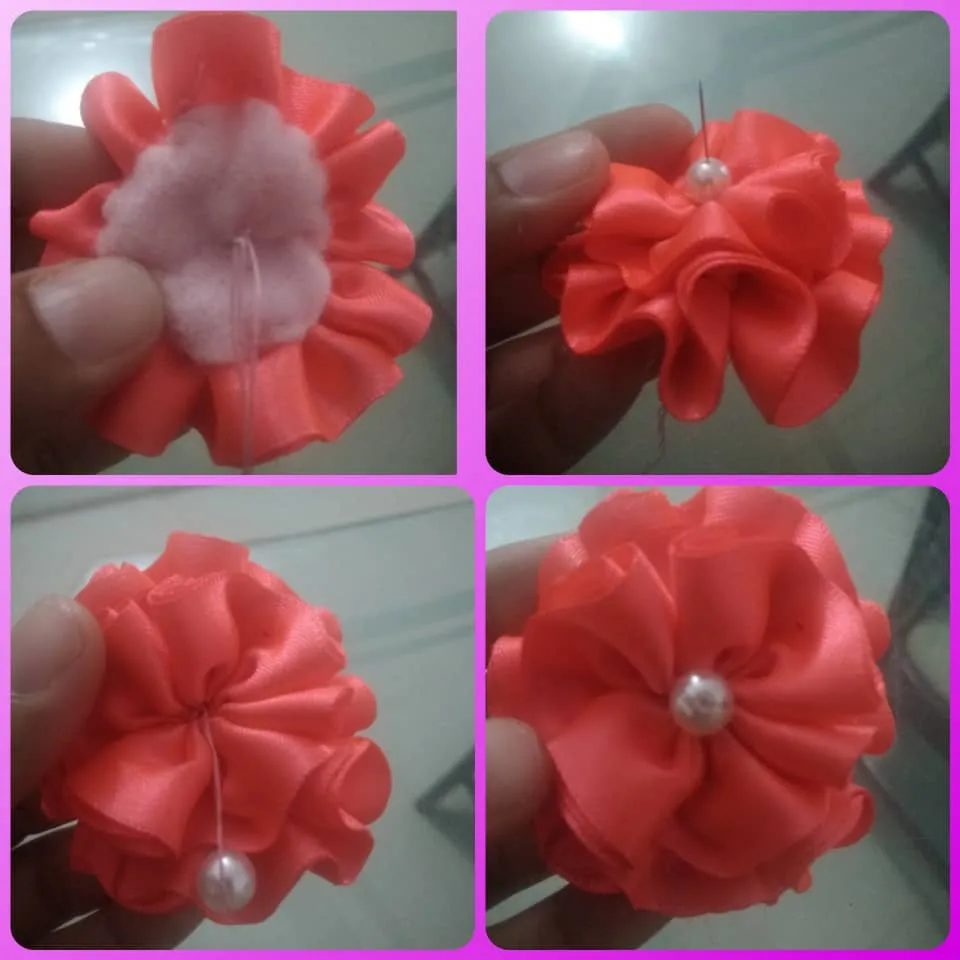
Paso 2
Al tener lista las dos cintas cocidas encogidas, tomamos el fieltro y lo cosemos en una de las partes del círculo de cinta más grande, dándole así una base. Luego colocamos la otra cinta encogida encima de la primera y la aseguramos cociendola, dándole forma ya a la flor.
Step 2
Once we have the two shrunk ribbons ready, we take the felt and sew it on one of the parts of the larger ribbon circle, thus giving it a base. Then we place the other shrunk ribbon on top of the first one and secure it by sewing it, giving it the shape of the flower.
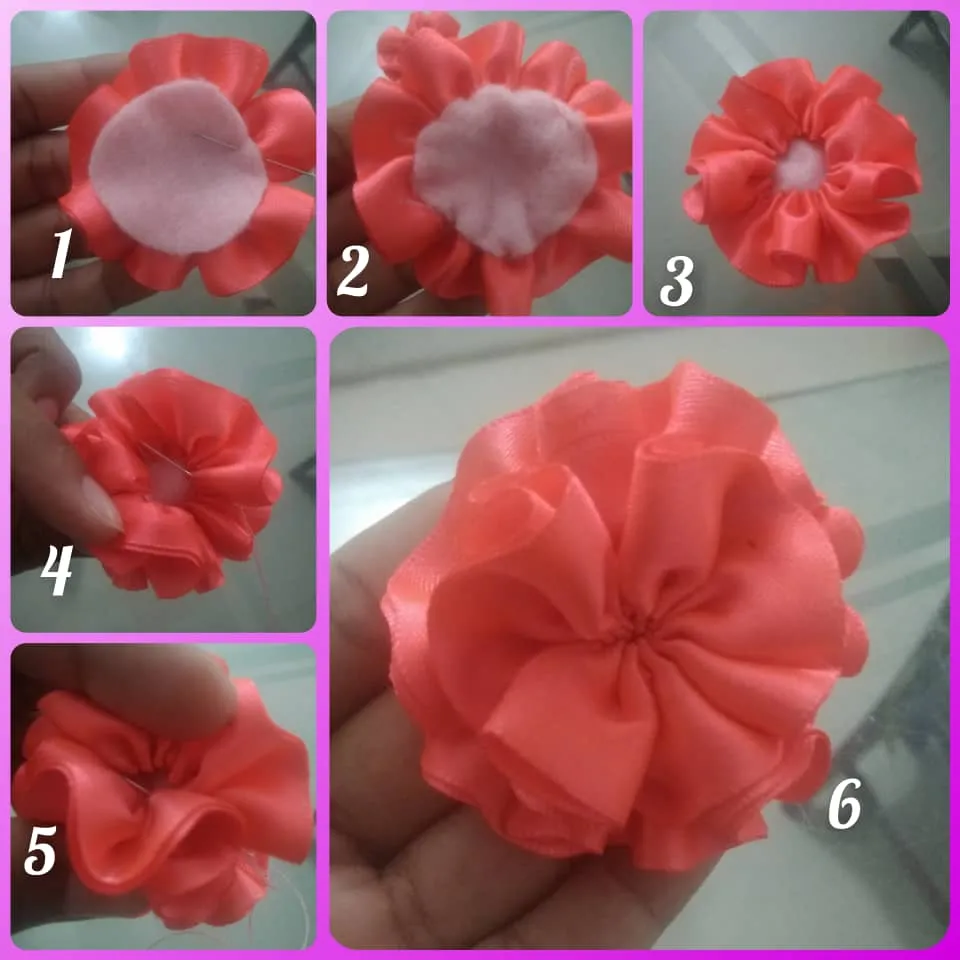
Paso 3
Al tener ya la flor montada, procedemos a colocarle la perla en el medio de la flor cosiendola desde el fieltro (parte de abajo) hacia arriba, así queda más segura.
Step 3
Once the flower is assembled, we proceed to place the pearl in the middle of the flower sewing it from the felt (bottom) to the top, so it is more secure.
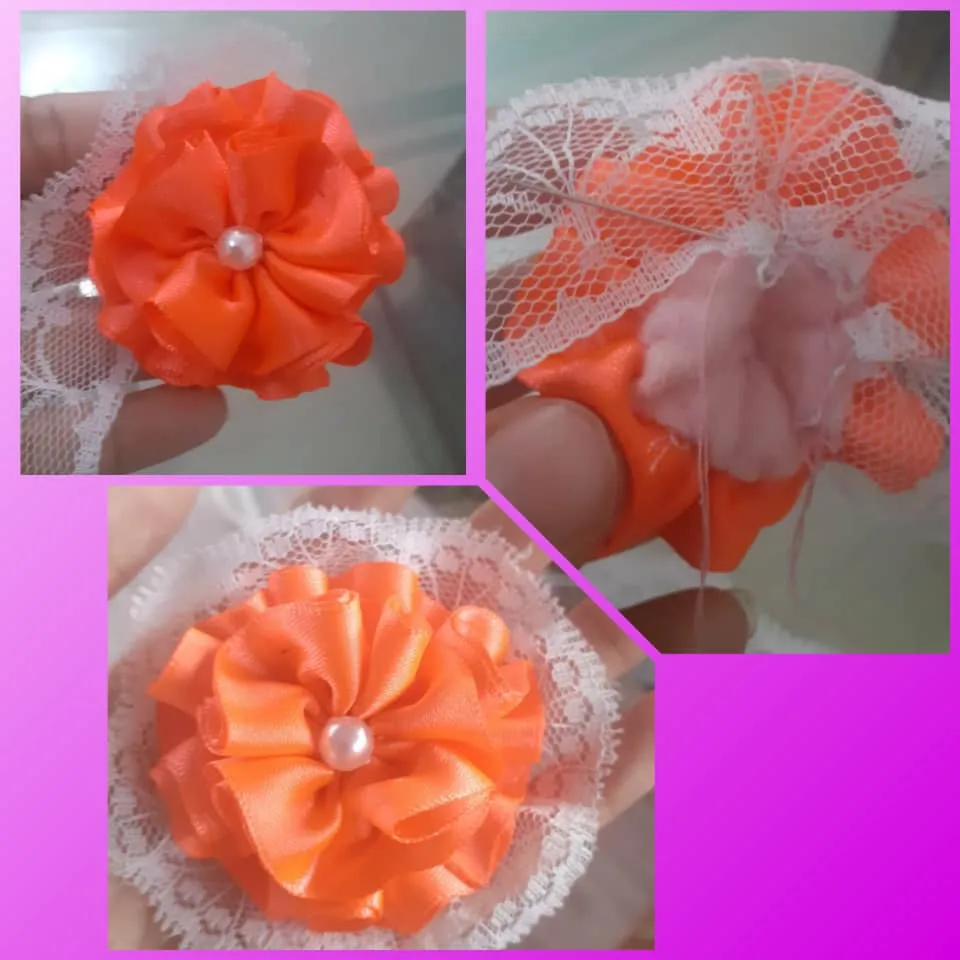
Paso 4
Así mismo colocamos el encaje por la parte de abajo y cosemos hasta cubrir toda la flor.
Step 4
Place the lace on the bottom and sew until it covers the whole flower.
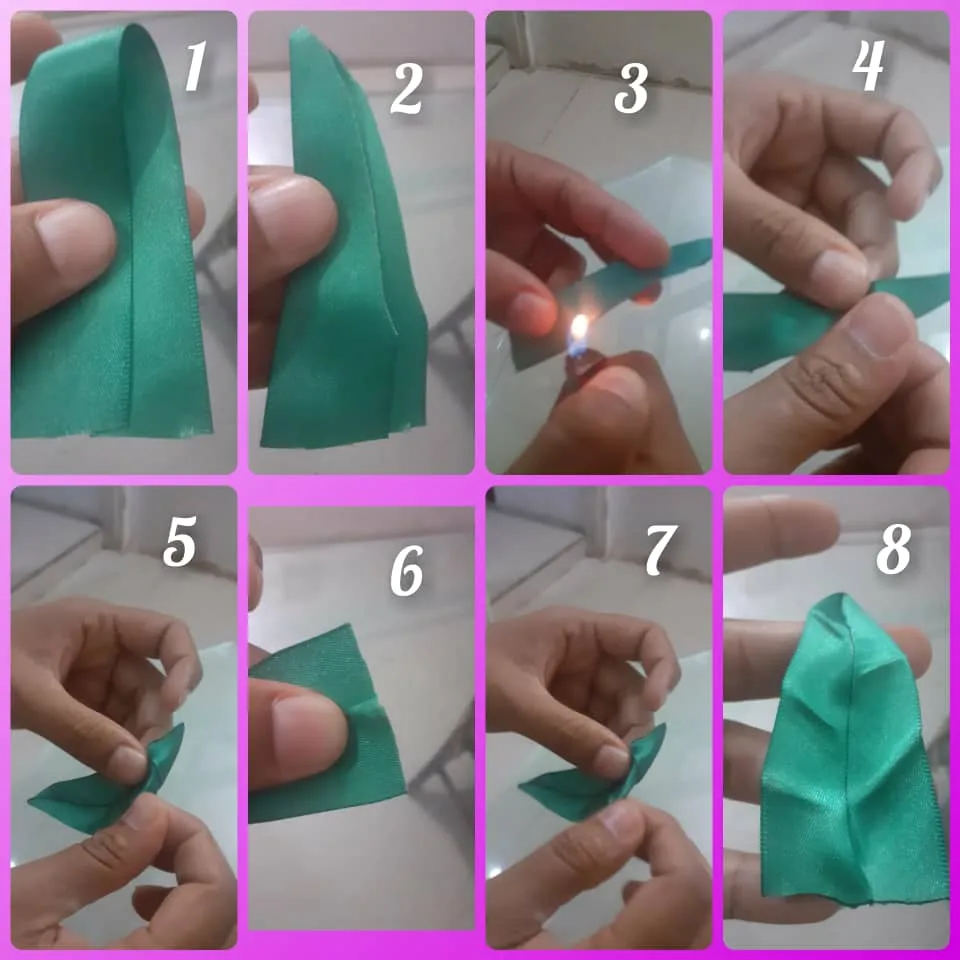
Paso 5
Ahora con esta cinta verde realizamos unas hoja para resaltar más la flor, como vemos en la imagen, doblamos la cinta y cortamos en forma triangular, quemamos con un yesquero para sellar las puntas, de igual manera lo hacemos en la parte de abajo y le hacemos dobles a la cinta con lo caliente del fuego para darle más forma a hoja.
Step 5
Now with this green ribbon we make a leaf to highlight more the flower, as we see in the image, we fold the ribbon and cut in triangular shape, we burn with a tinder to seal the tips, in the same way we do it at the bottom and we make doubles to the ribbon with the hot fire to give more leaf shape.
Paso 6
Listas las hojas, las cosemos por la parte de abajo de la flor. Y así queda listo el trabajo.
Step 6
Ready leaves, we sew them on the underside of the flower. And so the work is ready.
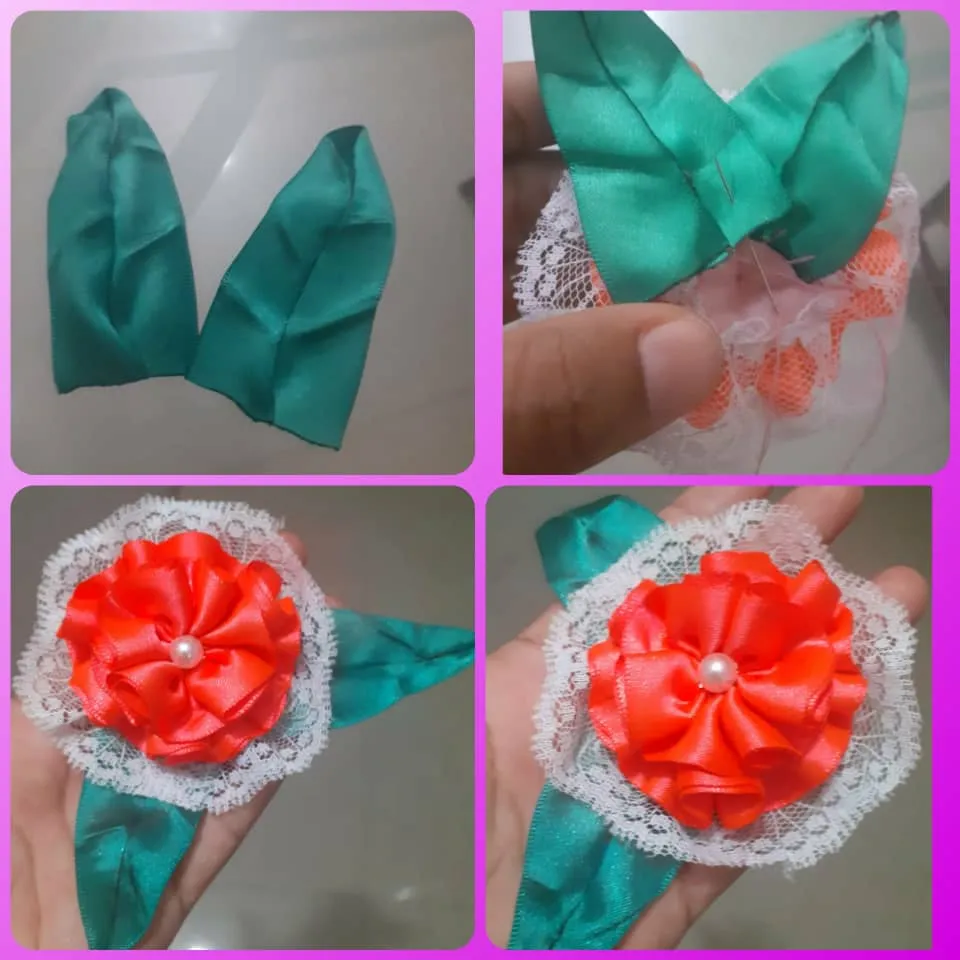
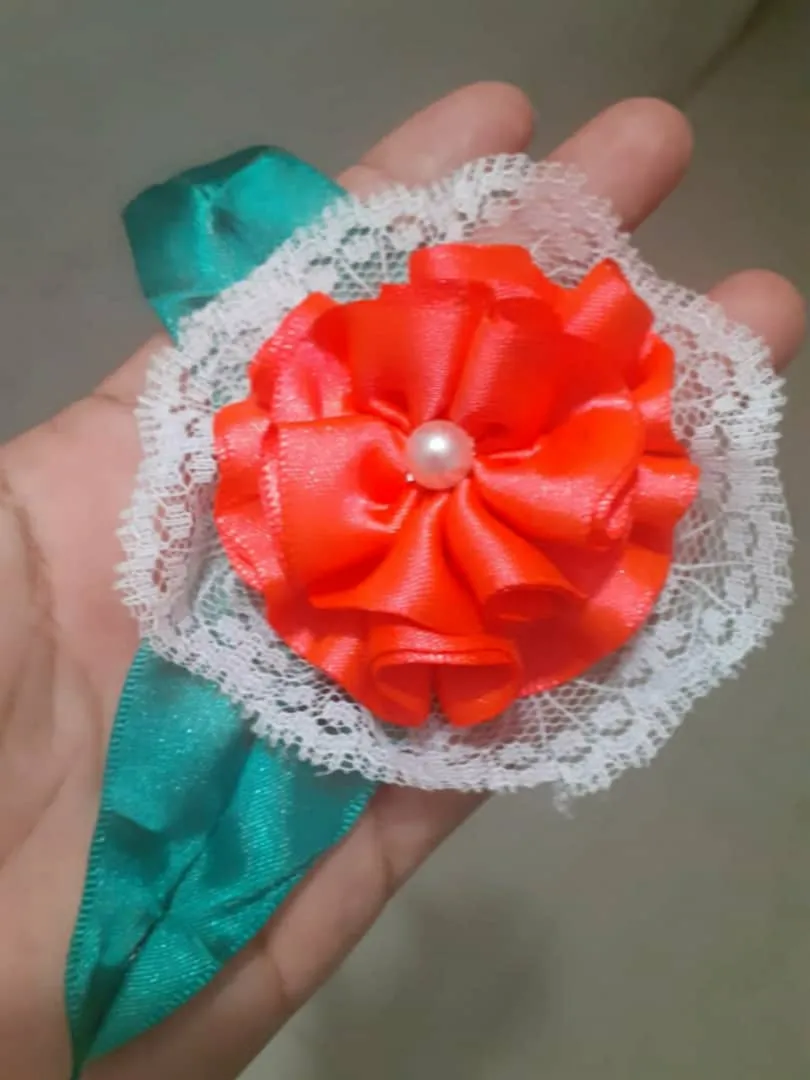
Linda, fácil y sencilla, este es nuestro resultado final.
Cute, easy and simple, this is our final result.
Y lo mejor puedes combinarlo en ropa para bebes, faldas, carteras, cintillos o con lo que quieras. Queda super linda con todo.
And the best thing is that you can combine it in baby clothes, skirts, handbags, headbands or with whatever you want. It looks super cute with everything.

Espero le haya gustado y sea de provecho para todos ustedes.
I hope you liked it and that it will be useful for all of you.
Todas las fotos fueron tomadas con mi celular android y la edición las hice con InCollage y Canva.
All the photos were taken with my android phone and the editing was done with InCollage and Canva.
Traducción: Deepl.com