¡Hola queridos usuarios de Hive ✨💕!
Hi dear Hive users ✨💕!
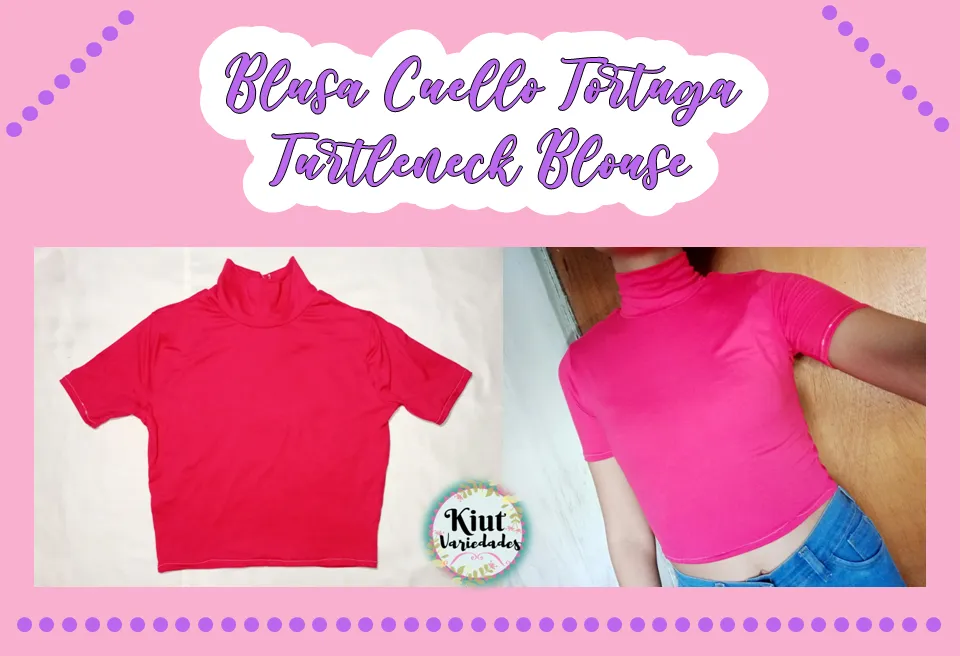
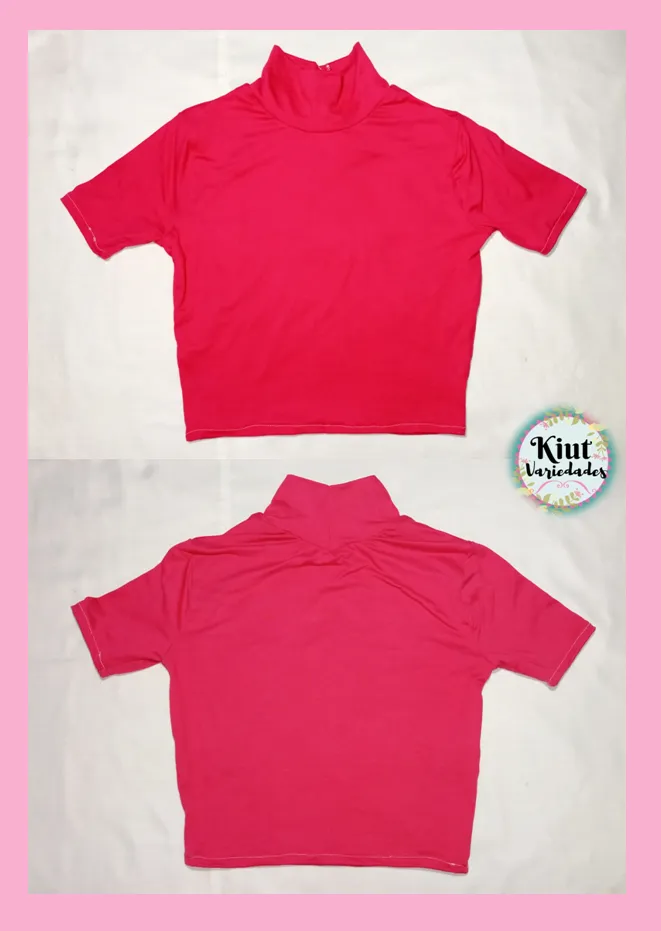
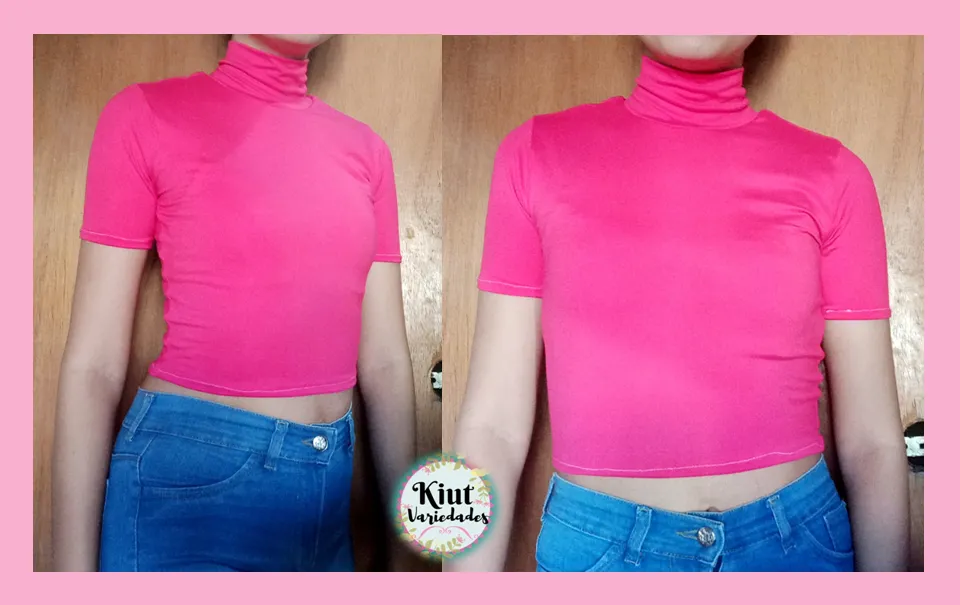
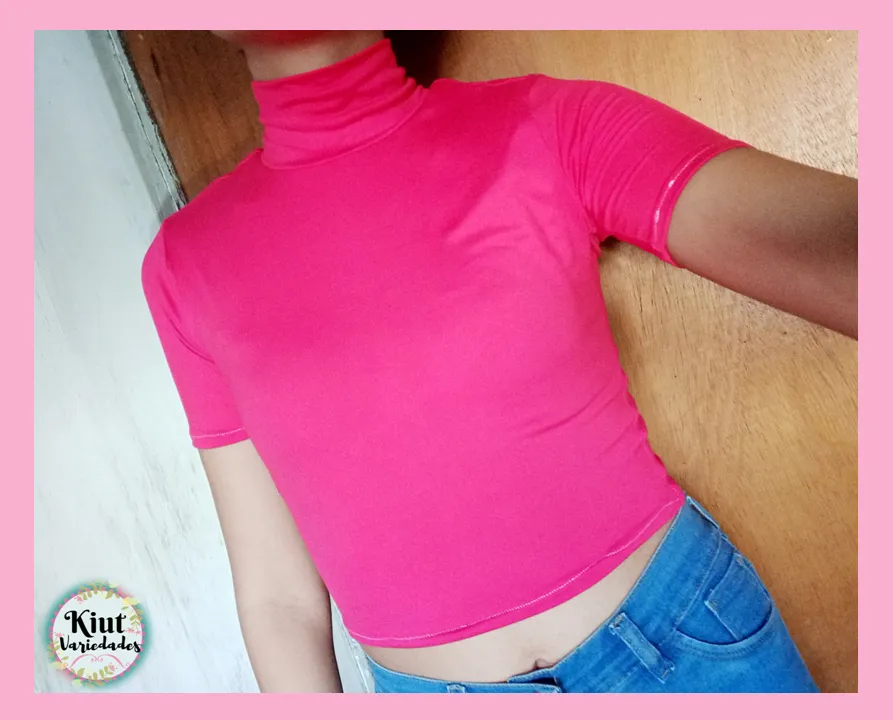
Si hay un modelo de blusa del que soy especialmente fan, es de este, me encanta la manera en que esta forma de cuello hace ver el rostro más alargado y al mismo tiempo estiliza el cuerpo, obviamente este modelo no es el favorito de todos, pero como ya dije ese no es mi caso, de hecho tengo varias blusas con este cuello y aun así ninguna tiene mangas, así que desde hace tiempo quería hacerme este diseño con mangas cortas y aprovechar de mostrarles el proceso.
If there is a blouse model of which I am especially a fan, it is this one, I love the way this neck shape makes the face look more elongated and at the same time stylizes the body, obviously this model is not everyone's favorite, but as I said that is not my case, in fact I have several blouses with this neck and yet none has sleeves, so for some time I wanted to make this design with short sleeves and take the opportunity to show you the process.

🧵 MATERIALES || MATERIALS 🧵
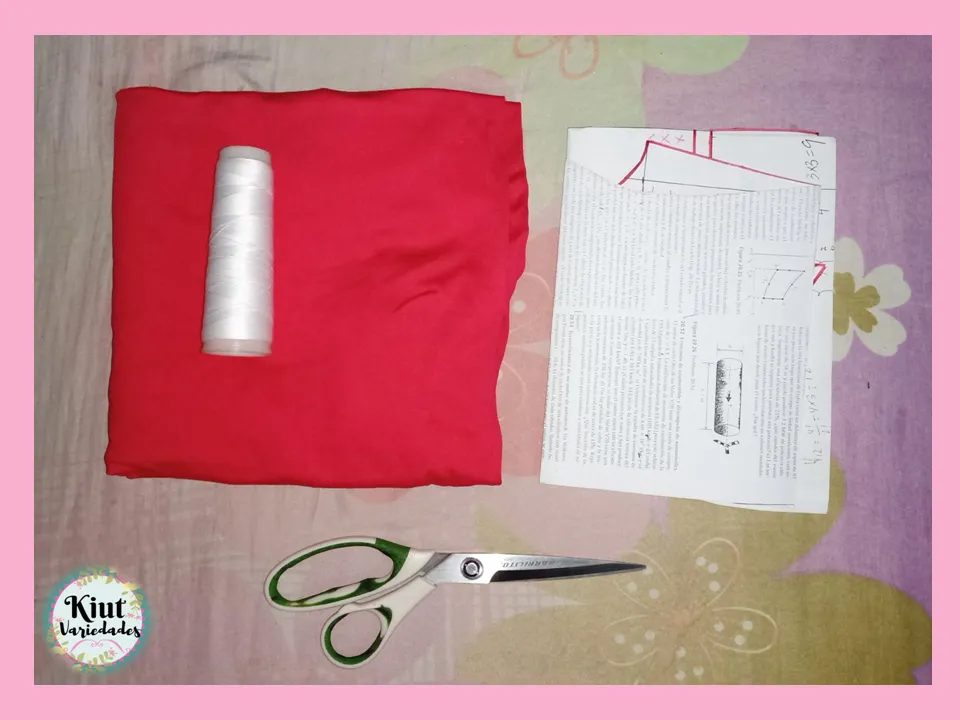
- Tela para Blusa
- Patrones Básicos de Blusa para Dama.
- Papel.
- Reglas de Patronaje.
- Lápiz o Marcador.
- Cinta Métrica.
- Hilo.
- Tijeras de Papel y Tijeras de Tela.
- Máquina de coser.
- Blouse Fabric
- Basic Blouse Patterns for Ladies.
- Paper.
- Pattern Rulers.
- Pencil or Marker.
- Tape measure.
- Thread.
- Paper Scissors and Fabric Scissors.
- Sewing machine.
🧵 COMENCEMOS || LET'S GET STARTED 🧵
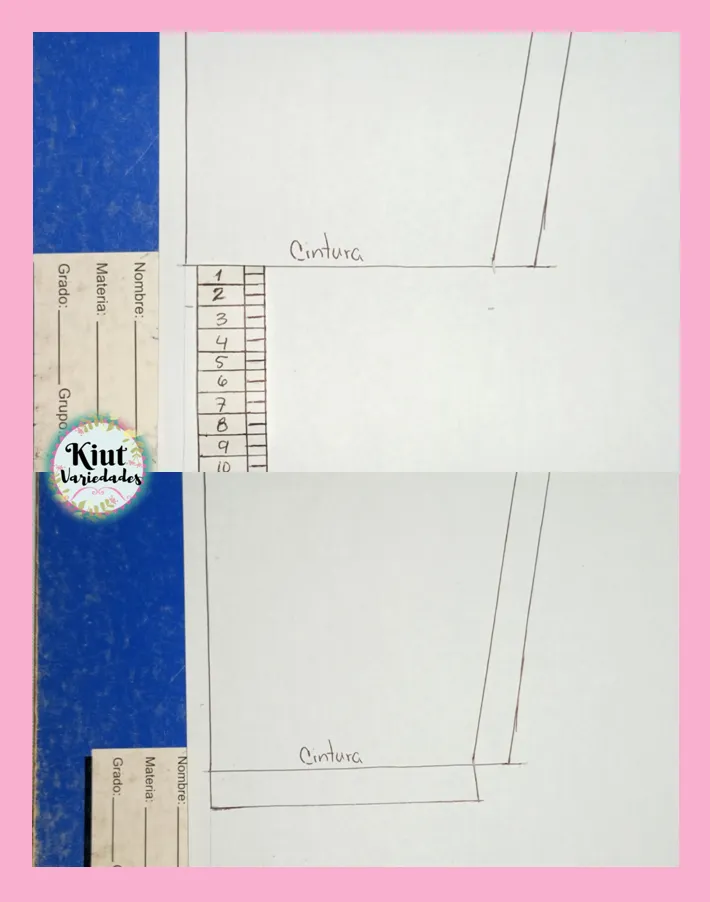
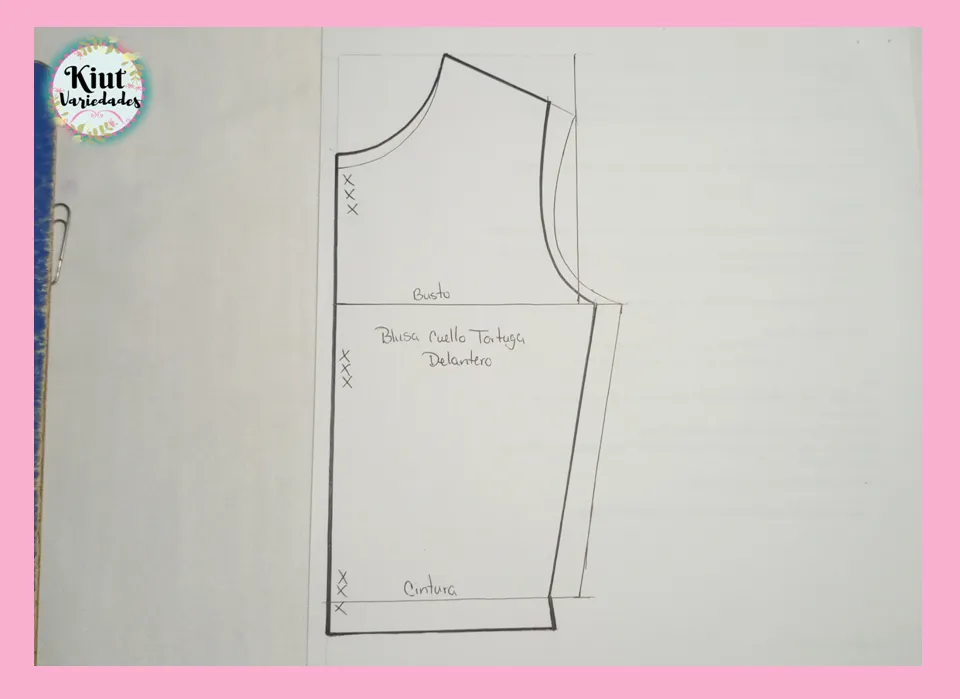
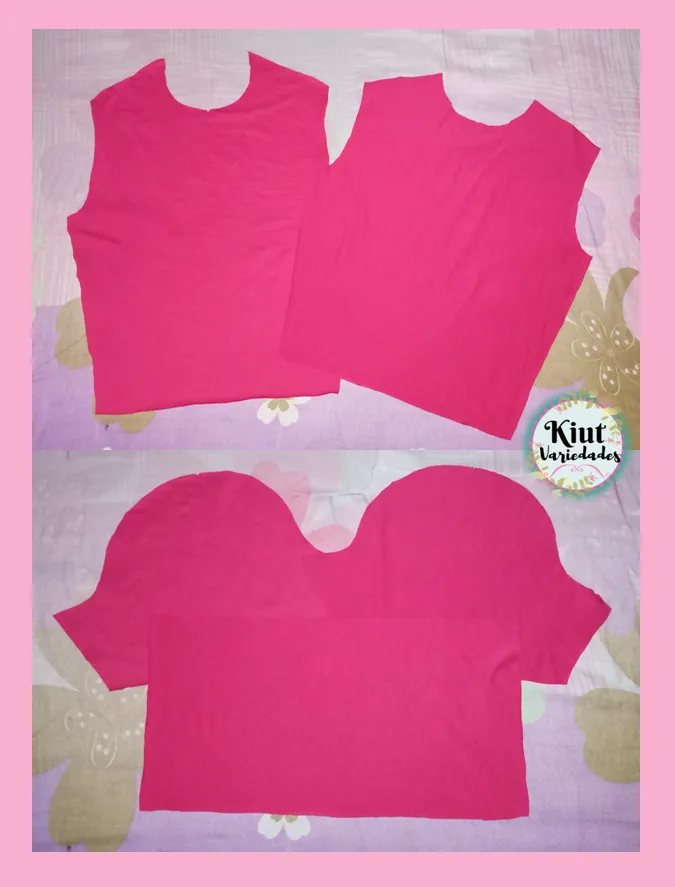
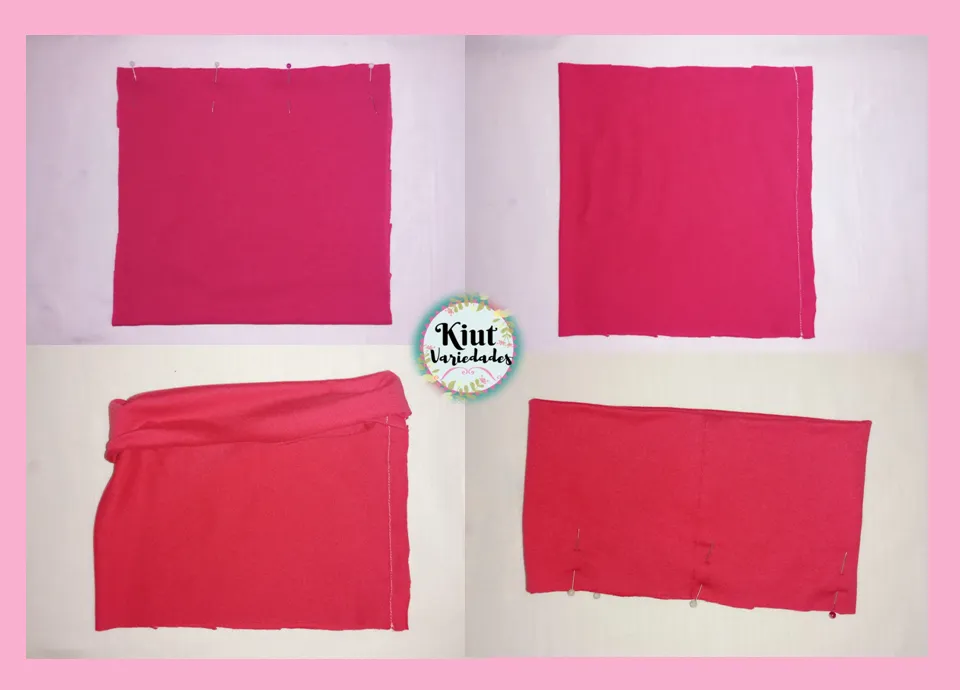
Para hacer esta blusa comencé haciendo los patrones, para ello copie mis patrones básicos de blusa y lo deje hasta la cintura (pues hasta allí quería mi blusa), como voy a trabajar con una tela elástica debo hacer unas reducciones al patrón original, para ello voy a medir 2cm hacia adentro en la línea del busto y cintura, y uniré estos dos puntos con línea recta.
To make this blouse I started making the patterns, for this I copied my basic blouse patterns and left it up to the waist (because I wanted my blouse up to there), as I will work with an elastic fabric I must make some reductions to the original pattern, for this I will measure 2cm inwards in the bust and waist line, and I will join these two points with a straight line.
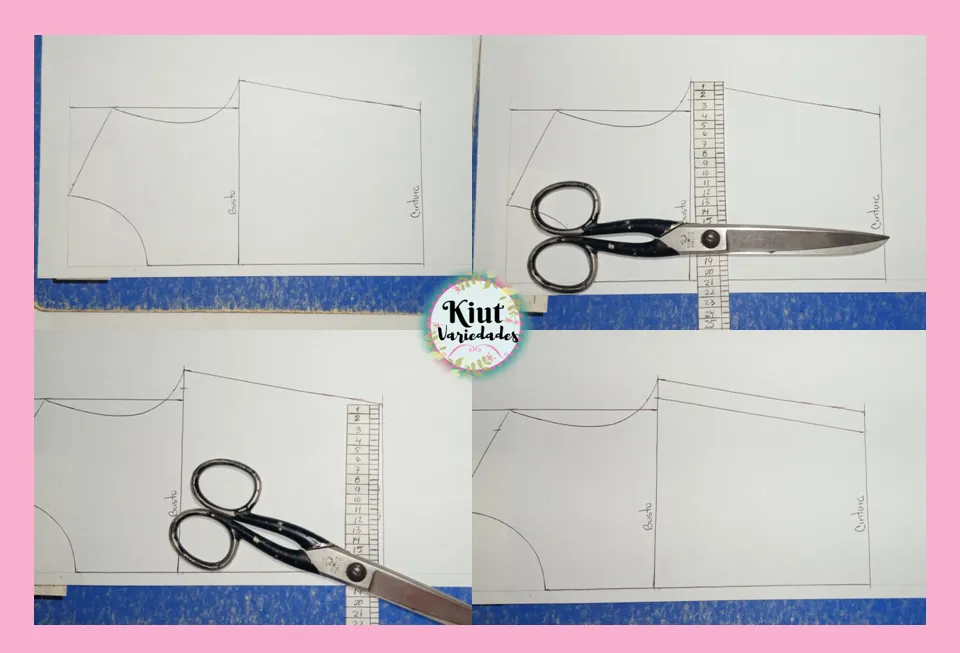
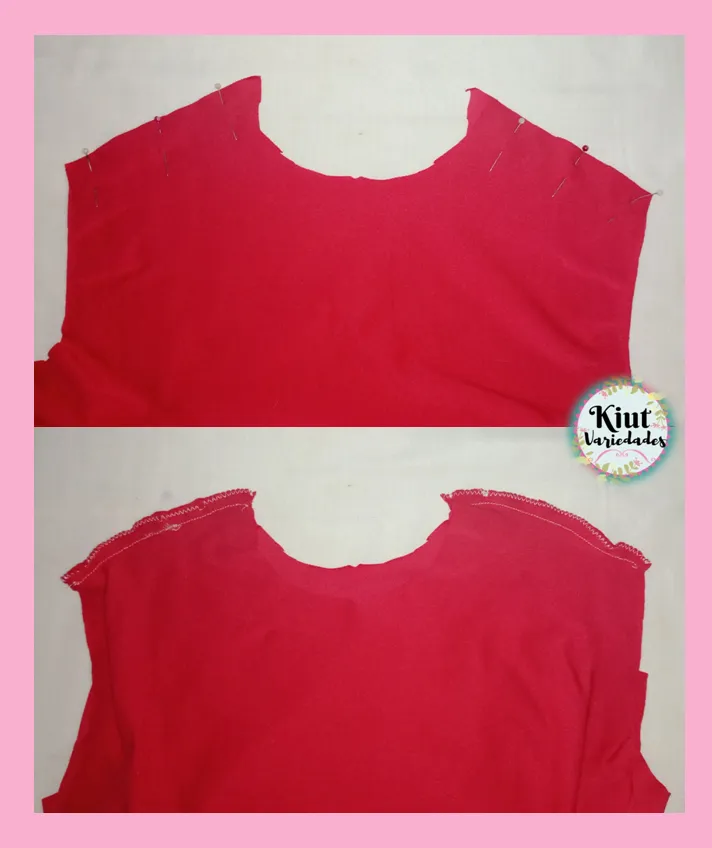
En el vértice hombro-sisa también voy a quitar 2cm (esta reducción corresponde al ancho de espalda), este punto lo uniré a la línea de busto formando una nueva sisa. En el cuello delantero voy a subir 1cm y formare la nueva curva del cuello.
At the shoulder-armhole vertex I will also remove 2cm (this reduction corresponds to the back width), this point I will join it to the bust line forming a new armhole. At the front neck I will raise 1cm and form the new neck curve.
En la parte inferior voy a bajar 2cm, porque aunque quiero que la blusa llegue hasta la cintura, esta tela que estoy utilizando tiende a subirse. Lo que quedaría por hacer es agregar márgenes de costura a todo el patrón.
At the bottom I'm going to go down 2cm, because even though I want the blouse to go all the way to the waist, this fabric I'm using tends to ride up. The only thing left to do is to add seam allowances to the whole pattern.
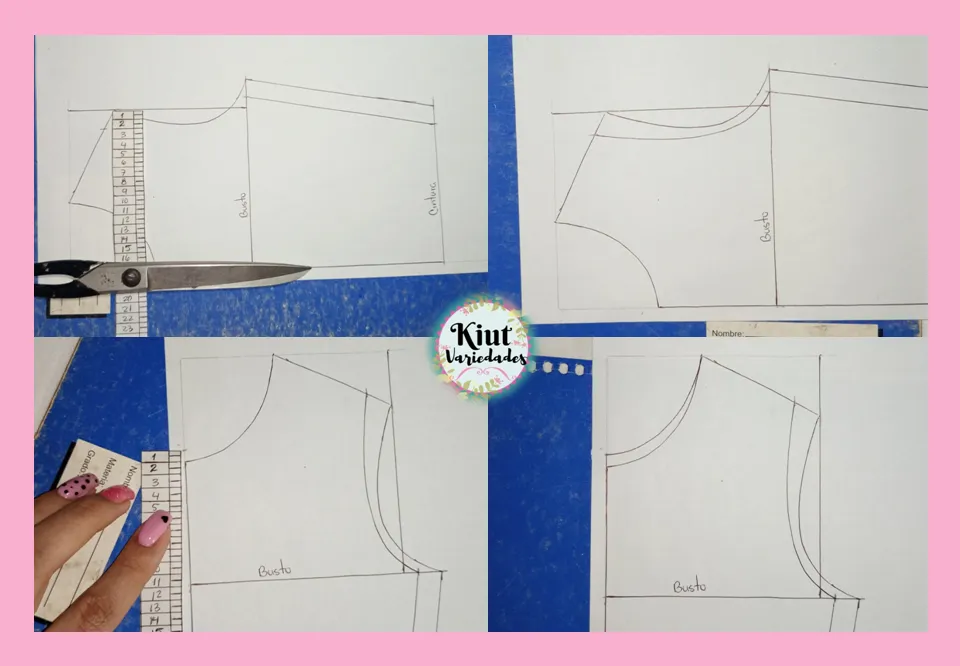
En el patrón de la espalda hice exactamente lo mismo con la excepción de que en el cuello no hice ninguna modificación. El patrón de manga lo volví a hacer con la nueva medida de la sisa.
In the back pattern I did exactly the same with the exception that I didn't make any changes to the neckline. The sleeve pattern was redone with the new armhole measurement.
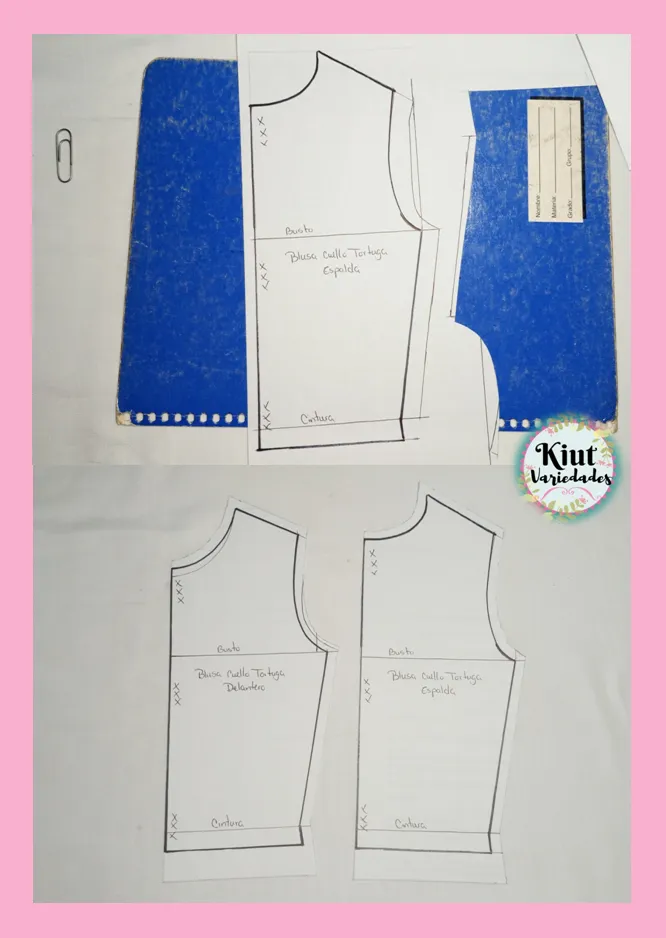

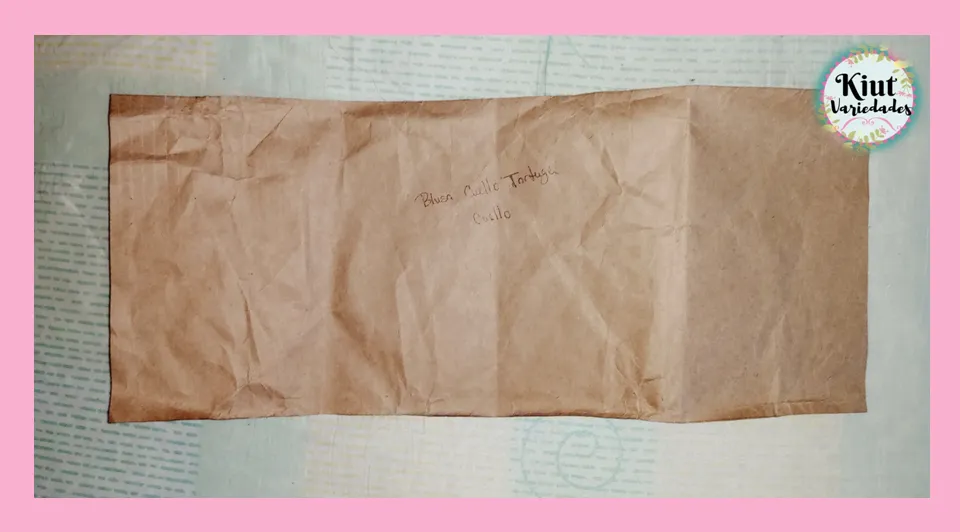
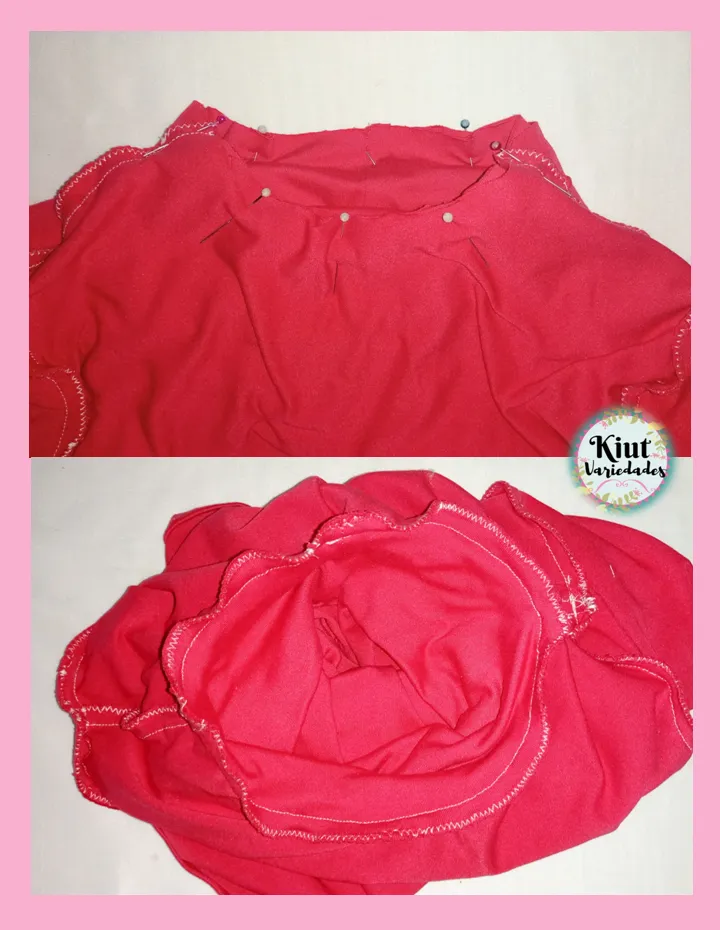
Para el cuello, tome la medida de ambos cuellos, esta medida la multiplique por 2 y al resultado le reste 5, con esta medida final hice un rectángulo de 16 cm de ancho.
For the collar, take the measurement of both collars, multiply this measurement by 2 and subtract 5 from the result, with this final measurement I made a rectangle 16 cm wide.
Con patrones listos es momento de ir a la tela, corte todas las piezas y comencé uniendo delantero y espalda por los hombros.
With patterns ready it's time to go to the fabric, I cut all the pieces and started by joining the front and back at the shoulders.
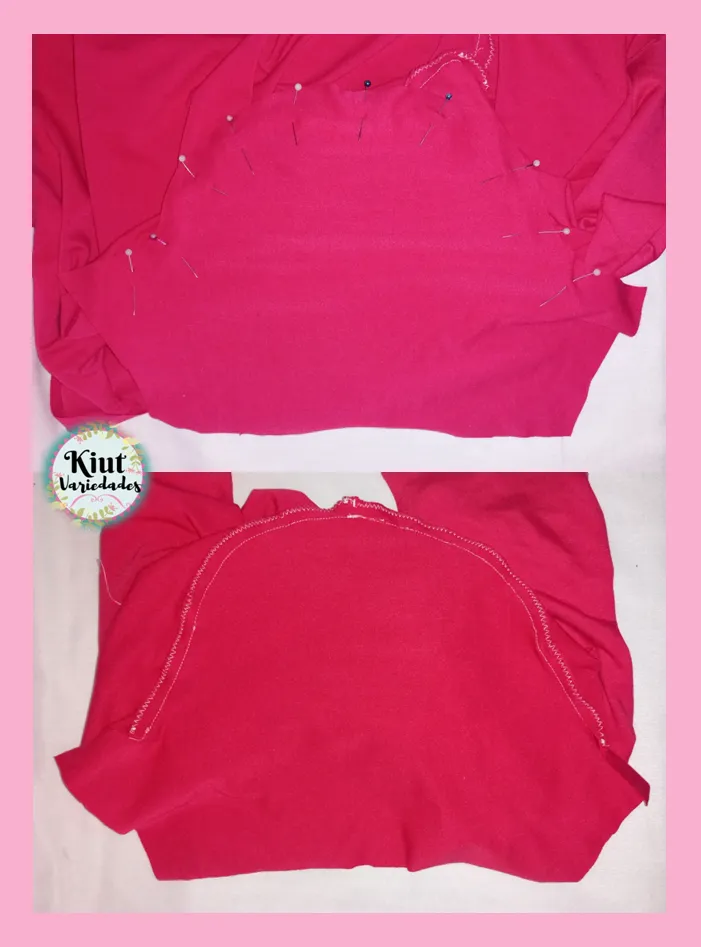
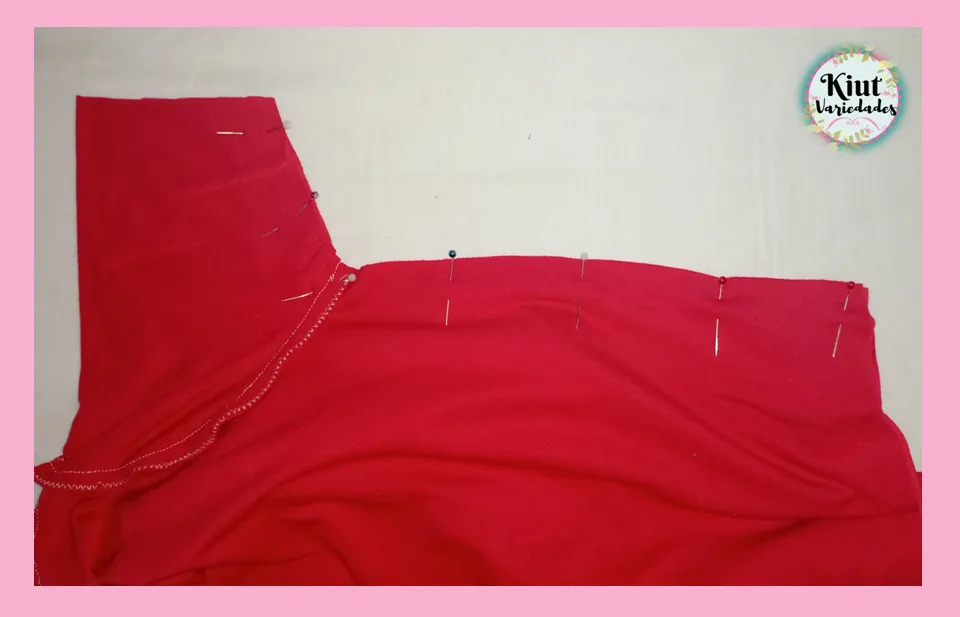
Luego de esto me pase a unir las mangas, teniendo precaución de saber cual parte va del lado de espalda y cuál del delantero, una vez las mangas estén listas me pase a unir todo el costado de la blusa.
After this, I joined the sleeves, taking care to know which part goes on the back side and which on the front, once the sleeves are ready, I joined the whole side of the blouse.
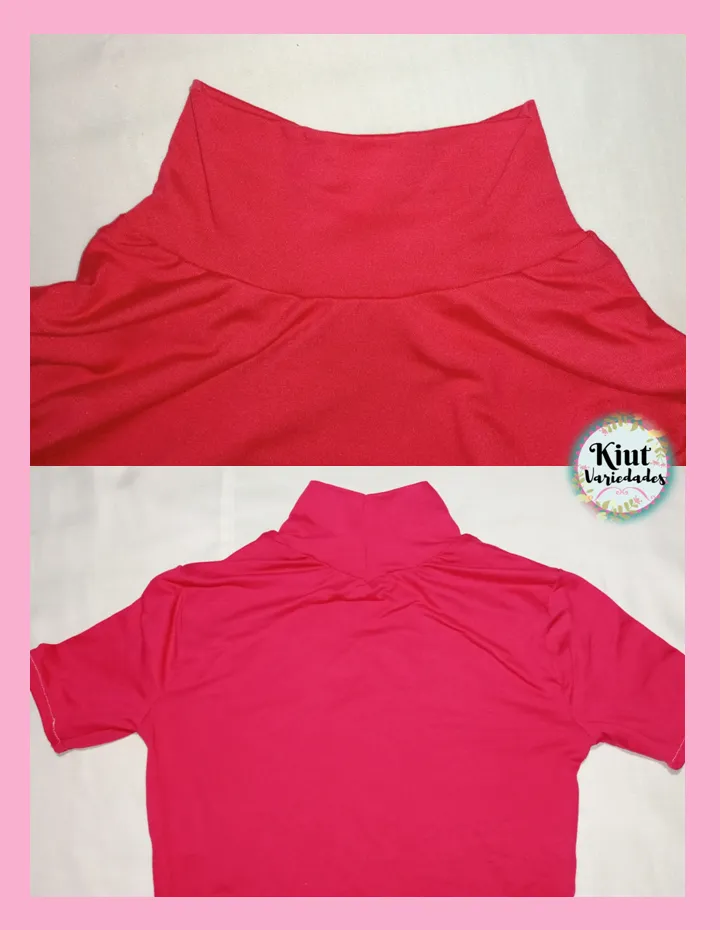
Cerré con costura recta la pieza del cuello y luego la doble por la mitad como muestro en la imagen, marque el centro y comencé a unir a la blusa estirando levemente para que a al momento de ponerme la blusa, el hilo no se reviente. Por esa misma razón en esta ocasión no hice costura de asentamiento.
I closed the neck piece with a straight seam and then folded it in half as shown in the picture, marked the center and began to join the blouse, stretching it slightly so that when I put on the blouse, the thread would not burst. For the same reason this time I didn't sew a seam allowance.
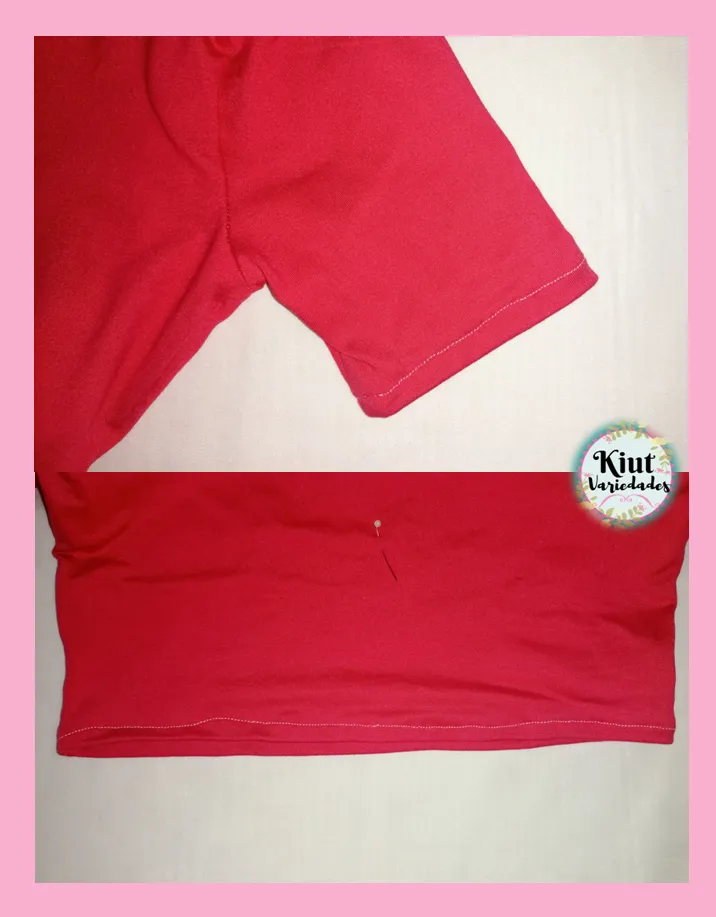
Ya para terminar hice el ruedo de las mangas (nuevamente estirando) y el ruedo de la parte inferior.
Finally, I made the sleeve hem (again by stretching) and the bottom hem.
Te invito igual que siempre a que intentes este proyecto por tu cuenta y me cuentes en los comentarios 👇 como es tu experiencia.
I invite you as always to try this project on your own and tell me in the comments 👇 how is your experience.


Síguenos en todas nuestras redes sociales… || Follow us on all our social networks ...
Facebook:KiutVariedades
Instagram:@Kiut_variedades
Twitter:@Kiut_variedades