Hola amigos Hivers, reciban un cordial saludo.
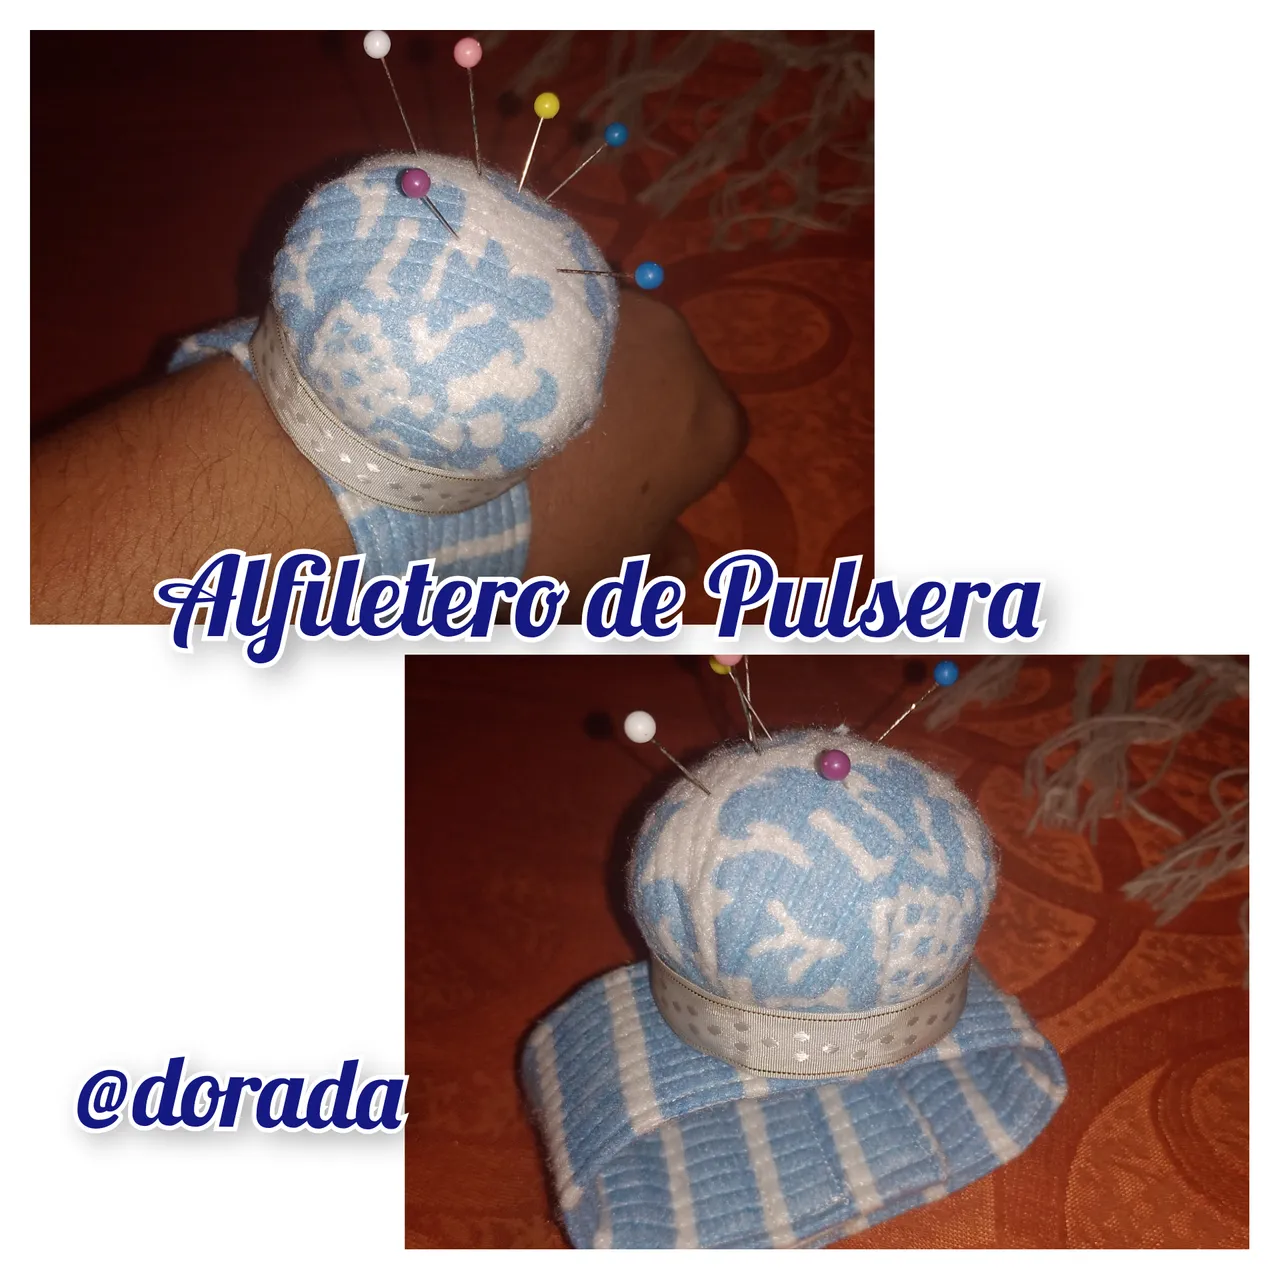
Hoy he realizado este hermoso alfiletero de pulsera, es muy práctico para utilizar en las labores de costura. Con pocos materiales podemos realizar un objeto utilitario, el cual nos ayudará a trabajar con más comodidad.
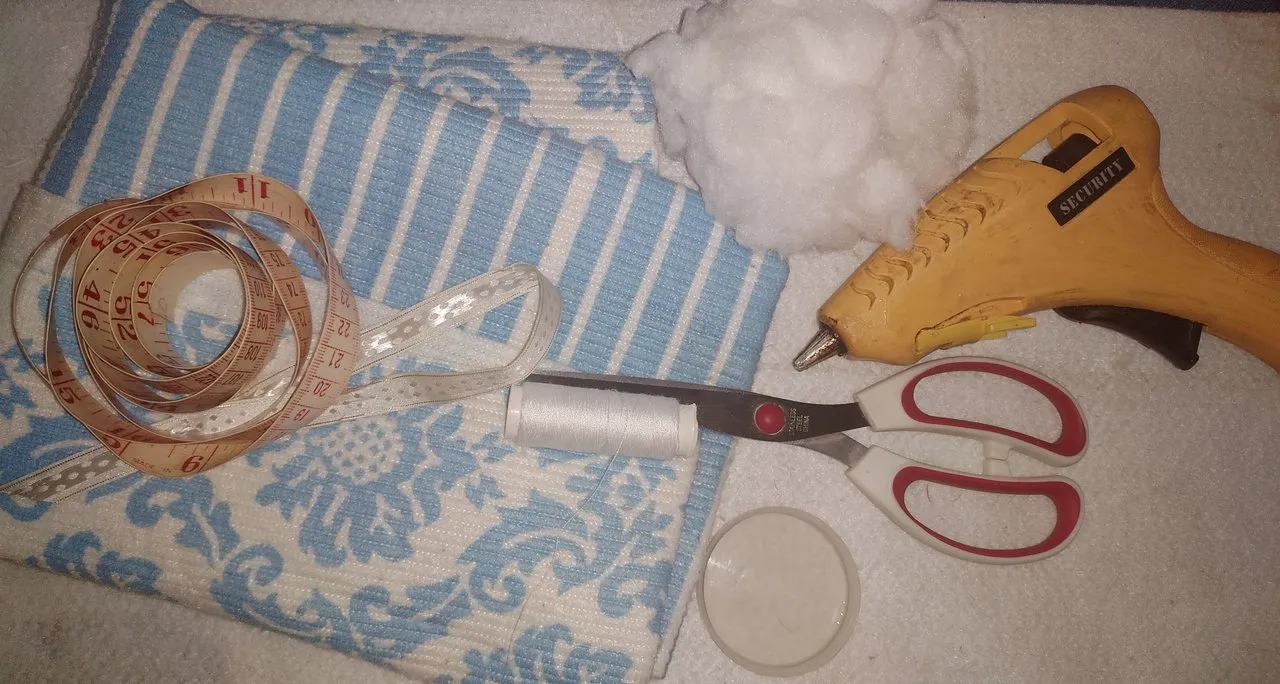
Materiales:
Tela
Algodón de relleno
Tijera
Hilo
Aguja
Cinta métrica
Un trozo de cierre mágico
Una tapa plástica
Un trozo de cinta de raso
Silicón
Elaboración Paso a Paso.
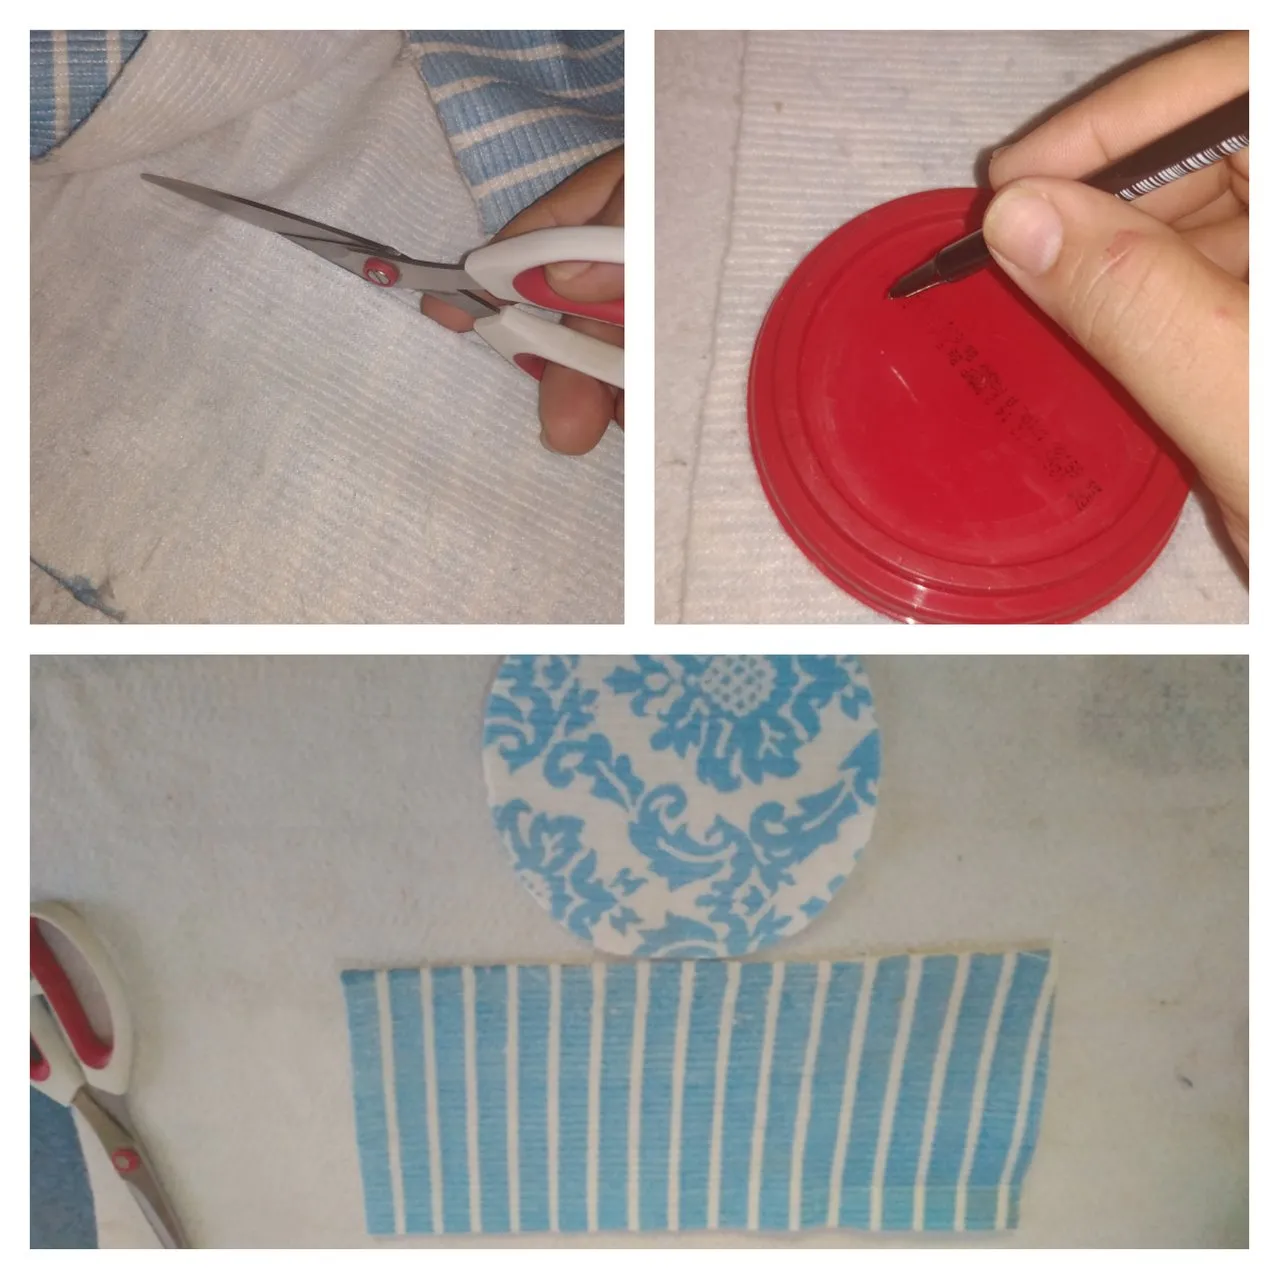
Paso 1.
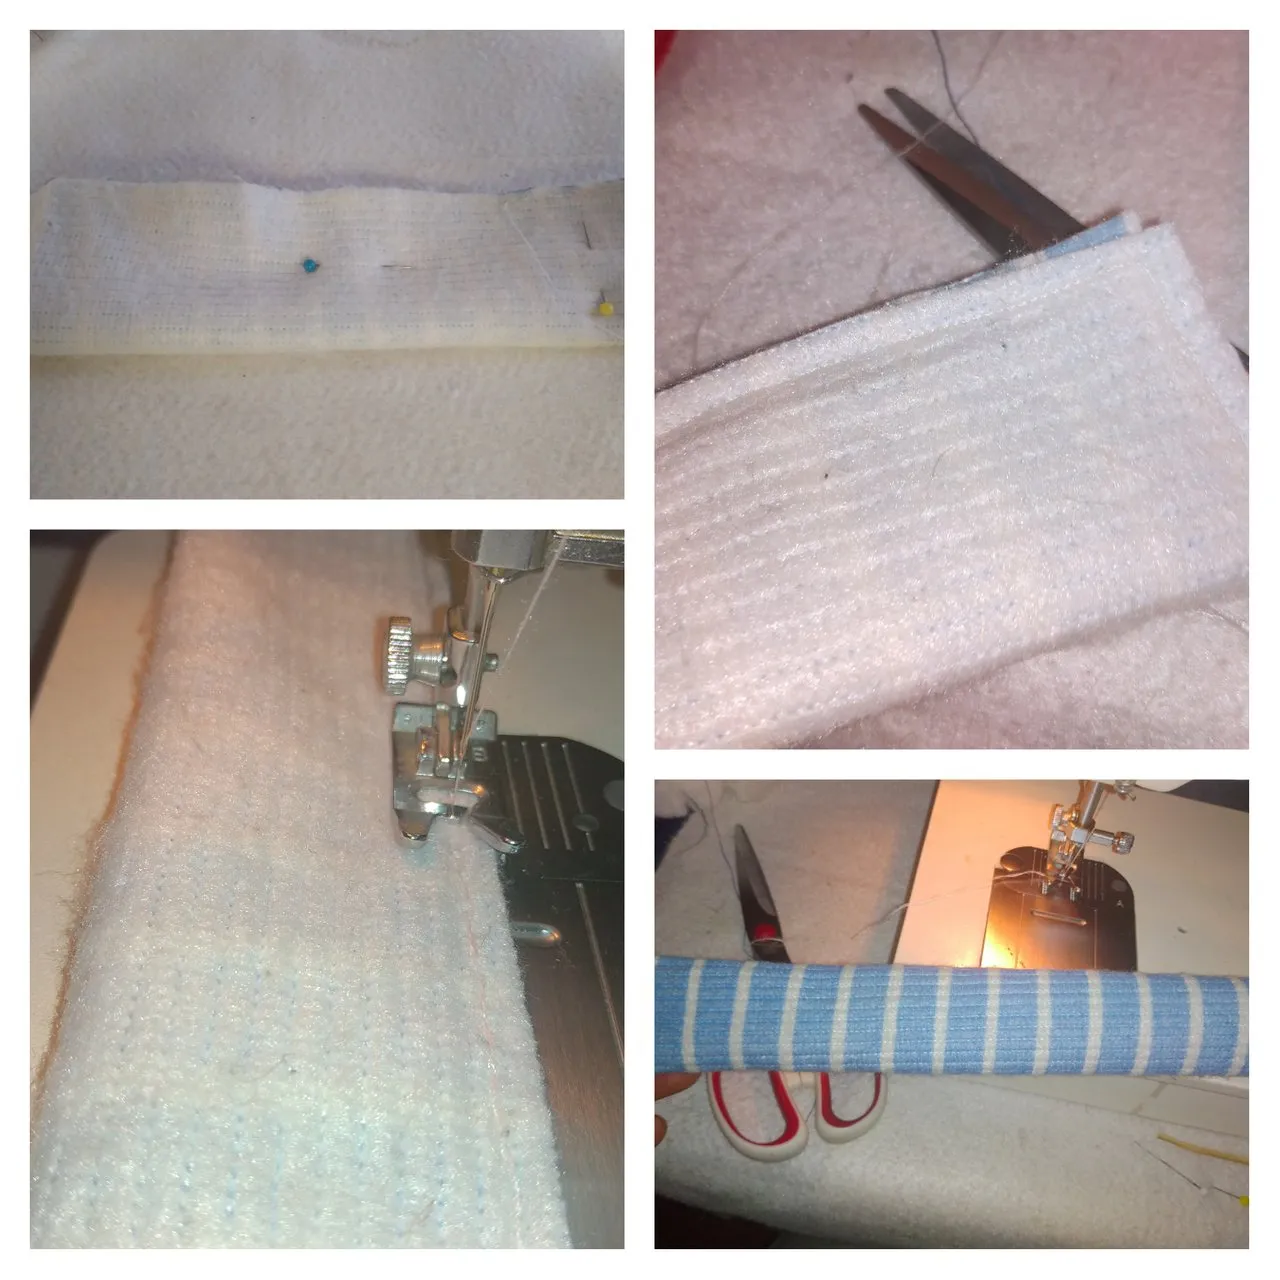
Comienzo recortando en la tela un rectángulo de 30cms x 10cms. En este caso utilicé cel mismo tipo de tela pero aprovechando los diseños diferentes. Igualmente recorté un círculo de 16 CMS de diámetro.
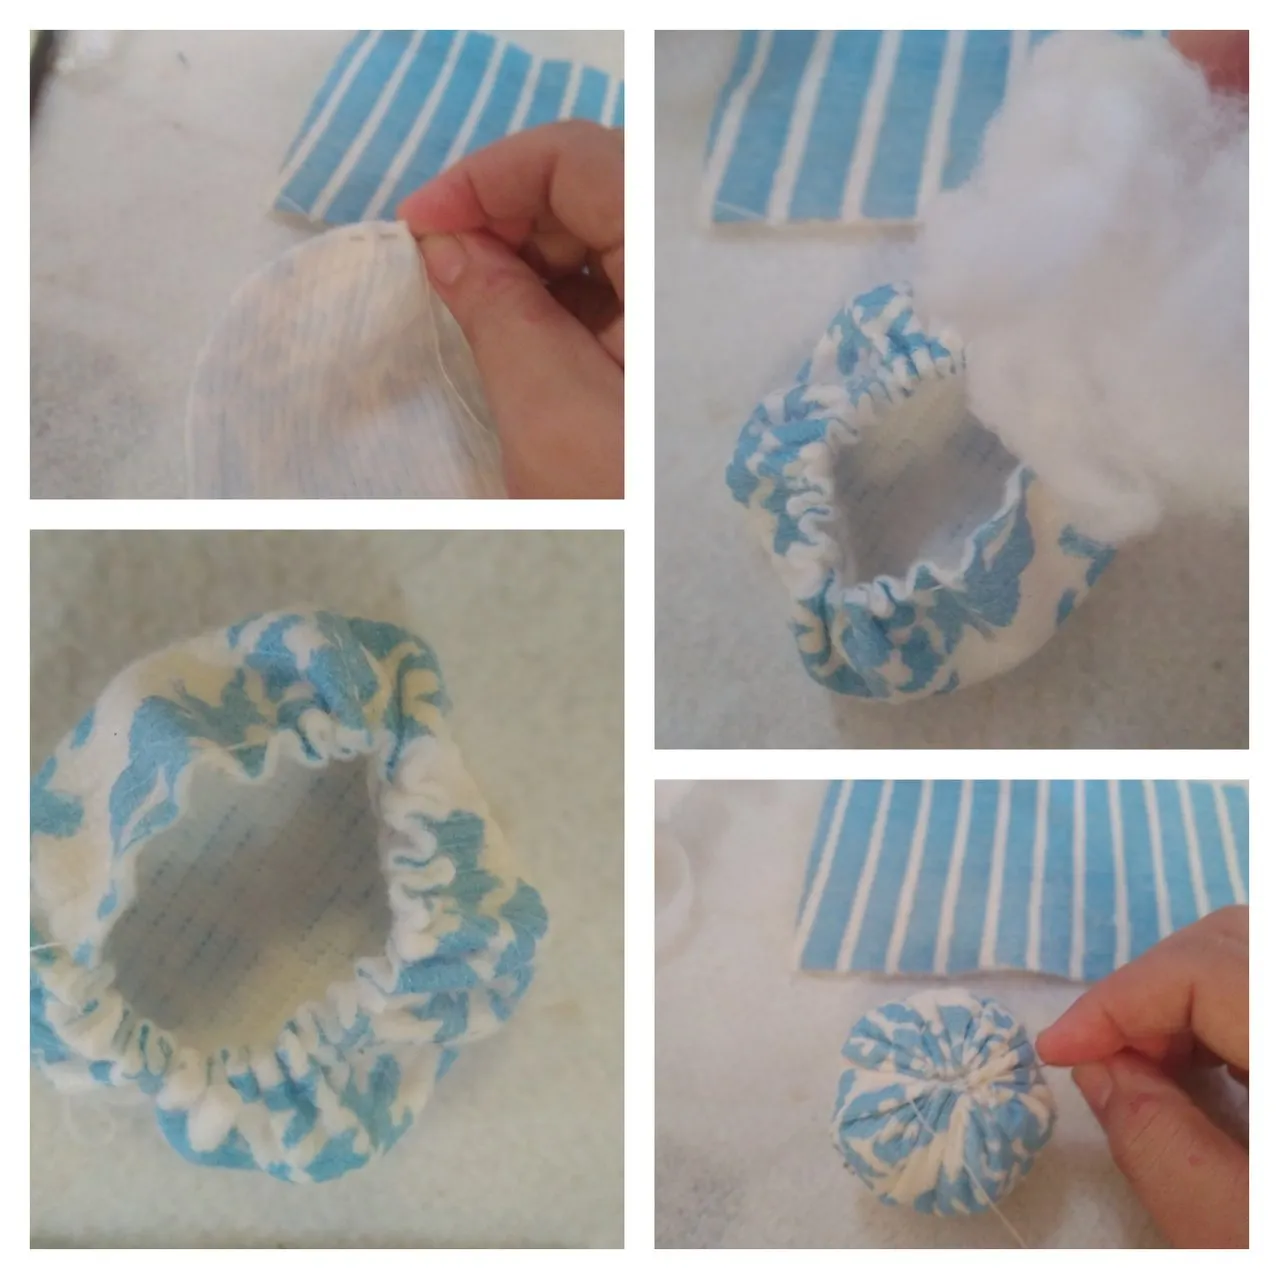
Paso 2.
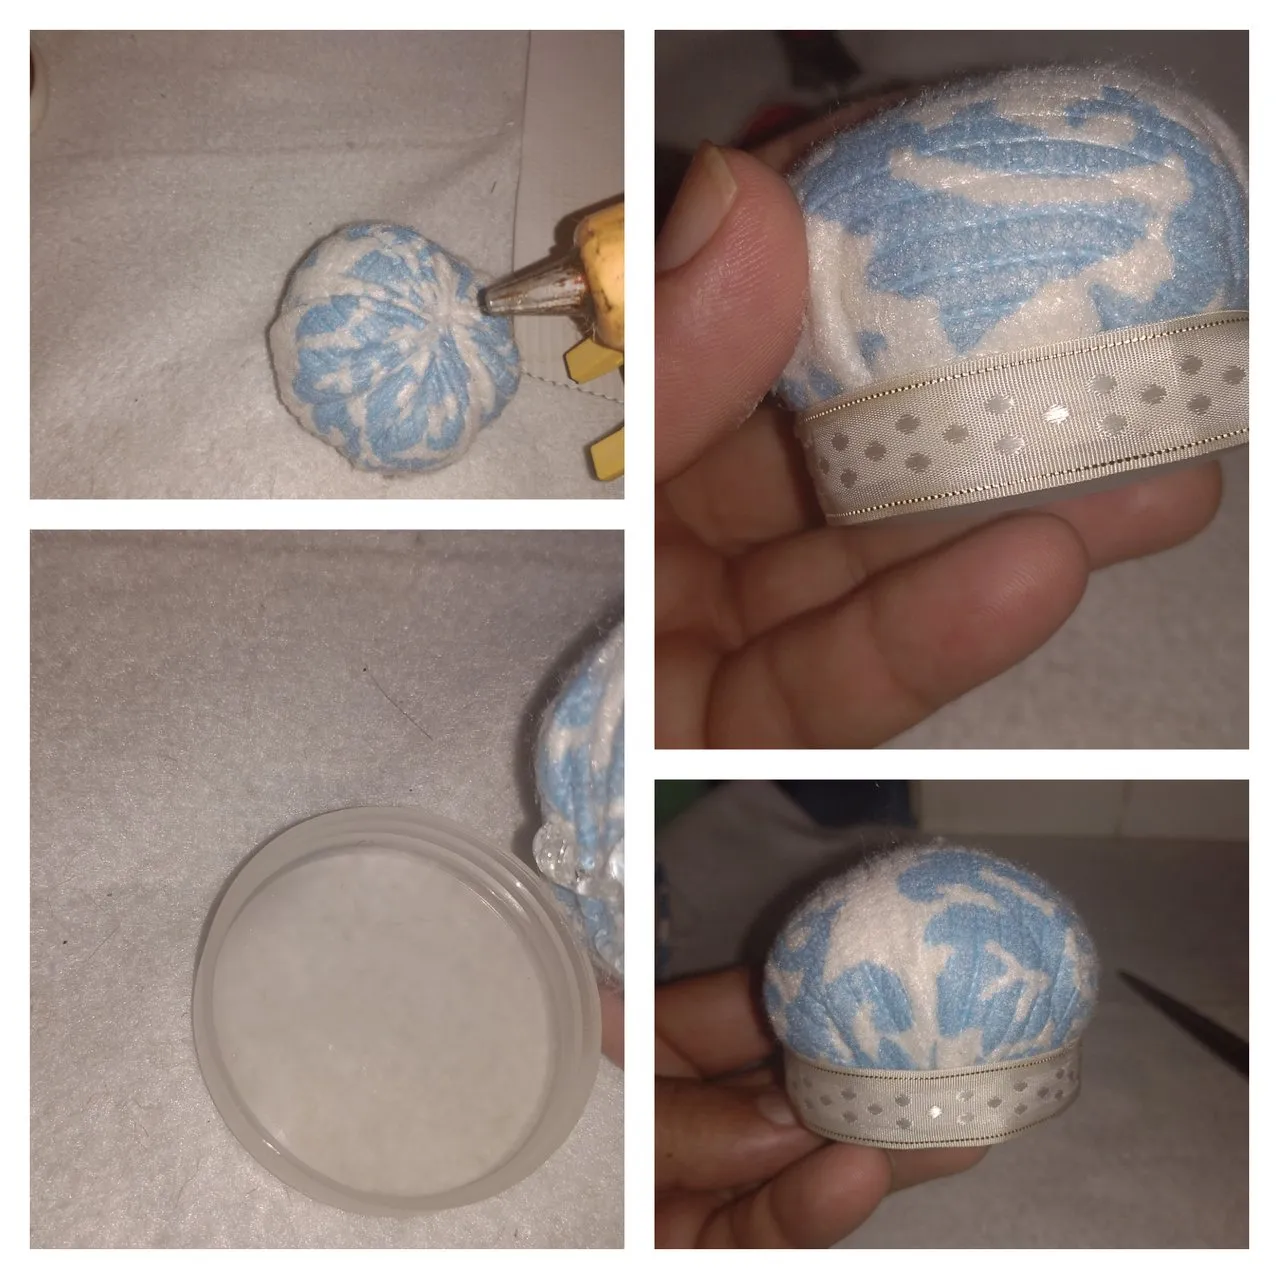
Procedo a hilvanar el círculo de tela por el borde, luego lo frunzo, le coloco el relleno y lo cierro utilizando varias puntadas de hilo.
Paso 3.
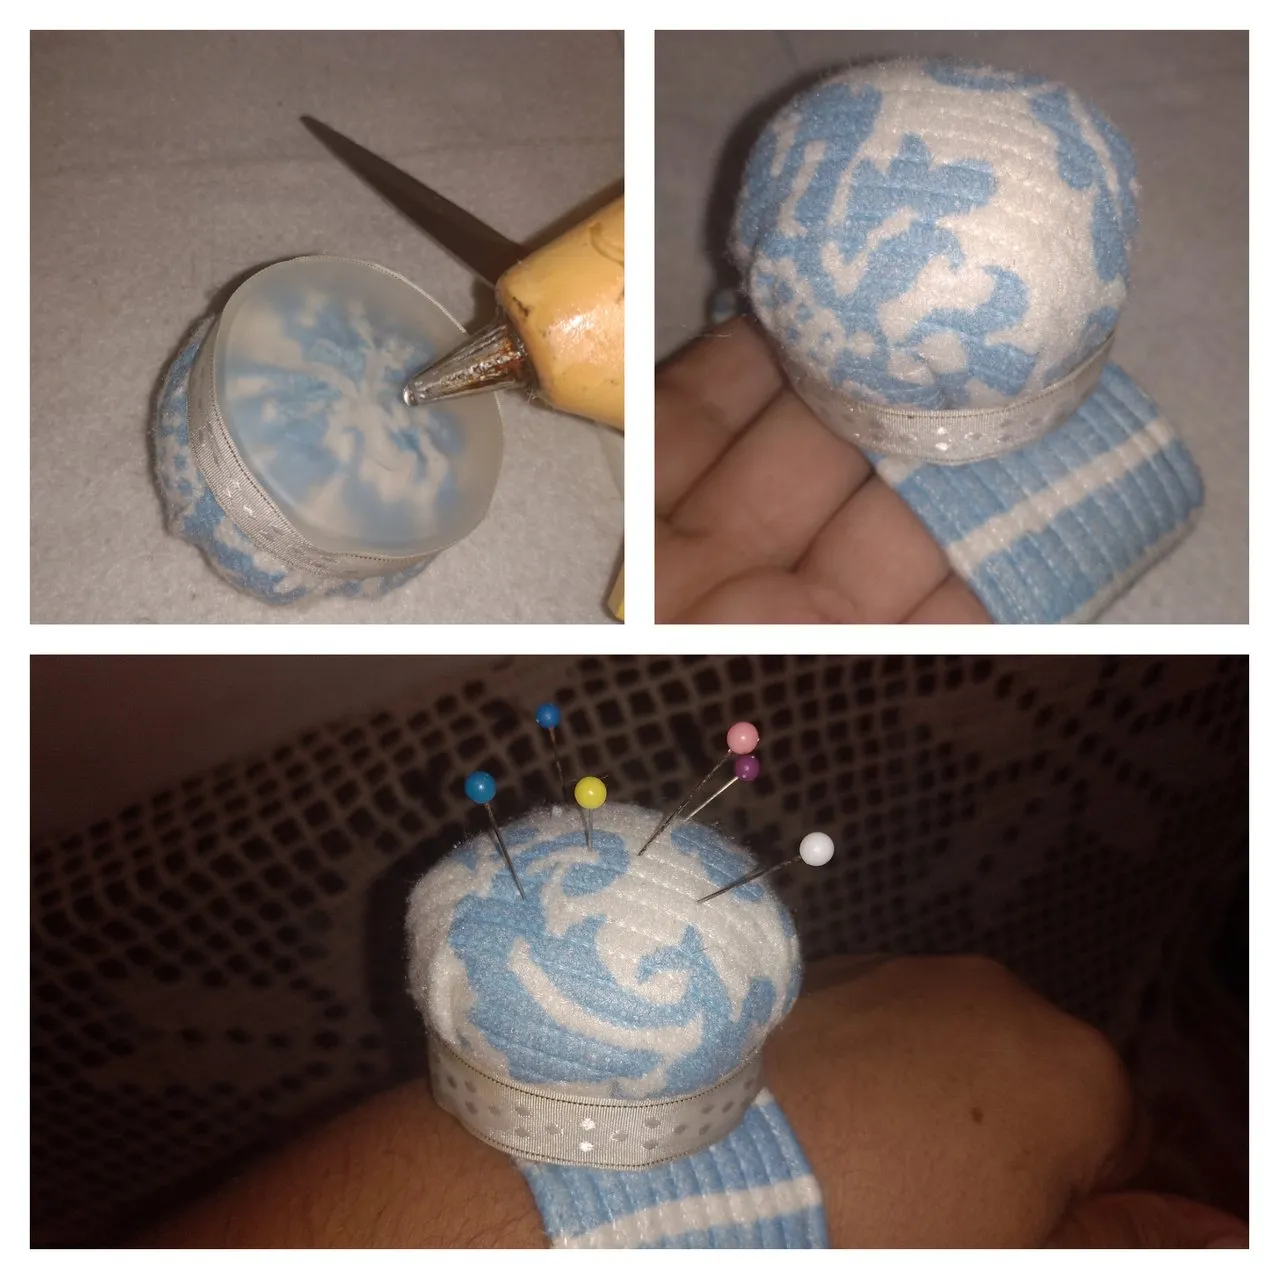
Aplico silicón sobre la esfera de tela y pego sobre la tapa plástica, luego le decoro el borde con un trozo de cinta de raso.
Paso 4.
Para realizar la pulsera, tomo el rectángulo de tela y lo doblo por mitad, luego paso una costura recta en L. Luego doy la vuelta al derecho.
Paso 5.
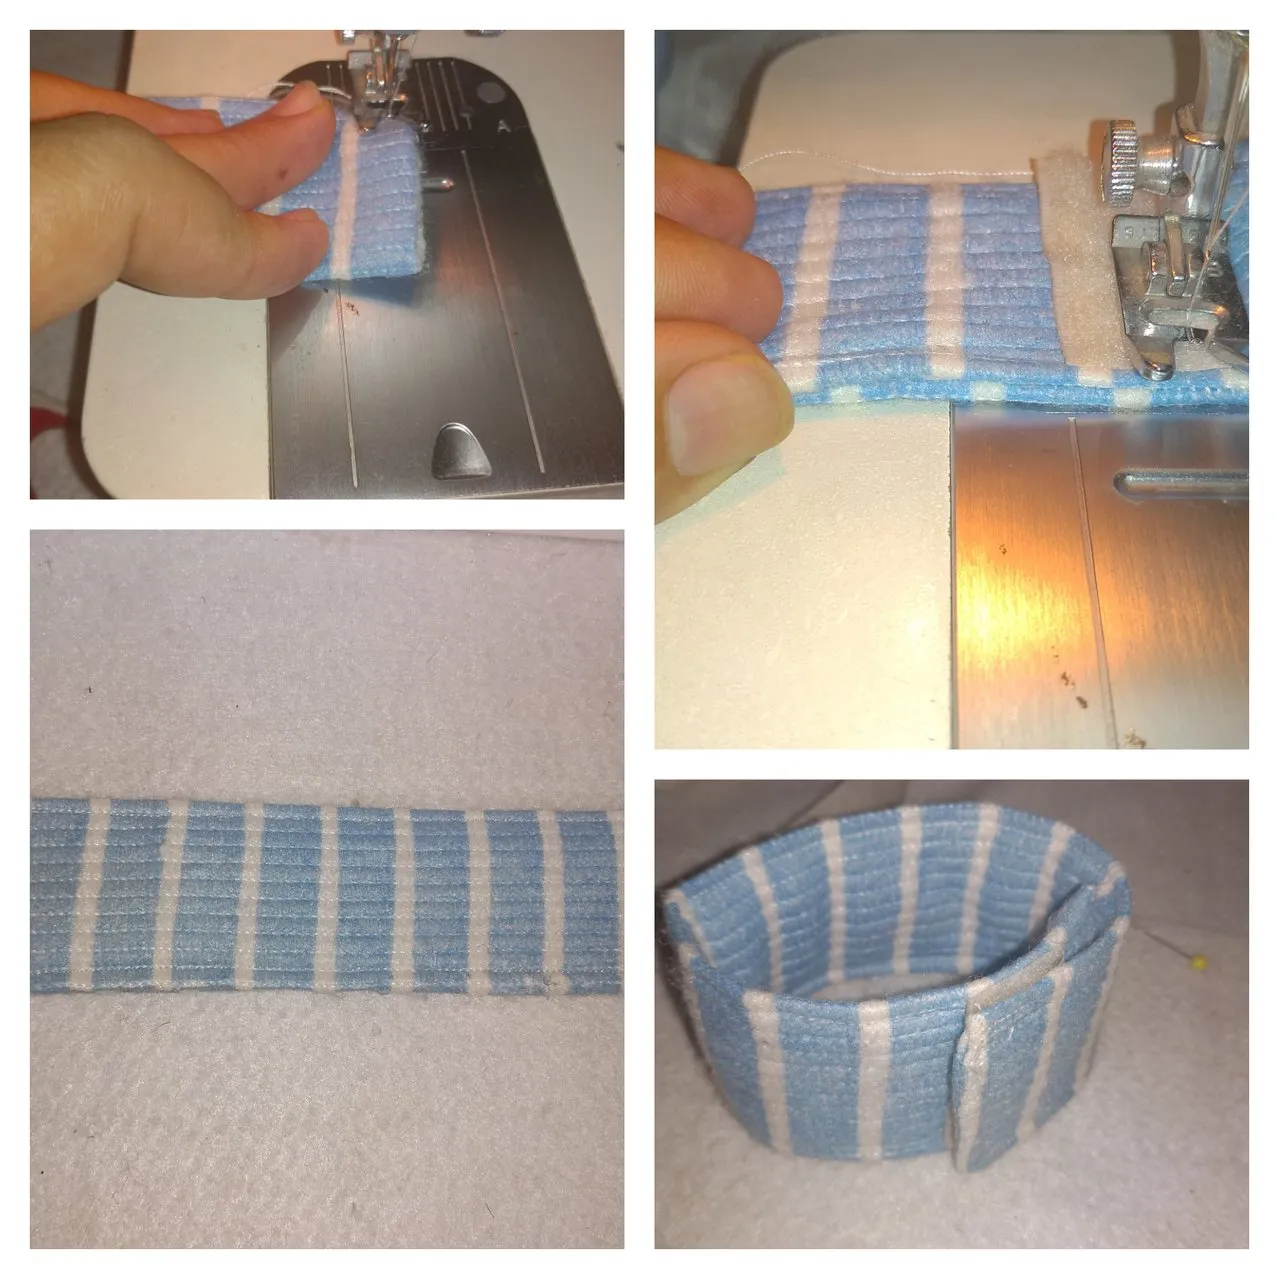
Luego paso costura por todos los lados del rectángulo para rematar los bordes.posteriormente ubico el cierre mágico y les paso costura recta.
Paso 6.
Finalmente coloco Silicón y uno el alfiletero a la pulsera.
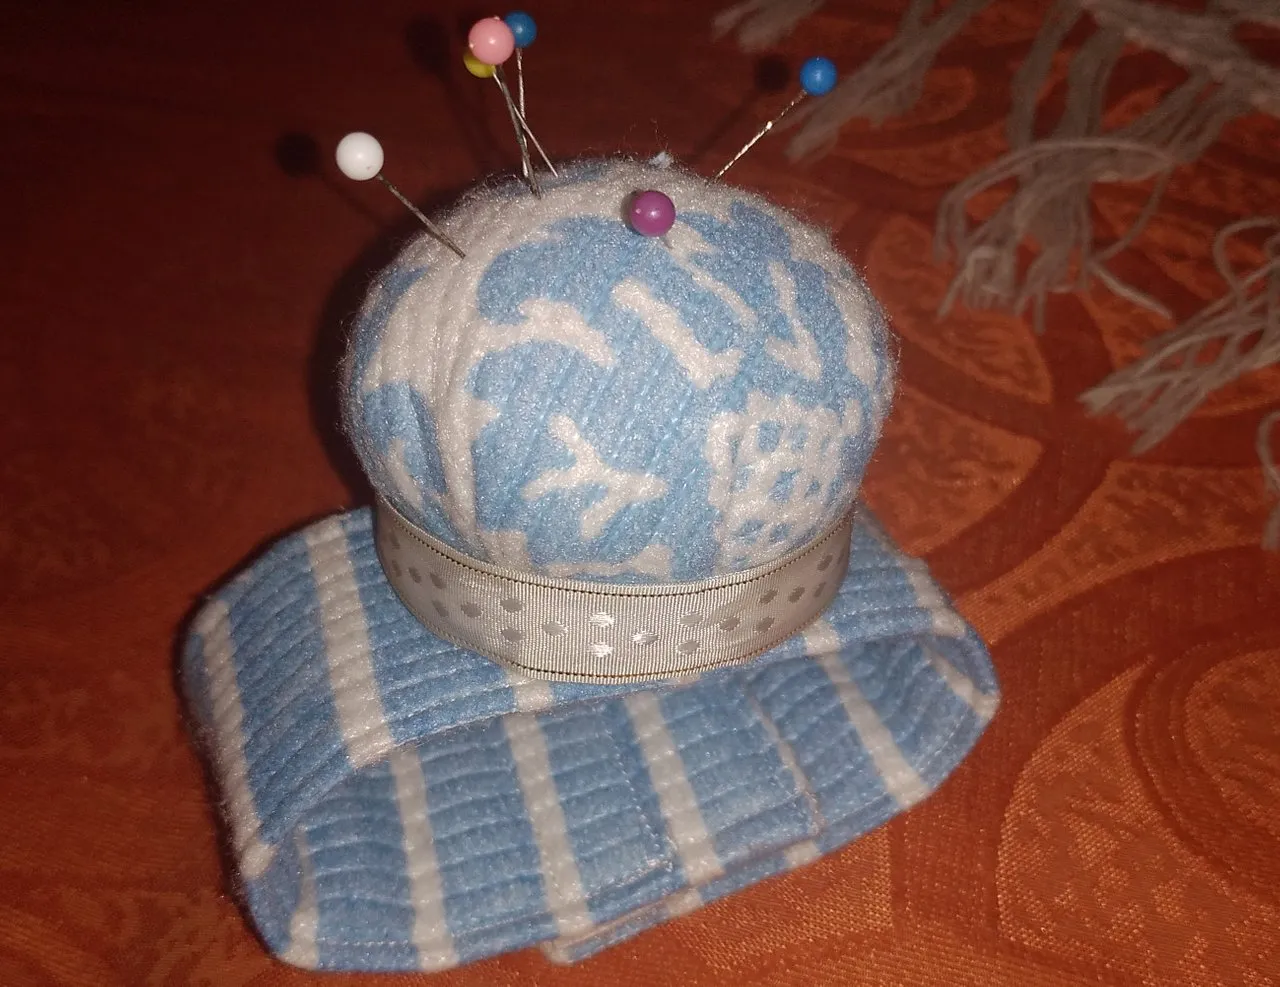
Está culminado mi alfiletero de pulsera...
La Vida es Arte...
Gracias por leerme! Nos encontraremos en el próximo Post @dorada.
Nota: fotos de mi autoría capturadas con dispositivo móvil Redmi 8.
English Versión
Hello friends Hivers, receive a warm greeting.
Today I have made this beautiful pincushion bracelet, it is very practical to use in sewing. With few materials we can make a utilitarian object, which will help us to work more comfortably.
Materials:
Fabric
Cotton stuffing
Scissors
Thread
Needle
Tape measure
A piece of magic zipper
A plastic lid
A piece of satin ribbon
Silicone
Step by step.
Step 1.
Start by cutting out a rectangle of 30cms x 10cms from the fabric. In this case I used the same type of fabric but taking advantage of the different designs. I also cut out a circle of 16 CMS in diameter.
Step 2.
I proceed to baste the fabric circle along the edge, then gather it, attach the stuffing and close it using several stitches of thread.
Step 3.
I apply silicone to the fabric sphere and glue onto the plastic lid, then decorate the edge with a piece of satin ribbon.
Step 4.
To make the bracelet, I take the rectangle of fabric and fold it in half, then pass a straight seam in L. Then I turn it right side out.
Step 5.
I then stitch along all sides of the rectangle to finish off the edges. I then place the magic zipper and stitch them straight.
Step 6.
Finally I place Silicone and attach the pincushion to the bracelet.
My pincushion bracelet is finished....
Life is Art...
Thanks for reading me! See you in the next Post @dorada.
Note: photos of my authorship captured with Redmi 8 mobile device.