So here we are with the promised backstory of the previous post! For those of you who have missed it, I'm attaching this flashback quote:
"In the world of fashion, every piece of work -from day to day collections to avant-garde ones- has a story or even a history behind how it's created and what factors define its characteristics. That's the type of story I'm willing to share on my next post, where you'd also see the finalized costume..."
The Costume's Propellant:
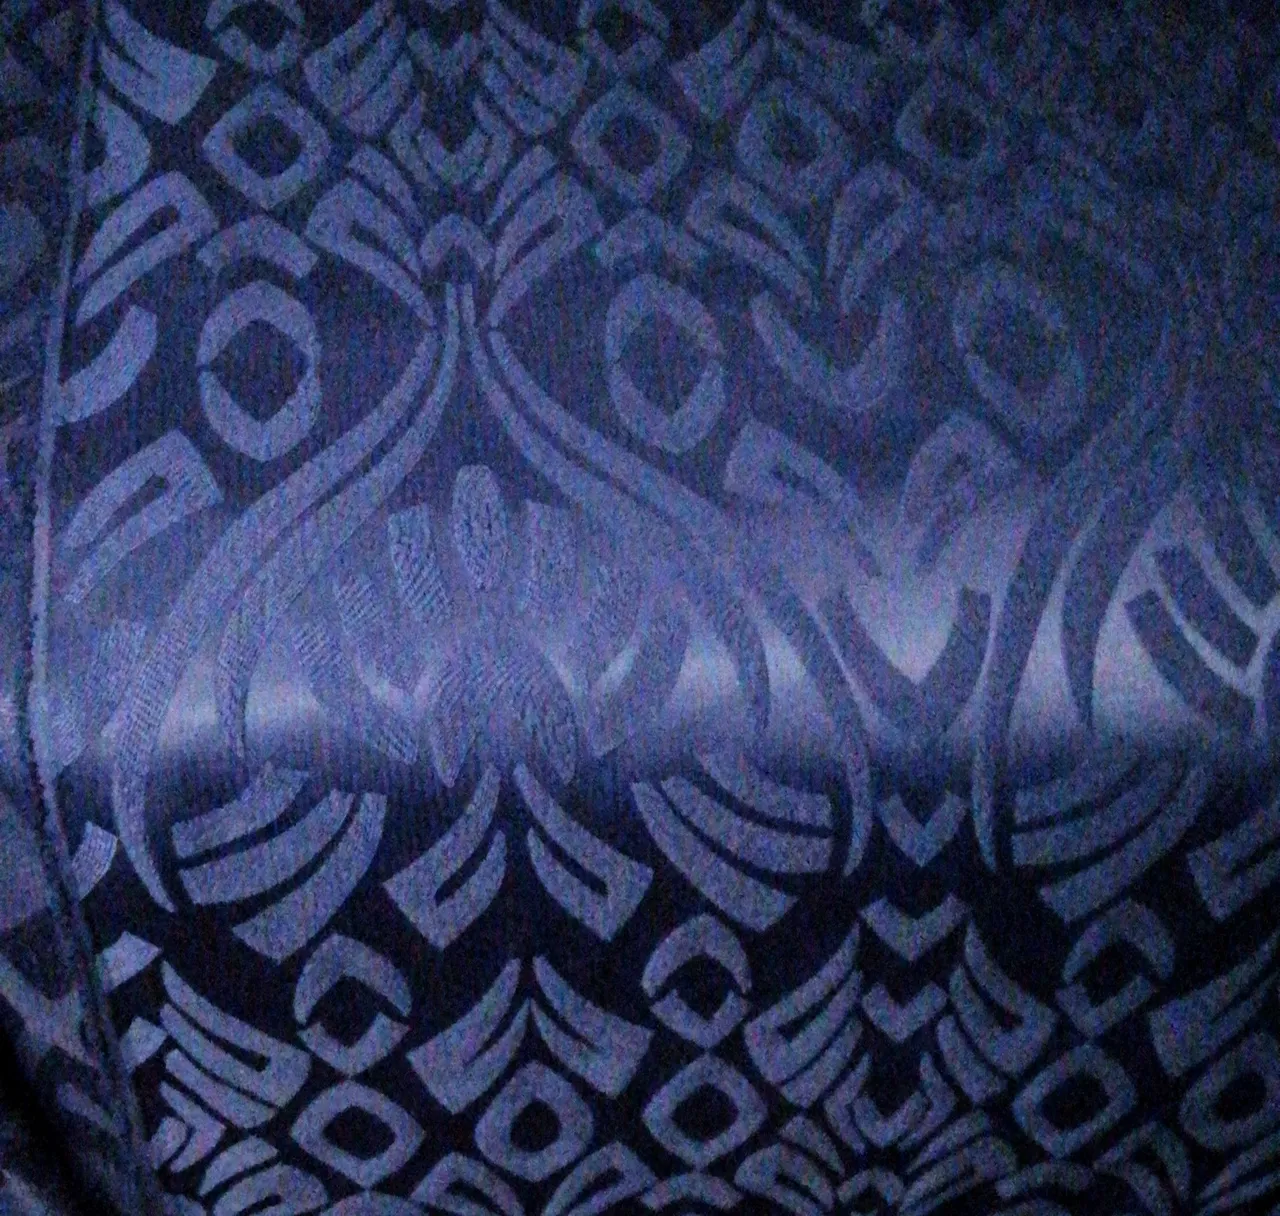
👆This is where everything began -in this case, of course-, by the fabric itself!
Only a few weeks had passed since I began working as a self-employed tailor when a customer/friend brought this elegant admiral blue Jacquard to my place. She had bought it at a generous discount, falling for its delicacy rather than following a particular occasion or need. Therefore, she ended up with a somewhat too brief request for me:
-"make an evening dress out of it!"
Obviously, this data wouldn't suffice in guaranteeing she'd approve what I'd make (no matter how much she insisted on favouring my taste). So, we had to go through a discourse.
Diving a bit deeper into my customer's perspective, needs, and appetite, we came to an eventual list of conceptual preferences.
The whole costume must:
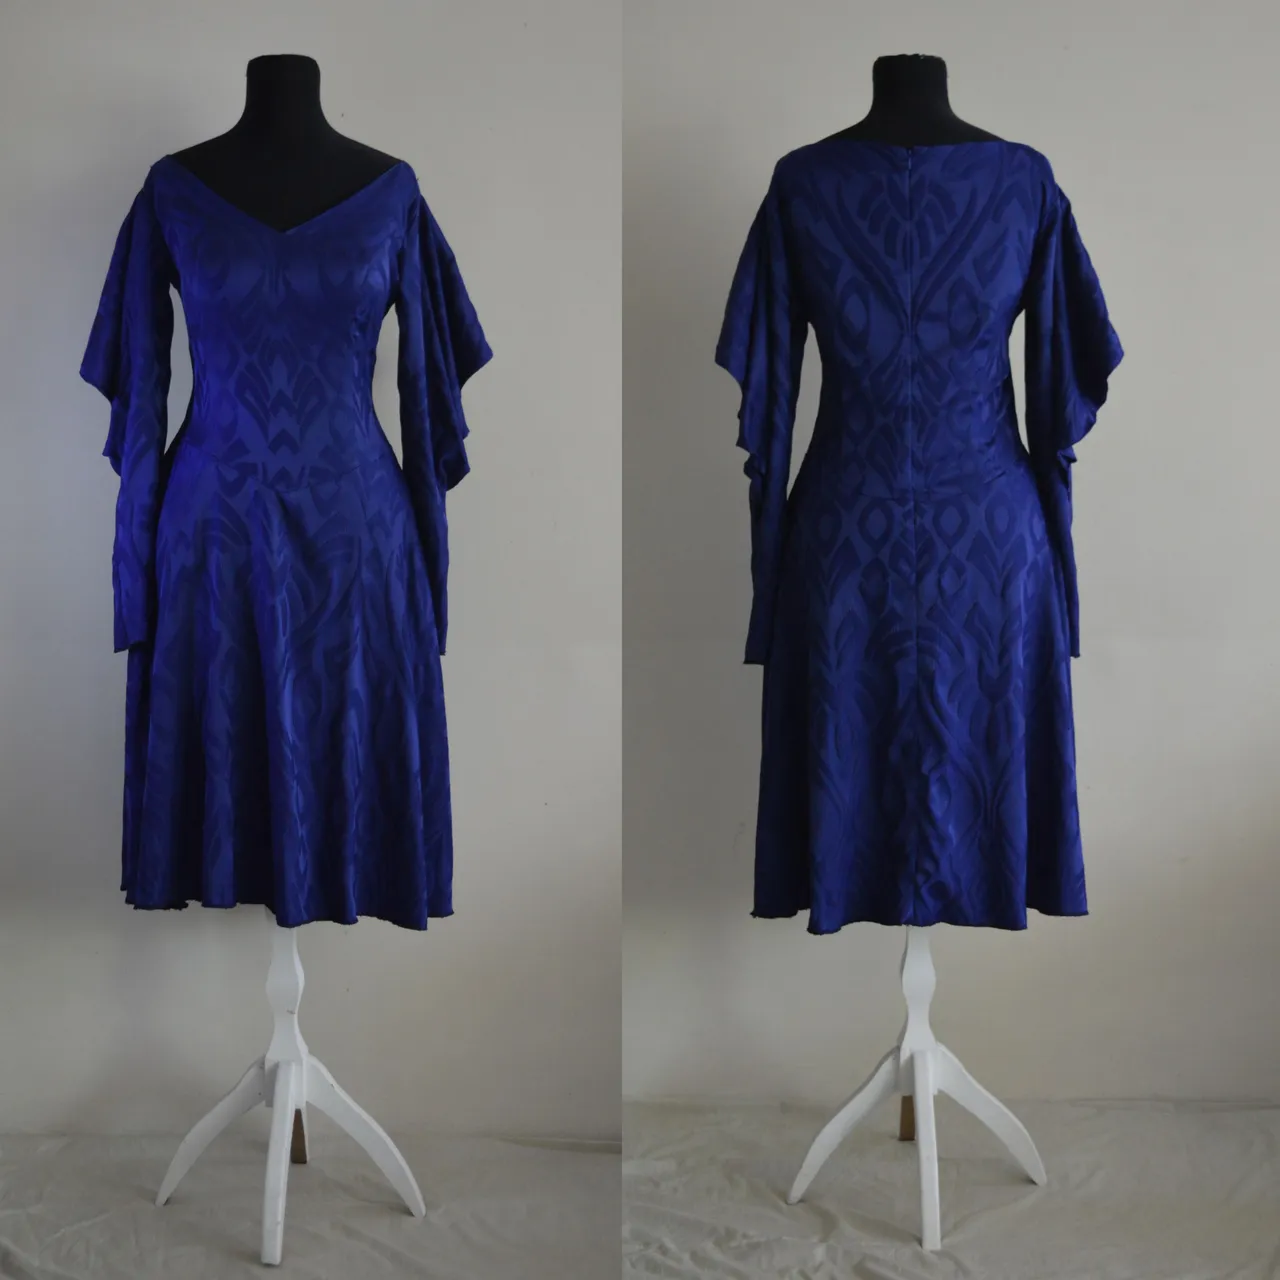
- Accentuate the fabric's -relatively large- pattern
- Be tight on the waist and loose on the lower body (to evince features she approved about her body and cover the ones she didn't)
- Have sleeves
- The lower body must fit within midi to maxi category
Coming to an agreement, I was ready to illustrate my ideas [shared in the previous post] to get the last confirmation before I start working on the fabric.
Tailoring Default Rituals
What came next is crystal clear as it is an inevitable part of every tailor's work.
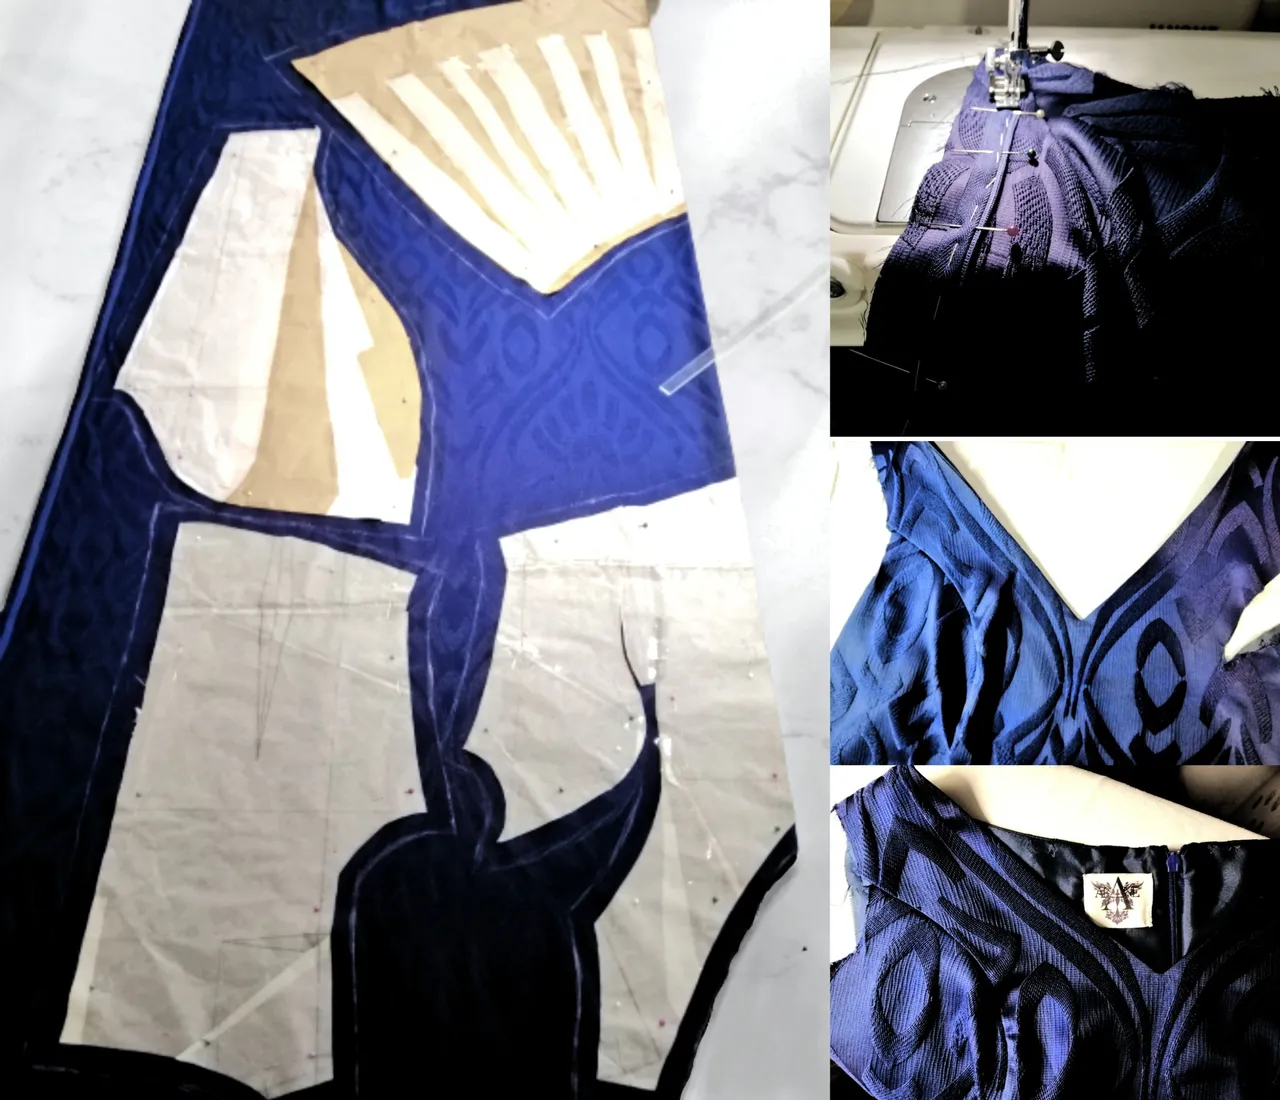
Speaking of pattern making, I've followed Muller's method -the only method I know- on the main body. For the sleeves, however, I had to figure the pattern through the moulage technique.
Furthure pattern info:
- Upperbody: princess cut
- Lowerbody: Flared skirt
- Sleeve: distorted set-in sleeve
[feel free to comment on any pattern related question that comes to your mind. I'll gladly dedicate a new post for further explanation.]
Tips and tricks
As you'll be informed in my next post (hive intro), I'll occasionally post some tips, tricks, and guides related to eatch post. here comes the tip of the day!
- Proper ironing is essential: Whether you'd use photography for your marketing or not, decent ironing is as important as your sewing skills are. As a tailor, you'll need to offer some high quality work to satisfy your current customers and attract new ones. A professional tailoring Iron -I recommend pro steam Irons- will help you make that professional impression, and is definitely worth the cost (even if you're starting your work with a low budget.). ( I've attached the unfortunate, misshaped, and cheap-looking version of my work, before it had been ironed and the background had been photoshopped.