Hola amigos Hivers, bienvenidos nuevamente a mi blog!
Hello friends of Hive, welcome once again to my blog!
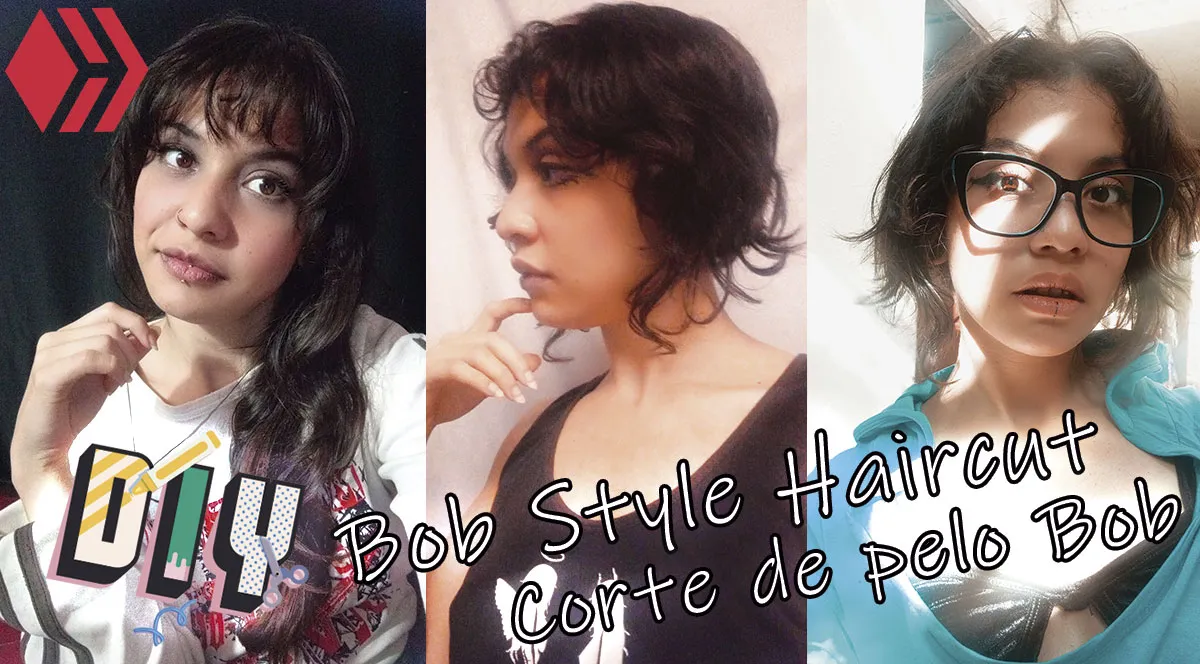
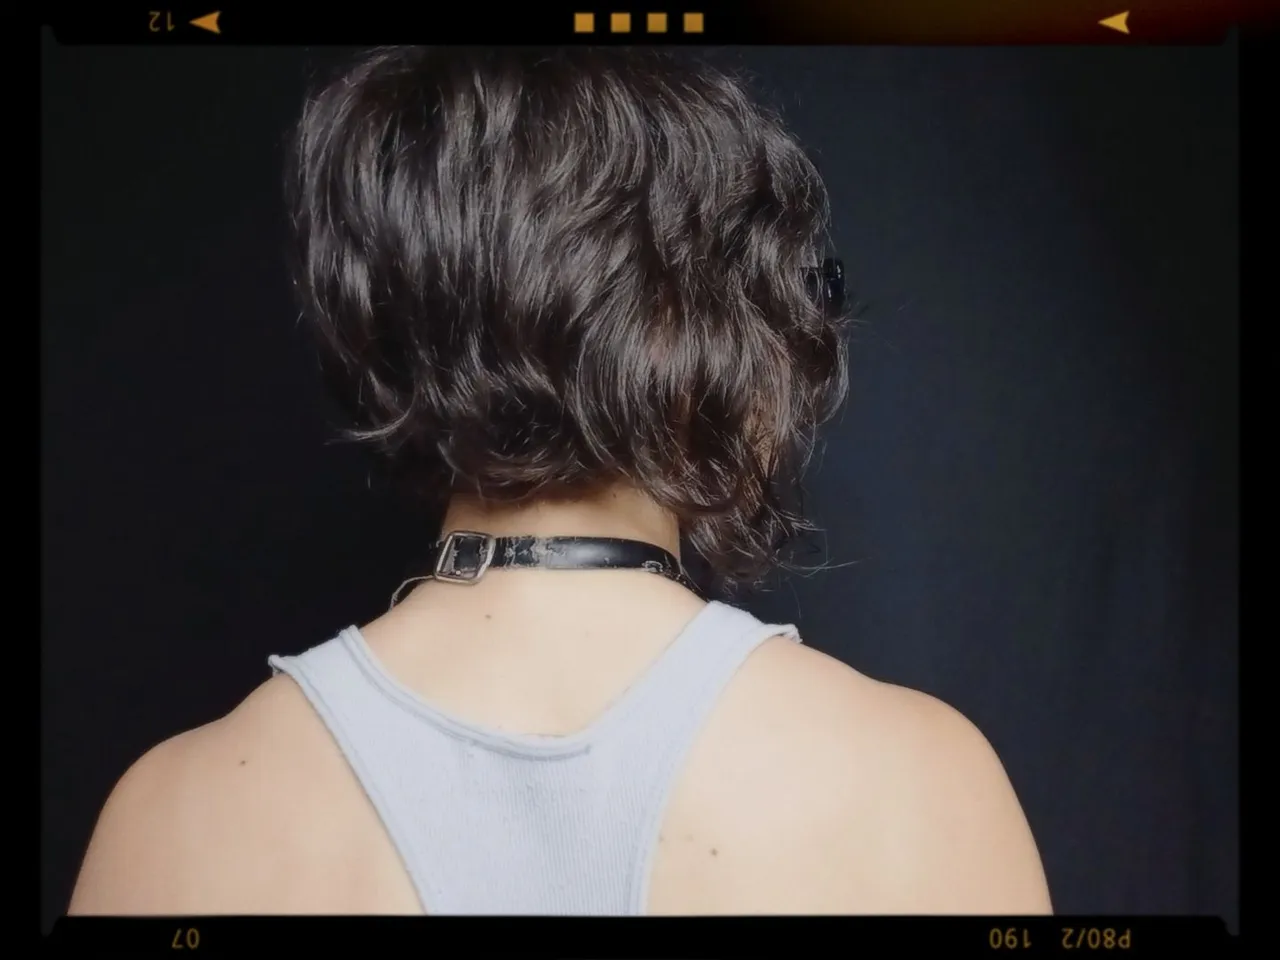
En este post voy a compartir con ustedes mi manera para cortarme el cabello estilo Bob, con acabado inclinado, es decir, más corto en la nuca y más largo adelante.No soy peluquera profesional ni mucho menos, por lo que espero que no juzguen con mucha severidad mi técnica.Comencé a cortarme el cabello yo solita porque a veces quedaba insatisfecha con los resultados de los cortes que me hacían en la peluquería, así que decidí experimentar y me gustó el resultado.
In this post I'm going to share with you my way to cut my hair in bob style, with a slanted finish, that is, shorter at the nape of the neck and longer at the front.I'm not a professional hairdresser by any means, so I hope you won't judge my technique too harshly. I started cutting my own hair because I was sometimes dissatisfied with the results of the cuts I got at the salon, so I decided to experiment and I liked the result.
Te cuento un poco sobre el corte
A little info about the haircut
El corte estilo Bob es considerado un corte "vintage", es decir, un corte que te da una apariencia de pertenecer a una época de antaño. Y tienen bastante razón, ya que nació en la época de la primera guerra mundial, gracias a las mujeres que acudieron a servicio como enfermeras y cocineras.En mi opinión personal el estilo vintage es juvenil y elegante al mismo tiempo, y ya ha quedado súper claro que nunca pasa de moda.
The bob style haircut is considered "vintage", that is, a haircut that gives you an appearance of belonging to an era of yesteryear. And they are quite right, since it was born at the time of the first world war, thanks to the women who went to service as nurses and cooks.In my personal opinion the vintage style is juvenile and elegant at the same time, and it has already been super clear that it never goes out of fashion.
De paso, este tipo de corte es de los mejores para quitar volumen. ¿No usas el pelo corto porque se te esponja? Pues con este corte ya no tendrás ese problema, ya que las capas internas quedan más cortas y todo el cabello queda más dócil.Recomiendo este corte con toda seguridad si tienes el cabello ondulado. El mío tiende a los bucles y le da un aspecto maravilloso.Si tienes el cabello liso te aseguro que también queda precioso, pero en ese caso asegúrate de tener el pulso firme al cortar, o pide ayuda a une amigue para hacerlo, ya que se notará con mayor facilidad si la línea de corte queda torcida.
By the way, this type of haircut is one of the best to reduce volume. You do not use short hair because it gets fluffy? Well with this haircut you won't have that problem anymore, as the inner layers are shorter and the whole hair is tamer.I highly recommend this cut if you have wavy hair. Mine tends to curl and it looks wonderful.If you have straight hair I assure you it looks beautiful too, but in that case make sure you have a firm pulse when cutting, or ask a friend to help you do it, as it will show more easily if the cut line is crooked.
Tutorial paso a paso
Step by step tutorial
En este video les cuento paso a paso cómo realizar el corte.Debajo les dejaré la misma información por escrito un poco más detallada, para combatir las dudas.
In this video I tell you step by step how to make the cut.Below I will leave you the same information in writing, a little more detailed, to fight doubts.
Preparación
Previous steps
— Peina y desenreda tu cabello. Los nudos durante el corte pueden convertirse en mechones disparejos.— Realiza el corte con el cabello seco. Si cortas con el cabello mojado no sabrás exactamente la altura que tendrá, y podrás llevarte una sorpresa desagradable cuando se seque.— Consigue una moñera gruesa preferiblemente, o muchas colitas pequeñas como alternativa.
— Comb and detangle your hair. Knots during cutting can turn into uneven strands.— Do the cut on dry hair. If you cut wet hair you won't know exactly how long it will be, and you may be in for a unpleasant surprise when it dries.
Dividiendo el cabello
Splitting the hair
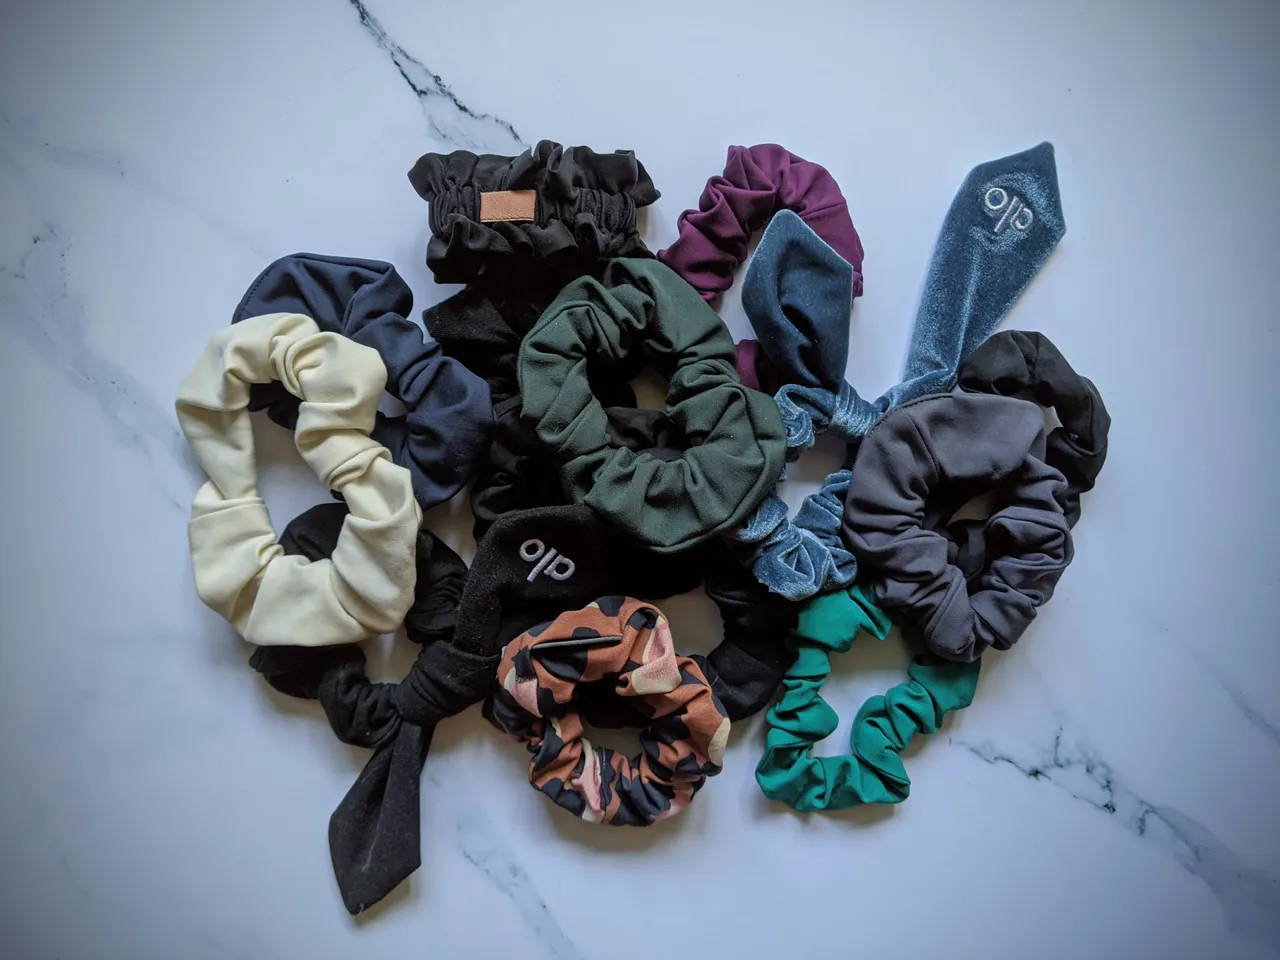
Para lograr este corte debes dividir tu cabello en 3 partes:1.- La parte de arriba:Comienza a la altura de tu ceja, y traza una línea divisoria rodeando la cabeza en línea recta, hasta llegar a la otra ceja.Utiliza la moñera y hazte una cola de caballo con esta porción de cabello, lo más atrás que puedas sin bajar de la línea divisoria.La altura de el moño con la moñera debe ser aproximadamente del tamaño de tu puño (entre 8 y 10 cm)Si no tienes moñera, puedes amarrar con varias colitas, una detrás de la otra, pero asegúrate de alcanzar la altura adecuada.
To achieve this haircut you must divide your hair into 3 parts:1.- The top part:Start at the height of your eyebrow, and draw a parting line around your head in a straight line, until you reach the other eyebrow.Use the scrunchie and make a ponytail with this portion of hair, as far back as you can without going below the parting line.The height of the chignon with the scrunchie should be about the size of your fist (3 1/2 inches)If you don't have a scrunchie, you can use several small ties, one behind the other, but make sure you reach the right height.
El corte
The cut
Comenzamos por los laterales
Start at the sides
1.- Usa tus dedos índice y anular como pinza para agarrar un primer mechón de cabello. Agarra la parte más cercana a tu cara.2.- Mide tu mechón a la altura de tu mandíbula, colocando los dedos en línea recta justo por debajo de la mandíbula.3.- Corta en línea recta, por encima de tus dedos.4.- Agarra de la misma manera el siguiente mechón de cabello, y éste lo vas a medir a la altura del que ya cortaste.5.- Asegúrate de estirar bien el mechón largo y el mechón corto para verificar que estén a la misma altura, y corta en línea recta igual.6.- Repite el proceso mechón a mechón hasta acabar con el cabello lateral.7.- Repite el proceso del otro lado.
1.- Use your index and ring fingers as a clamp to grab a first strand of hair.2.- Measure the strand at the height of your jaw, placing your fingers in a straight line just below your jaw.3.- Cut straight across, above your fingers.4.- Grab the next strand of hair in the same way, and this one you will measure at the height of the one you have already cut.5.- Make sure to stretch the long strand and the short strand well to verify that they are at the same height, and cut in a straight line as well.6.- Repeat the process strand by strand until you have finished with the side hair.7.- Repeat the process on the other side.
Segundo vamos a la parte de atrás
Second we go to the back.
1.- La forma de agarrar los mechones de atrás es en diagonal, de arriba hacia abajo, de afuera hacia adentro. Para entender mejor esto:2.- Imagínate que tienes puesto un casco y que tus dedos (índice y anular) son una flecha que cayó desde el techo de una casa.3.- Al agarrar tu mechón, tu muñeca debe quedar más o menos a la altura de tus ojos, mientras que la punta de tus dedos debe estar a la misma altura del pelo lateral que ya cortaste.4.- Corta de adentro hacia afuera, de abajo hacia arriba, por encima de tus dedos inclinados.5.- Repite el proceso mechón a mechón hasta acabar con el cabello de atrás.
1.- The way to grab the back strands is diagonally, from top to bottom, from outside to inside. To understand this better:2.- Imagine you are wearing a helmet and your fingers (index and ring finger) are an arrow that fell from the roof of a house.3.- When you grab your strand, your wrist should be about eye level, while your fingertips should be at the same height as the side hair you already cut.4.- Cut from the inside out, bottom to top, above your sloping fingers.5.- Repeat the process strand by strand until you finish with the hair at the back.
Por último, la parte de arriba
Finally, the top
1.- Utiliza tus dedos índice y anular para marcar una línea horizontal 1 cm por encima de la moñera.2.- Aplana (extiende) un poco la coleta en donde vas a cortar, para que la tijera pase más fácil.3.- Corta en línea recta.
1.- Use your index and ring fingers to mark a horizontal line half-inch above the topknot.2.- Flatten (spread out) the ponytail a little where you are going to cut, so that the scissors will pass more easily.3.- Cut in a straight line.
Y Listo!Ya puedes soltar el moño y peinarte como gustes.
And that's it!You can now loosen the top bun and style your hair as you like.
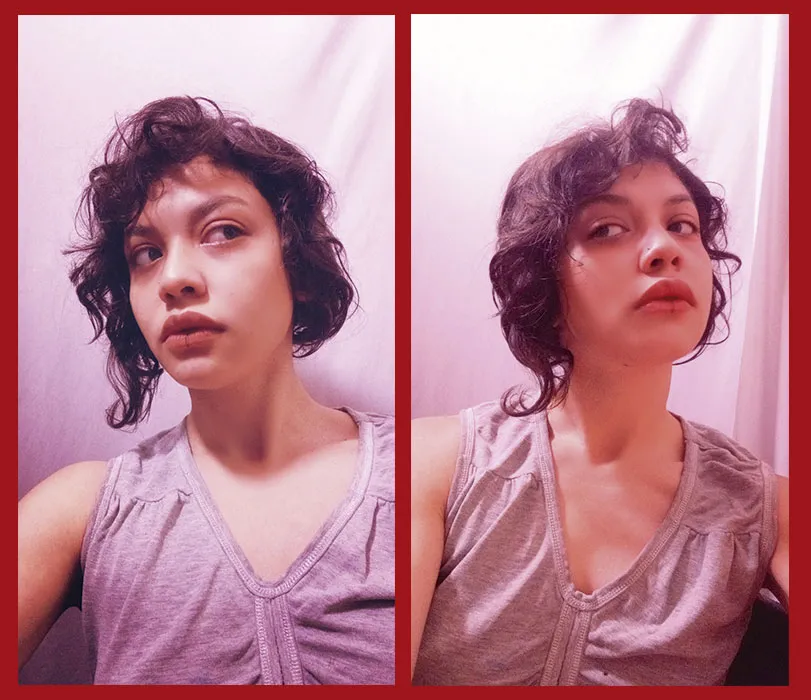
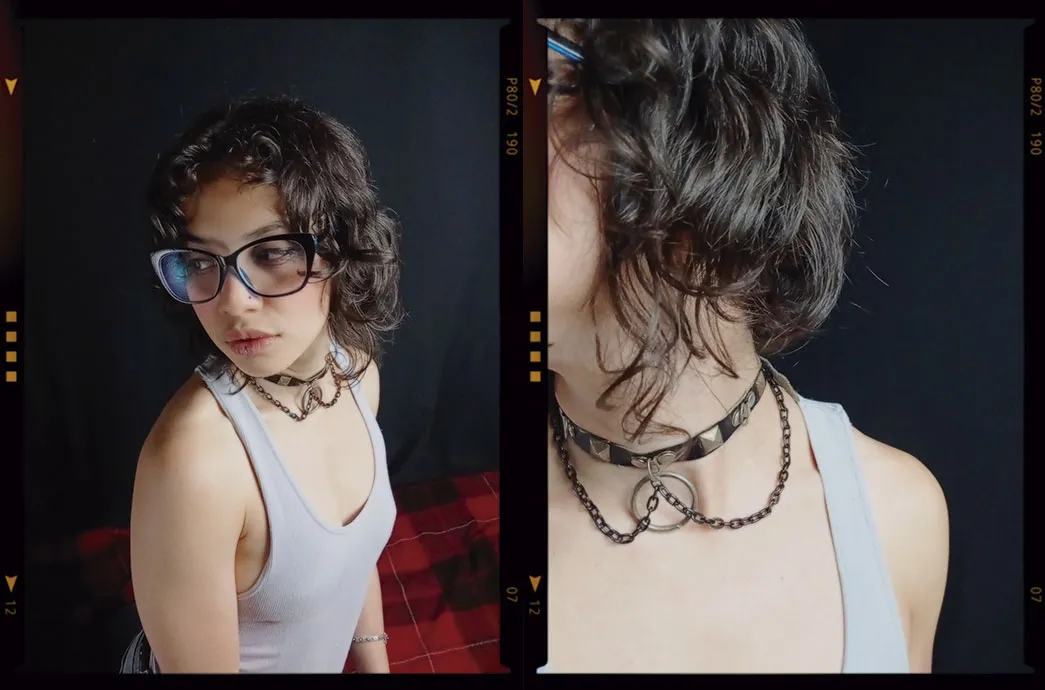
Otras fotitos del corte:
More pictures of the haircut:
Eso es todo, queridos Hivers. Espero les haya gustado mi post y les resulte útil.No duden en preguntarme cualquier cosa que no haya quedado clara. Y si un día lo intentan muéstrenme sus resultados!Como siempre...
That's all, dear Hivers. I hope you liked my post and found it useful.Don't hesitate to ask me anything that wasn't clear. And if one day you try it show me your results!
¡Muchas gracias por leer!
Thanks for reading!
❤️🍀

DIY logo: Vector de Arte creado por freepik - www.freepik.es
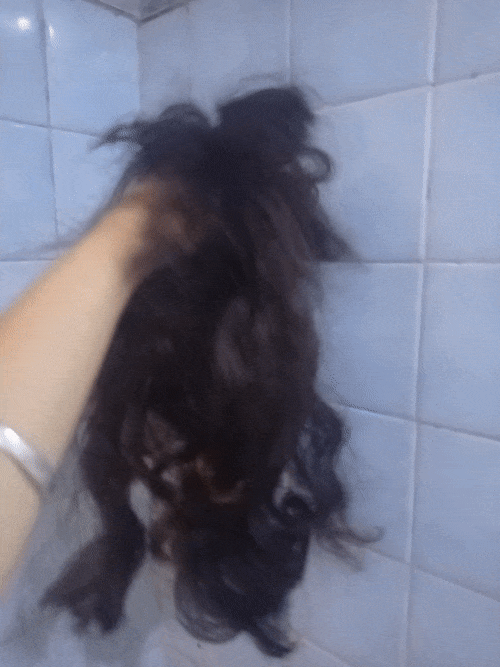
Hair Gif created in: https://ezgif.com
Photos taken with Snow app
Cover and photo collages created in Adobe Photoshop