Last time on The Road to Ramen I made some Chāsū pork rolls to go with the ramen.
This whole exercise was part of my LEARNING to make a fairly authentic recipe Tonkotsu style Ramen for my daughter, @aimeludick's birthday. The birthday is now past and I have quite a few more Road the Ramen posts to make before we get to the end result at the birthday but life has been busy. Plus I cannot throw out a Foodie post every day can I?
First off let me say that this will never be exactly 100% traditional as I live in South Africa. My daughter is, however, a giant weeb and I have a penchant for attention to detail. So I will do my best to make sure to make it as authentic as possible.
Last time I made Chāsū and damn, I can make it good! The most important part of making an authentic bowl of Ramen is the broth, however.
We can all throw together some 2min noodles because ramen noodles are just that - wheat noodles. You get better, slightly more expensive noodles, but without a proper broth, you have not made Ramen.
Ramen broth is a labour of love and I feel that if you have not put effort into the broth, then the broth will not be great. This traditional style of broth will take you a lot of time so I suggest you start 3 days before you want to plate your Ramen if you have a day job. Unless you spent all your time at home where you can attend to the broth every so often, just do the steps in sets.
Let's get cooking!
Day 1 - Soak the bones
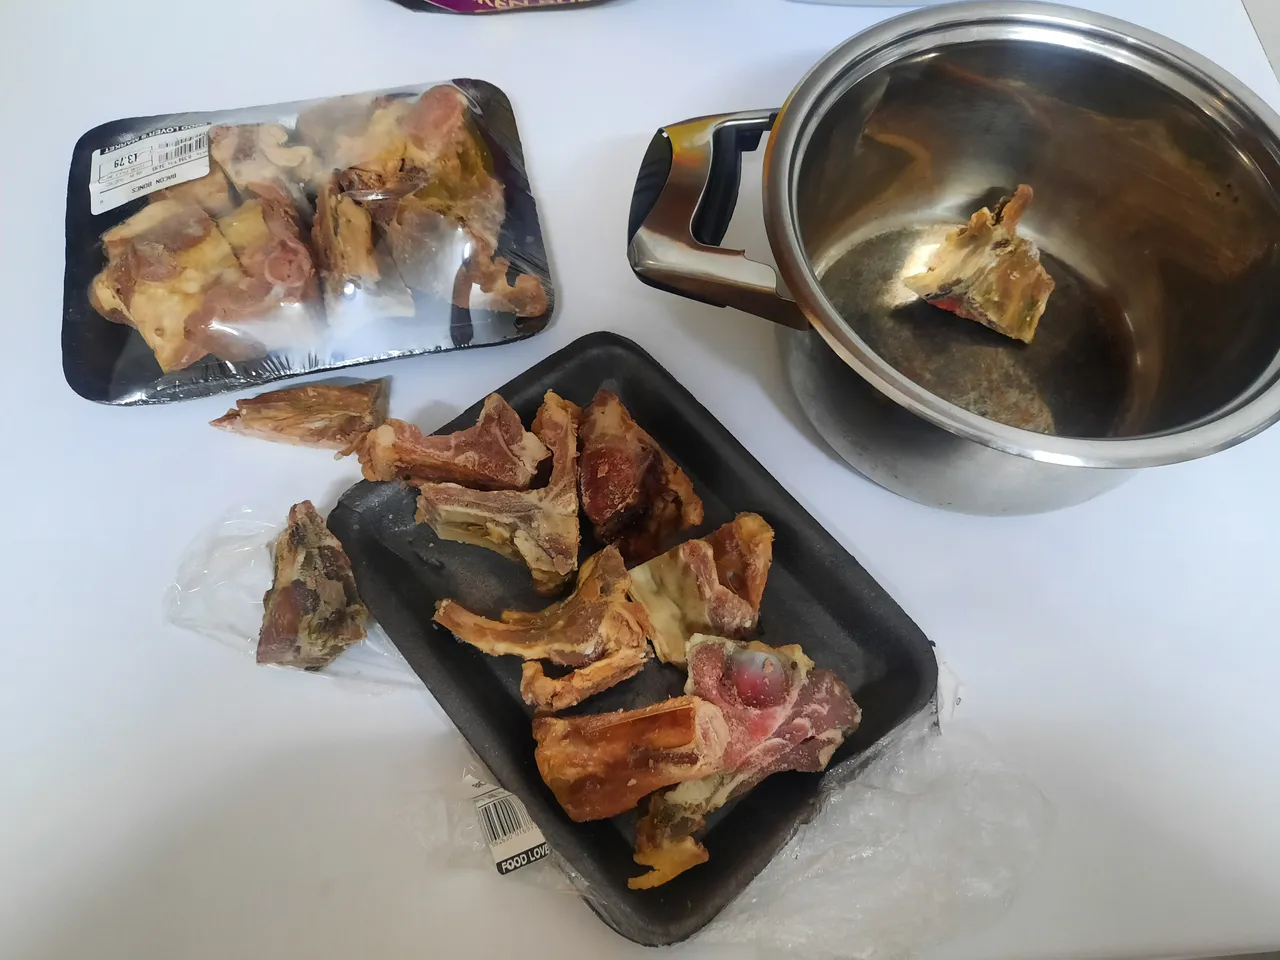
What you want is pork bones, soup bones, or whatever you can get your hands on. You want fatty pork bones. You can either buy them prepared from the butcher/supermarket or keep your pork bones from another dish. By now I have experimented with this step with frozen pork bones as well and you can make that work too, just let it defrost before you do the first step.
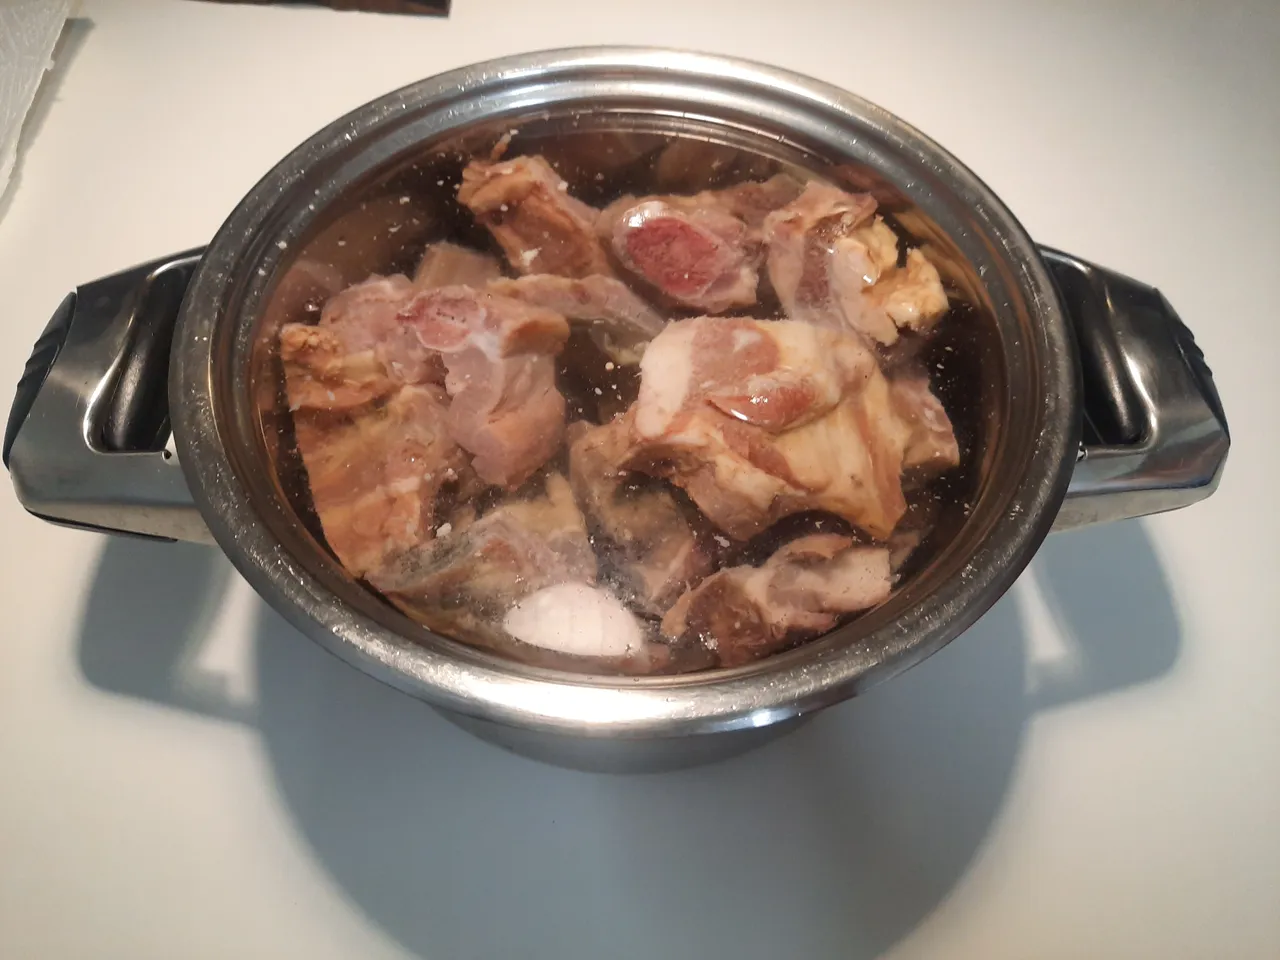
The first step is to soak these bones in room temperature (cold) water for at least 1 hour. This allows the blood to dissolve into the water and will make your broth cleaner.
I used a product from the butcher called Bacon Bones. I am not too sure how they got it like this, but they are nice and meaty and fatty and smell slightly smoked.
For those who work with meat or injuries, you might know the trick about blood. When blood is heated up, it expands and sticks to surfaces. That's why you should not use warm water to wash blood out of clothes. First rinse with cold water before a regular wash.
That same bit of physics and biology general knowledge made this step make a lot of sense to me. When you pour this water off after an hour it will be tinged red. That way, you know it worked.
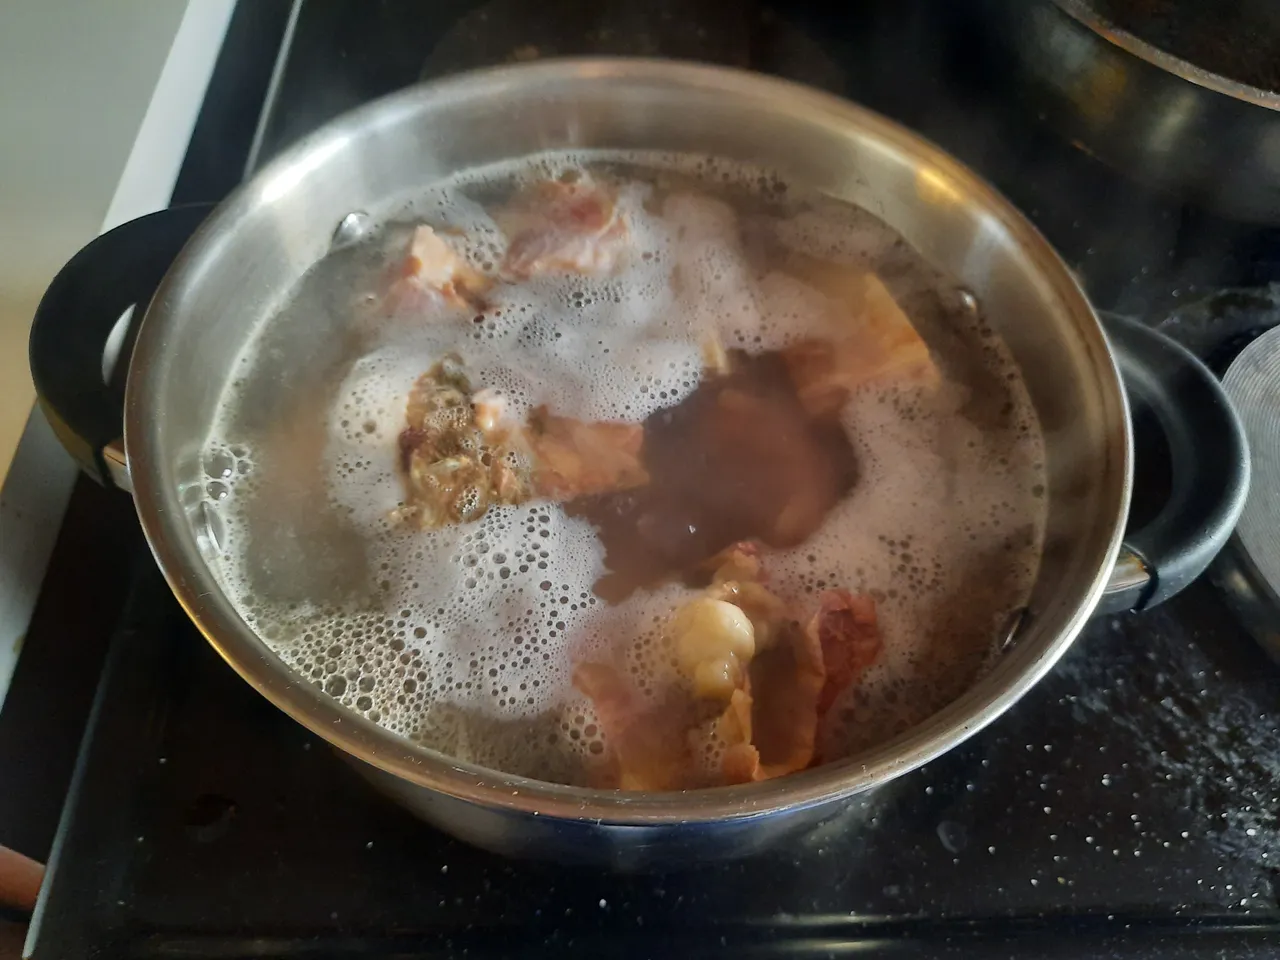
In the next step, fill the pot with clean water and boil it for one hour. This will start to separate the scum from the bones. In the many videos, I watched about making the broth this scum is either scooped off the top until there is none left or the first pot of water is thrown out.

That is what I did, using a colander, I threw the water out. With the bones in the colander, I gave them a rinse with clean water. Of course, you need to make sure your basin and kitchen is nice and clean for this type of cooking!
Back into the pot, new water and get it to boil again. Any other scum that might rise to the surface of the water is scooped out and eventually there will be no more floating bubbles and material.
If you are on limited time, you can pause here and start the next set on Day 2.
Day 2 - Veggies
The reason I say, start this on a fresh day is because you need to have this step on the stove for at least 8 hours! I am not keen on leaving a stove unattended while I am out so I totally left this for the next day.
The pork bones were covered and left on the stove. While I chopped and prepared the veggies, I put it to boil again and after a good 10mins of boil, set it down to a simmer.
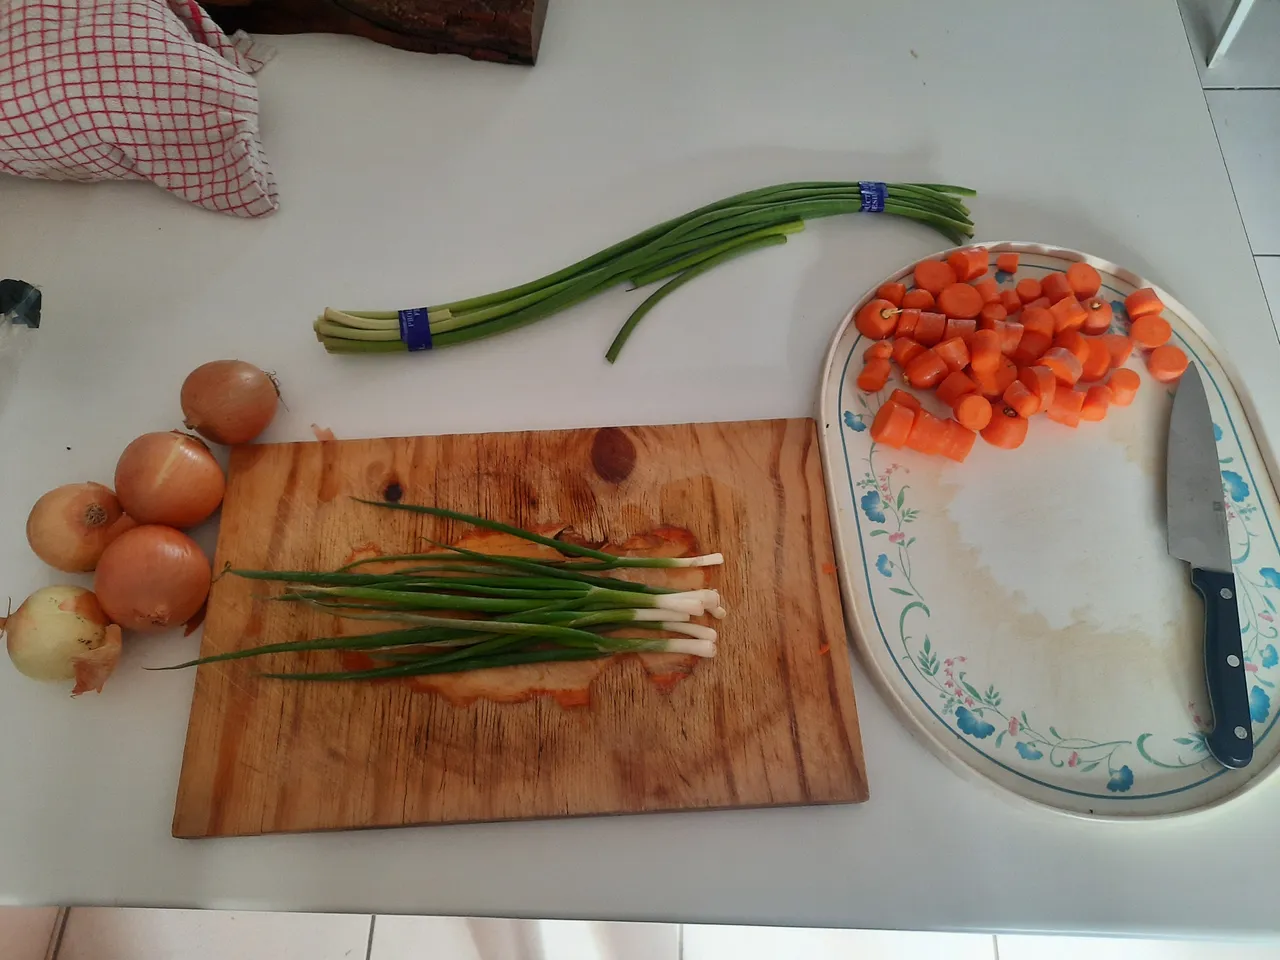
You can prepare a borth with so many different ingredients, the traditional Japanese recepies alone have a staggering variety. Each district and area of Japan or even specific restaurants have their own style and own recepies that make them special.
For myself, I took a median route and also had to work with what I could get!
Above you will find White Onion, Carrots, Spring Onion and a typle of green garlic plant I bought at the Asian Supermarket. I have no idea what it is, the Asian Supermarket had it labelled as "garlic" and I chopped a piece off and ate it - a super strong garlic taste!
So off I went chopping!
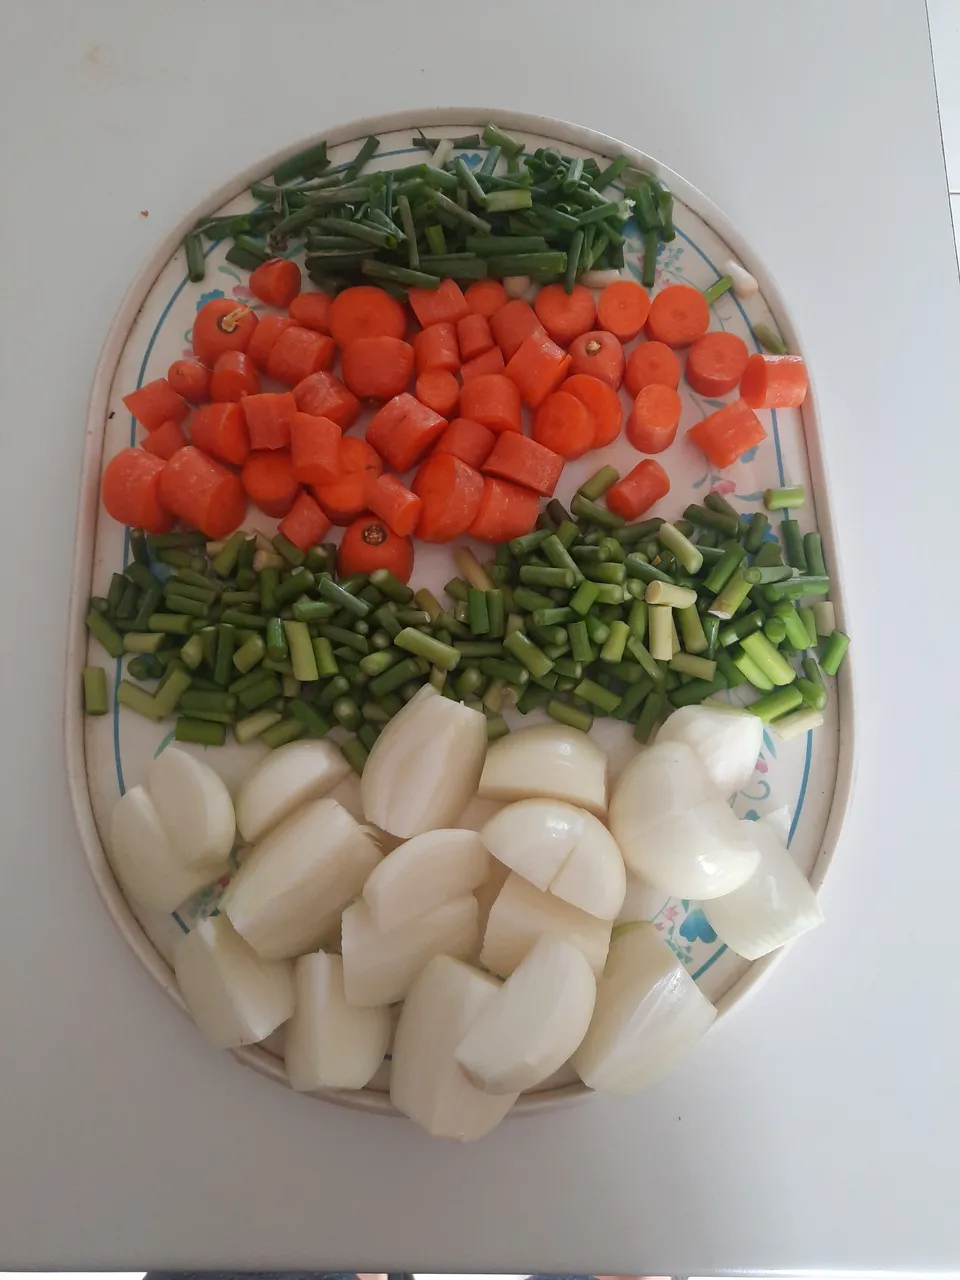
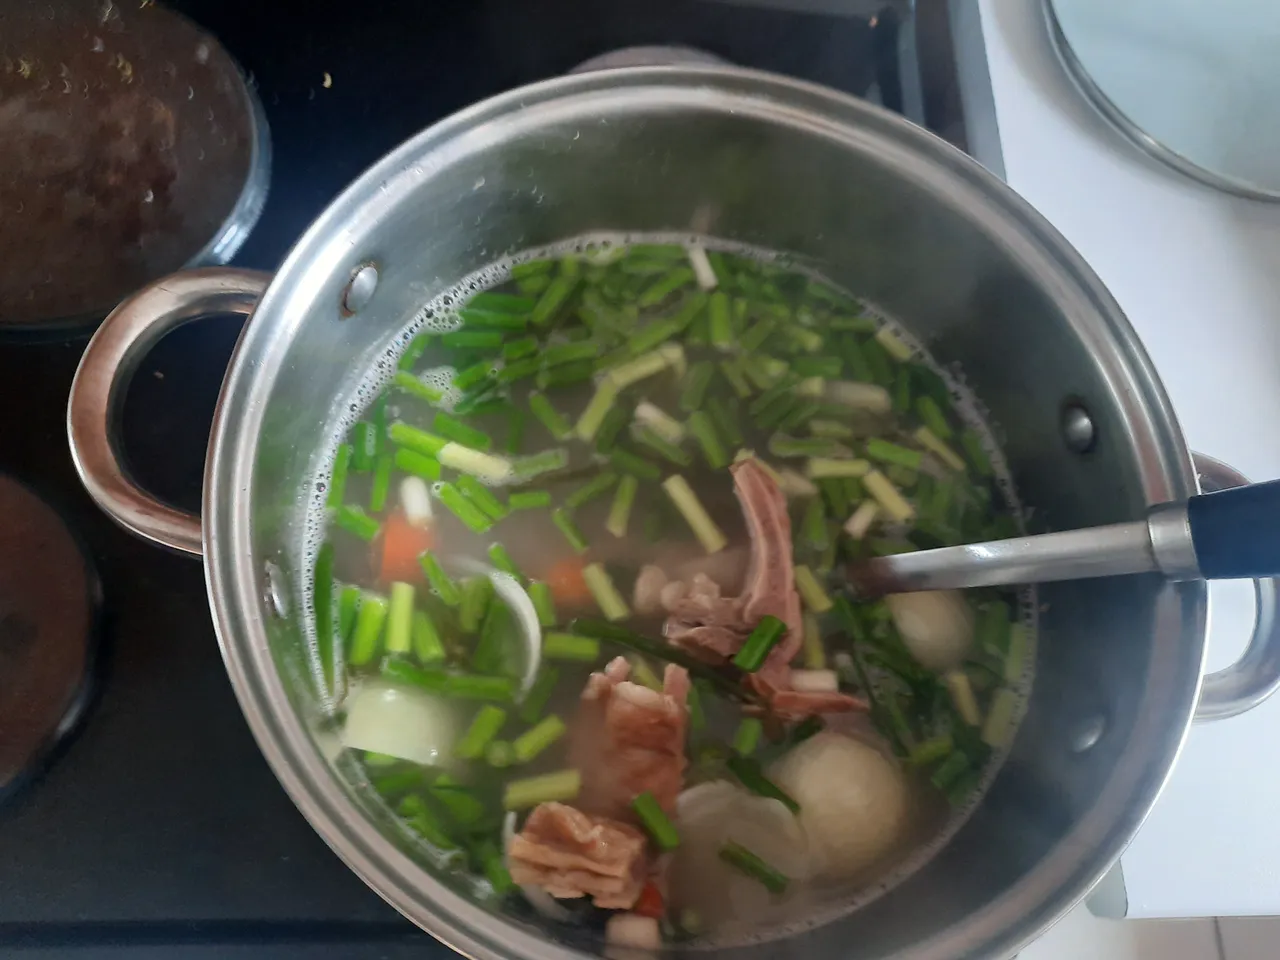
Chop chip and look at it all, beautiful and colorful. Into the pot they go! Every time you throw material into a pot you can hear the equilibrium of the temperature shift and it needs time to regain.
Have patience with this step, it takes hours.
Here we can see all the ingreadients together. Notice how the liquid between the veggies and bones has turned a milky white. I learned later that this was very correct and actually part of the ART of this Tonkotsu broth dish.
Its not scum, but the fat emulsifying. So the fat is separated from the bone, melted off and mixes together with the rest of your broth.
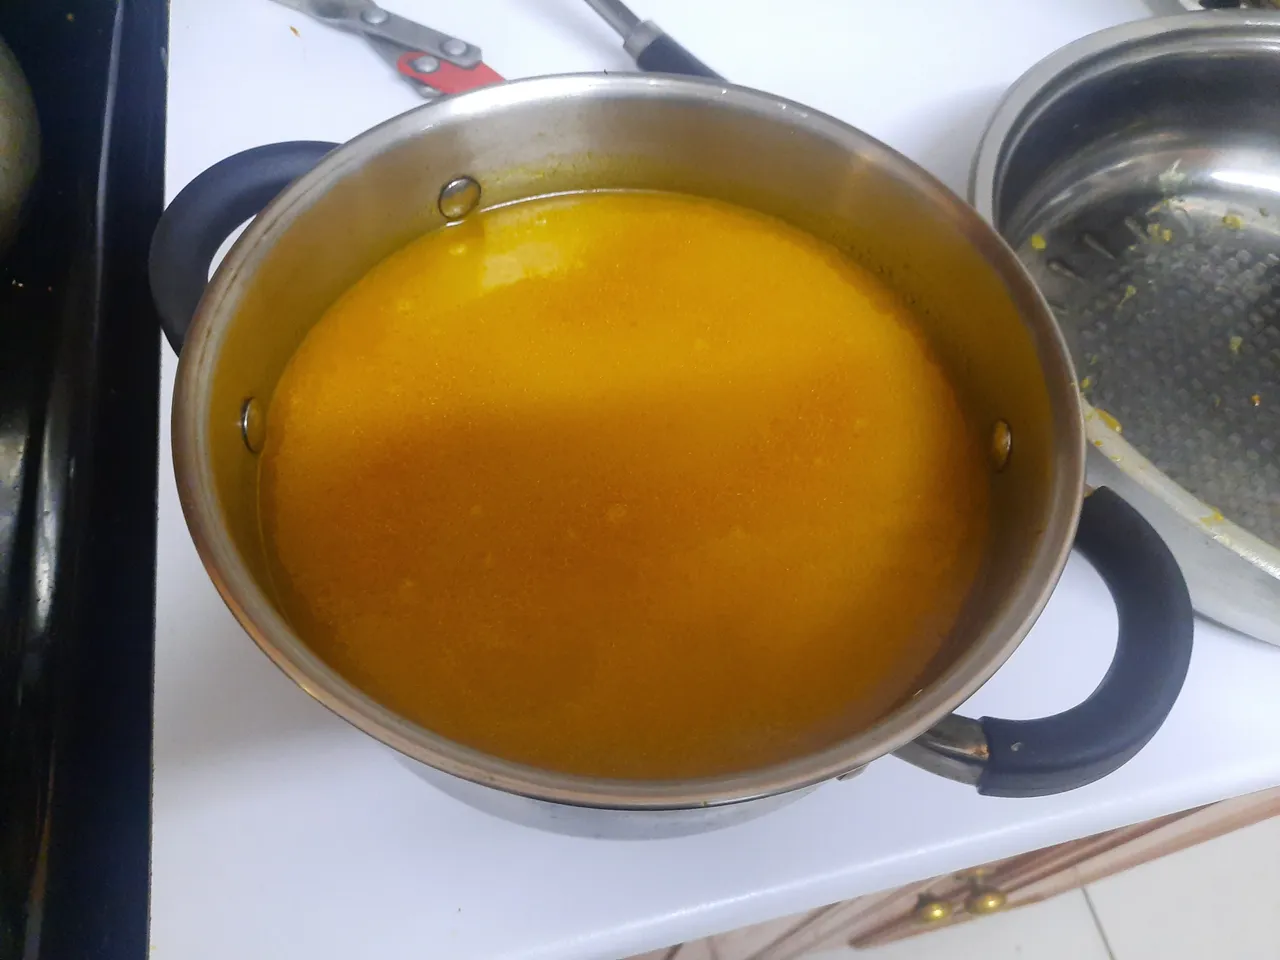
This is the last you are going to see that milky wonder as I followed a specific recepie and put a bit of tumeric into the broth, giving it that distinct yellow tinge. Bring this to a boil and ease into a simmer for 6 to 8 hours.

Day 3
If you have another 4 to 8 hours of time before plating your Ramen, you can do this same day or else you need to start this part on day 2.
I sliced up and added a punnet of button mushrooms. I learned later that the local Asian Supermarket stocks all sorts of strange mushrooms for me to try. In my case, this is what we grow here and most often stock at any local supermarket.
Mushroom adds umami flavor!
Once you have left the mushrooms the time needed to add their flavor to the broth you need to strain it all through a sieve. Therefore, what comes through is just a liquid.
I actually kept what was left behind, added to it, and made a regular old boere-soup with it to eat with bread for another day.
The Result!
Behold the milky, creamy wonder of the completed broth!
I cannot fully describe to you the first taste test that I had once I had come to this final step. Before then, I had been following a recipe and it was sort of like coloring by numbers, not yet knowing what the end result will be.
It was creamy and flavourful, it had the taste and mouthfeel of everything that went into the broth without their physical parts, and all at once, I knew that this was immensely nutritious!
All at once, I realized why it could be served to both the elderly and the sick as it was PACKED with goodness!
This was just amazing and there is quite a bit of preparation left in the final steps of my first Ramen. This I will put into my next post, hopefully with fewer days between this and the post about the Chāsū pork rolls.
Enjoy!