Hello!! everyone, hope you are doing fine.
Considering the state of our economy here in this part of the world, I was just trying to grab breakfast without spending much.
Boom! then I remembered this sponge cake recipe which involves the use of only three ingredients.
Let me share with you guys the steps I used in making this recipe.
This sponge cake recipe is easy to make and only requires three ingredients, isn't that amazing? This cake is perfect for the base for a strawberry short cake or numerous other types of cakes you may want to make, start with this, and then do whatever toppings and decorations you want.
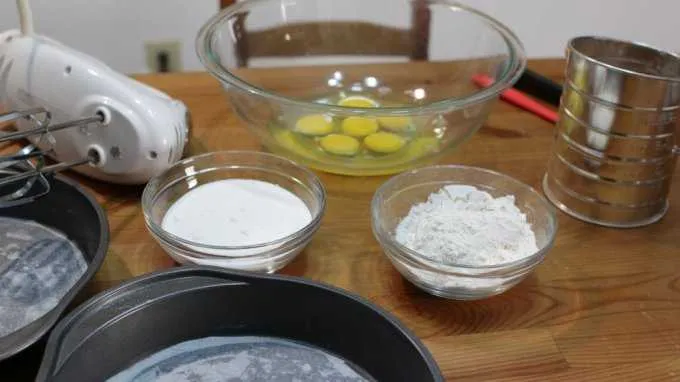
INGREDIENTS/ TOOLS
6 large eggs (room temperature)
1 cup of white granulated sugar (225g)
1 cup of cake flour or all-purpose (plain) flour (130g)
Tools:
hand mixer or stand mixer
large bowl
spatula
2 9-inch round cake pans
cookie rack
parchment paper
sifter
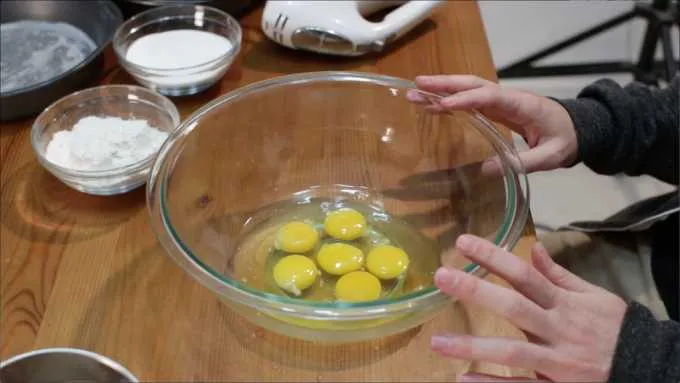
STEP 1: BEATING THE EGGS
First let's start by preheating the oven to 350 F (176 C). Now we begin beating the room temperature eggs. We will need to use a hand mixer or stand mixer, because we will be beating the eggs for quite awhile. Start beating the eggs on medium to medium high speed, and beat them for 5 minutes. The eggs will turn a pale yellow, and the volume will increase.
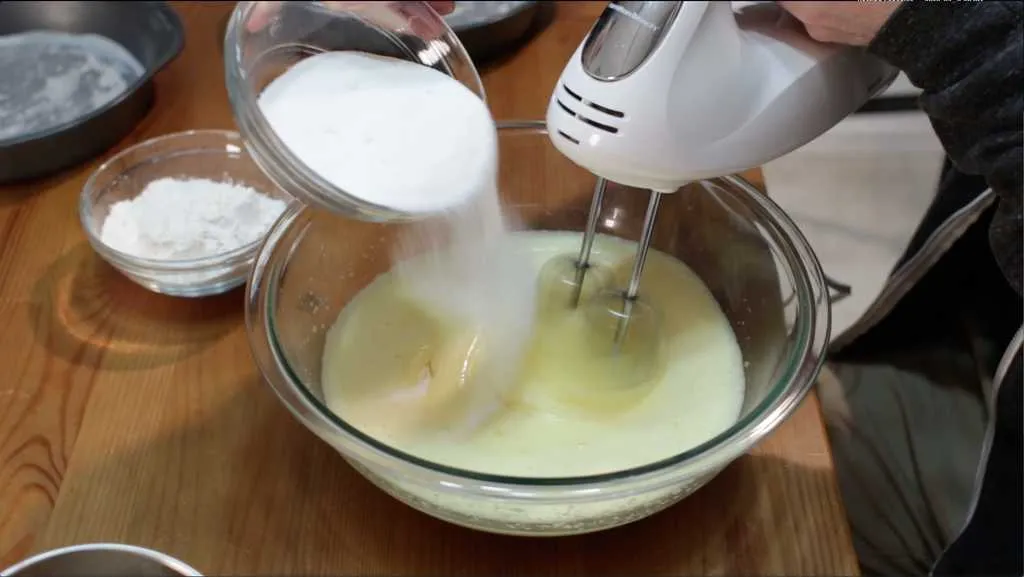
STEP 2: ADDING SUGAR AND MIXING
Next we will continue mixing the eggs and slowly add in our white granulated sugar. And continue beating for 10 to 15 minutes. Why do we need to beat them for so long you may be wondering. Well here is where the science comes in. In this recipe the eggs are acting like the leavening agent. There are 4 main ingredients that are used in baking for leavening, they are: baking soda, baking powder, yeast, and eggs! For sponge cakes we want the bubbles to be very small. If we don't beat the mixture long enough the bubbles of air that we are creating will be too big, and then when we bake it, the bubbles will get larger causing the structure of the cake to change a bit, making it susceptible to deflating. No one wants a deflated cake. But don't be alarmed, if your cake does deflate, it will still taste good, haha. One way to tell that you have mixed long enough, is when you pull up the beater, the ribbon of batter will land on top and keep its shape for a bit before dissipating into the rest of the mixture. If when lifting it up the ribbon of batter dissipates super quickly, you need to keep mixing for 3 to 5 minutes. :)
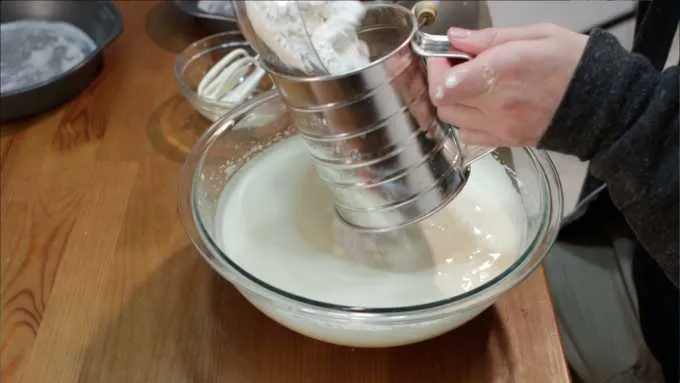
STEP 3: SIFT AND FOLD
Once our batter has been beaten for an appropriate amount of time, you will notice how much volume was added to the batter and it will feel light and fluffy. Next we need to FOLD in our flour little by little. I like to use a sifter when adding the flour, because it breaks up any clumps of flour, and makes it nice and light. Using a spatula, go under the batter and then fold it up on itself, do this a few times to mix in the flour, then put some more flour in the bowl and fold, etc. Keep doing this until all the flour has been folded in. DON'T dump all the flour in at once, and DON'T stir or use your mixer, haha, if you do, you will ruin all those cool little helpful bubbles you created when mixing earlier. We don't want to over do it, just until there is no more dry flour seen. Make sure to go underneath and up through the middle of the mixture too, sometimes there will be extra dry flour hanging out.
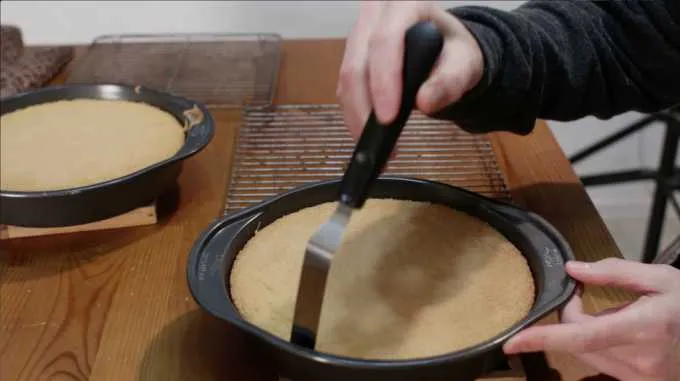
STEP 4: PREP, FILL, LEVEL, BAKE
Now we take two round 9-inch cake pans, which we have prepped with a bit of shortening on the bottom, then a piece or parchment paper, depending on your pan you may need to grease and flour the sides as well. Next evenly add our cake batter to them. After that we level off the top with a spatula. Next we bake them in the oven at 350 F (176 C) for 23 to 28 minutes. Mine usually are done at 25 to 26 minutes. Everyone's oven is different. Bake them until they are nice and golden brown on the top. You may be tempted to check them at 15 or even 20 minutes, but if you check them too early, you run the risk of changing the temperature on the inside of the oven, which may cause the cake to deflate as well. Check them at the 23 to 24 minute mark. Once you take the cakes out of the oven, let them cool in their pans for a few minutes.

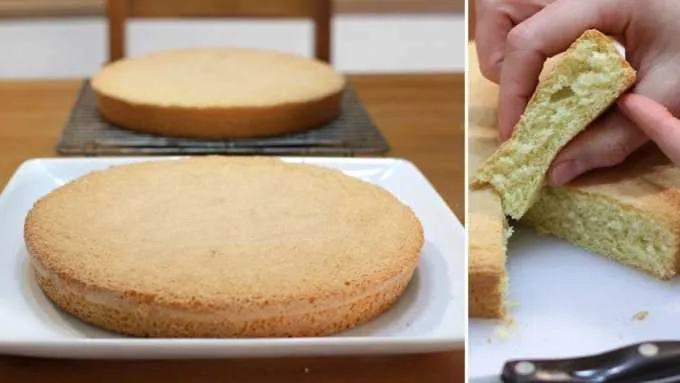
STEP 5: RACK, PEEL, AND SERVE!
Next we take a small butter knife or cake spatula and run it around the edges to help loosen the cake. These non-stick wilton cake pans I am using work great, so the cake loosens up very easily. I don't need to grease the sides and flour them, but you may to with your cake pans. Then place your cookie rack on top, and flip it over. You may need to jiggle it a little bit, for the cake to fall out. Now just peel up the parchment paper. Let the cake cool until it is room temp, then you can decorate it however you like. I included a picture of the inside texture as well. Just like a sponge! haha. :) Enjoy!
Well as you can see my recipe below, you can tell how interesting it is, if I can bake it then you can also bake it!
Don't forget to follow me, If you have any questions or comments leave them down below and I will get back to you as soon as I can.
#foodiesbeehive