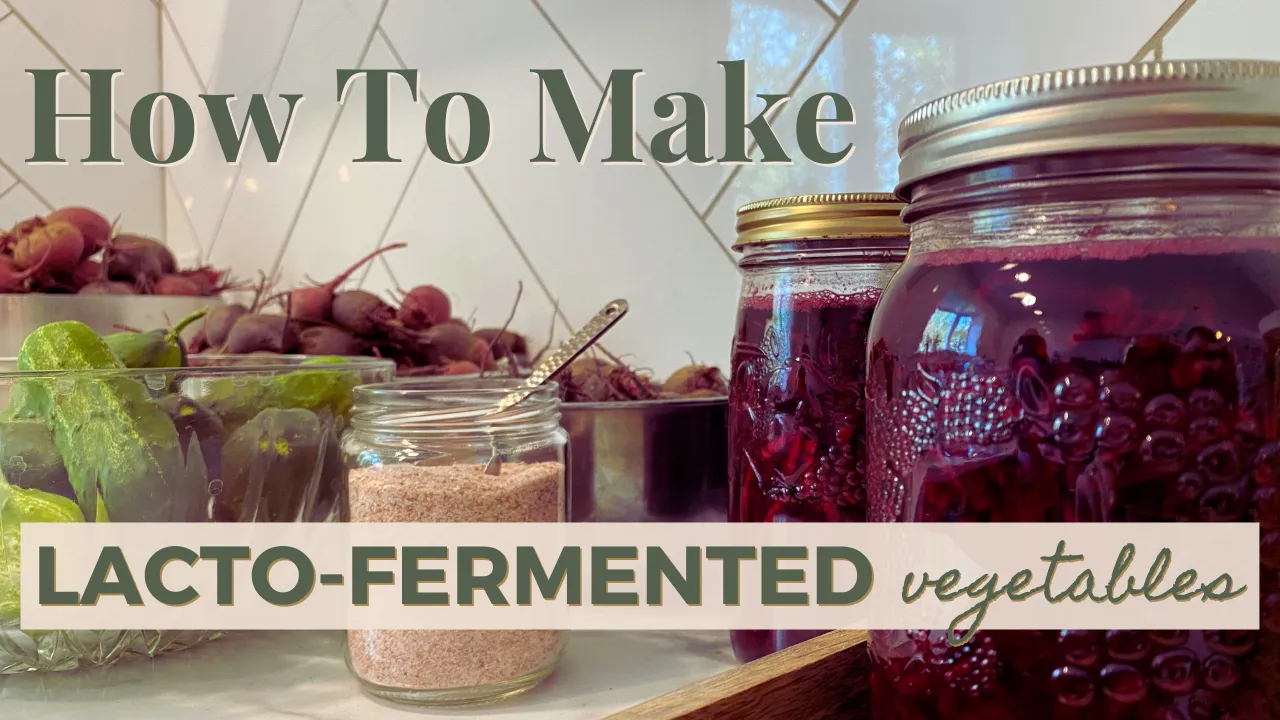
In this tutorial you will learn how to make lacto-fermented vegetables at home. This ancient technique of preserving food is an easy way to store food for winter, while maintaining, and elevating the nutrient content of the vegetables. Consuming fermented vegetables may make them easier to digest and more bio-available.
In my opinion, lacto-fermented vegetables are easier to make and better for your health than canning (although there is certainly a place for that, too). There is no need to sterilize, water bath, or pressure can the jars.
What is Lacto-Fermentation?
Lacto-fermentation is an ancient food preservation technique. In an oxygen free (anaerobic) environment, lactic acid is produced when the lactobacillus bacteria and yeast break down starches and sugars. Some common lacto-fermented foods are yogurt, sourdough bread, and sauerkraut.
You will need:
This is a basic list of what you’ll need.
- vegetables, clean and trimmed
- clean glass jar or fermenting crock
- lids for jars (optional)
- fermenting weights (optional)
- non-iodized salt
- kitchen scale
The Magic Lacto-Fermenting Formula
This is the basic formula that you can use to calculate the amount of salt needed to lacto-ferment vegetables.
Weight of Vegetables + Weight of Water x 0.025 = Amount of Salt
How to Make Fermented Vegetables
Now that we have the magic formula, and we know that some good bacteria called lactobacillus is going to be involved – I’ll show you how it works.
To lacto-ferment vegetables, they need to be completely submerged in a 2.5% salt brine which will create an anaerobic environment. An anaerobic environment means there is no free oxygen. Then, the vegetables are left to culture and ferment at room temperature for at least 4 days, then moved to cold storage.
Lacto-fermentation can be used to preserve many vegetables, so feel free to get creative with veggie blends, and flavourings.
WEIGHT OF VEGETABLES + WEIGHT OF WATER x 0.025 = AMOUNT OF SALT FOR BRINE
Step 1:
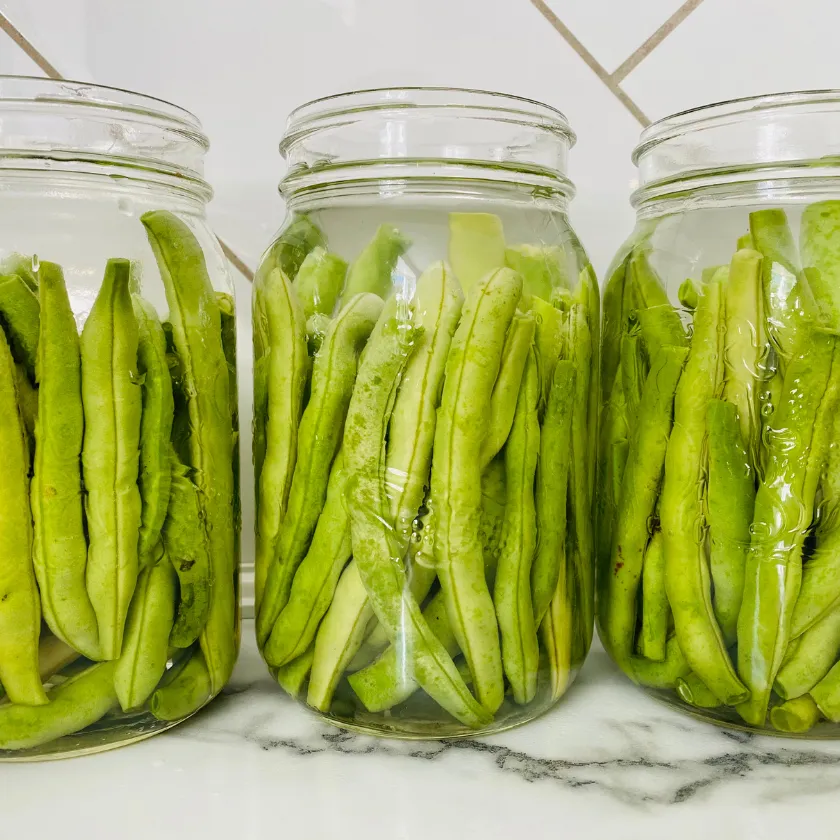
Wash and trim your veggies.
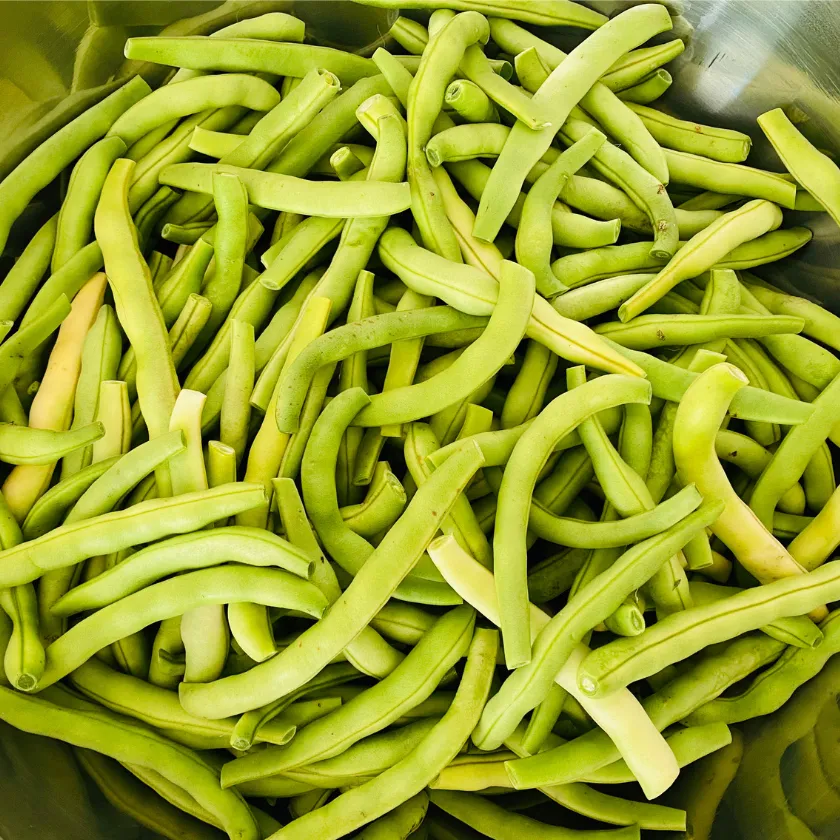
Thinner pieces will work better. A carrot stick will ferment better than a whole carrot. Shredded or matchstick sized beets will work better than larger chunks. Cucumber sticks or slices will work better than whole pickling cucumbers. Beans are already thin, so they will ferment well if left whole.
Step 2:
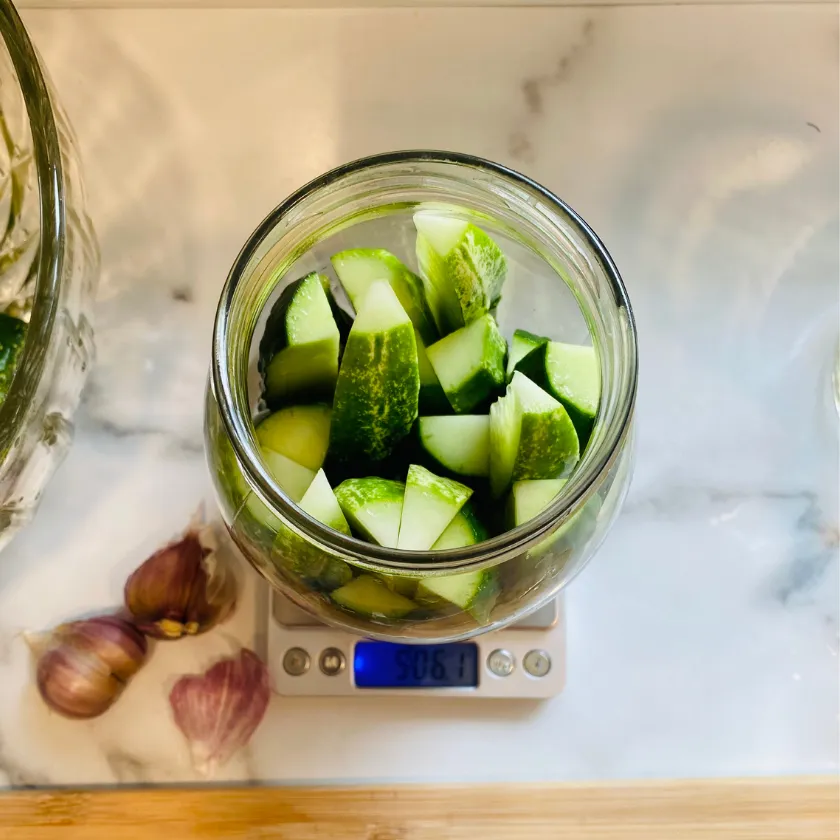
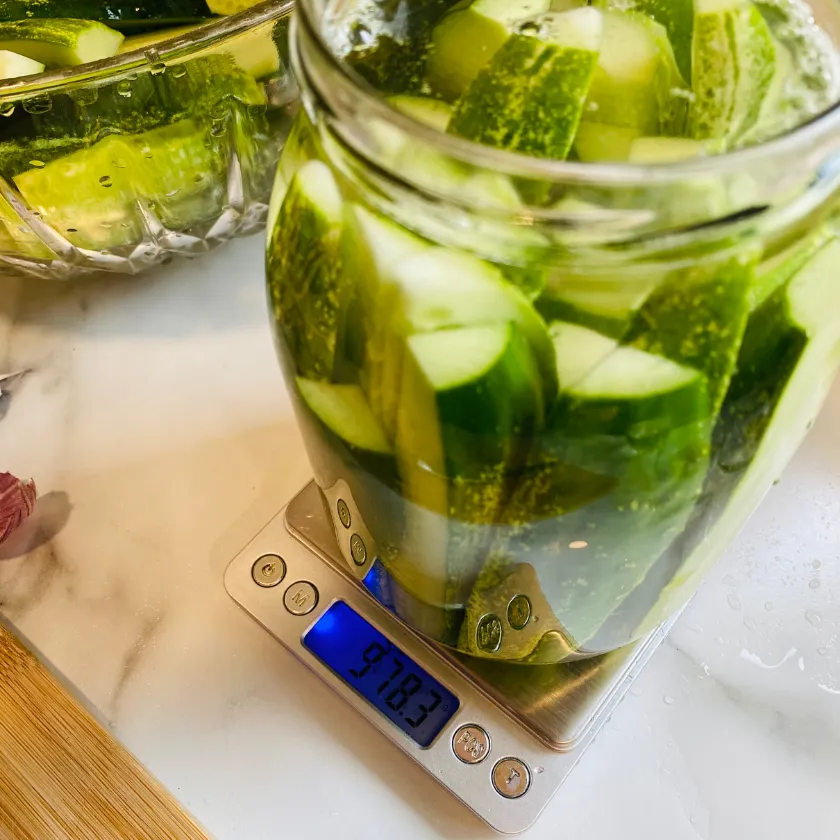
Weigh your vegetables.
Place your jar on a kitchen scale and zero it. Then, fill the jar with your vegetables and record the weight.
Pack the vegetables in tight so they won’t float around when the brine is added. Leave a little room at the top of the jar so the vegetables can be completely submerged in the brine.
Example: Weight of Vegetables (440g)
Step 3:
Weigh your water.
Keep the jar of veggies on the scale and add filtered water until the veggies are completely submerged. Record the total weight of vegetables + water.
Example: Weight of Vegetables (440g) + Weight of Water (360g) = Total Weight of Vegetables and Water (800g)
Step 4:
Make a 2.5% salt brine.
Calculate the amount of salt you will need by following the magic formula.
Example: Total Weight of Vegetables + Water (800g) x 0.025 = 20g saltStrain the water out of the jar and mix in 2.5% salt, until dissolved.
Pour the salt brine back over the vegetables
Step 5:
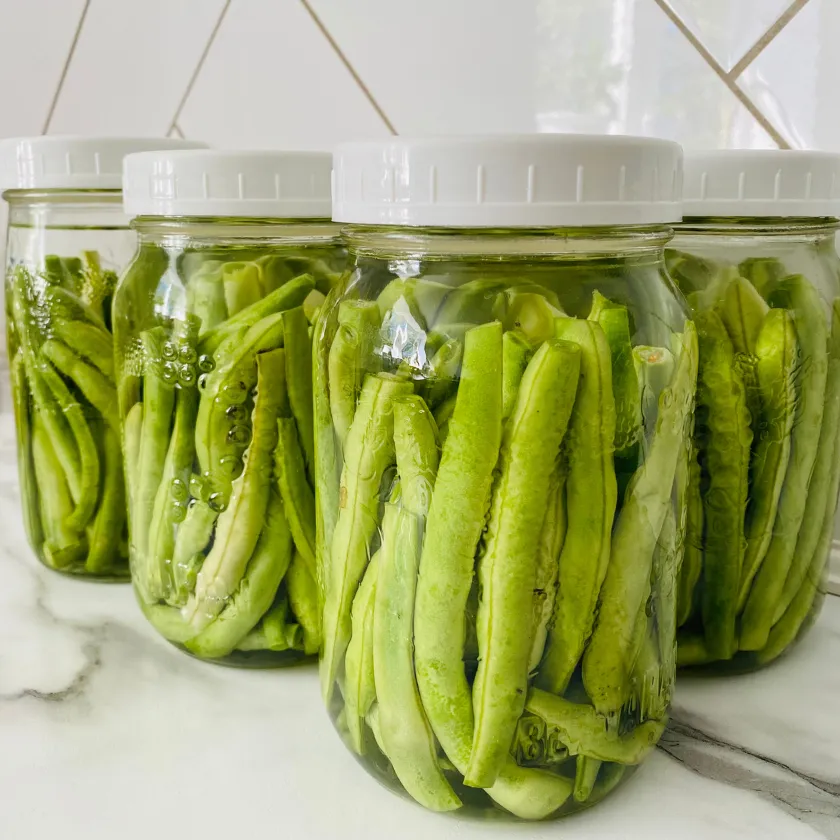
Cover and culture.
Use a loose fitting lid to cover the jar and allow it to culture at 15-21C (60-70F).
Check the veggies every day. If the lid on your jar is tight, burp it, to relieve any trapped carbon dioxide. Check to make sure everything is still submerged in the brine. Use fermenting weights, or a plastic baggie filled with water to help keep the vegetables submerged, if you need to.
In the first 24 hours, any harmful bacteria will be killed in the salt brine. The lactobacillus (good bacteria) will be preserved. The brine might become cloudy as the good bacteria and yeasts catch and begin to culture.
During the 2-4 day period the lactobacillus and yeasts will start to convert the starches and sugars into lactic acid. You may see little bubbles, indicating it is active and well.
After 4 days the tangy, effervescent flavours will develop and deepen. Do a taste test at any point to see where it’s at. Let it continue to ferment at room temperature as long as you’d like – until you are happy with the level of sour/pickled/tanginess. This can take anywhere from 4 days to 4 weeks.
Funky is good, mouldy is bad.
Step 6:
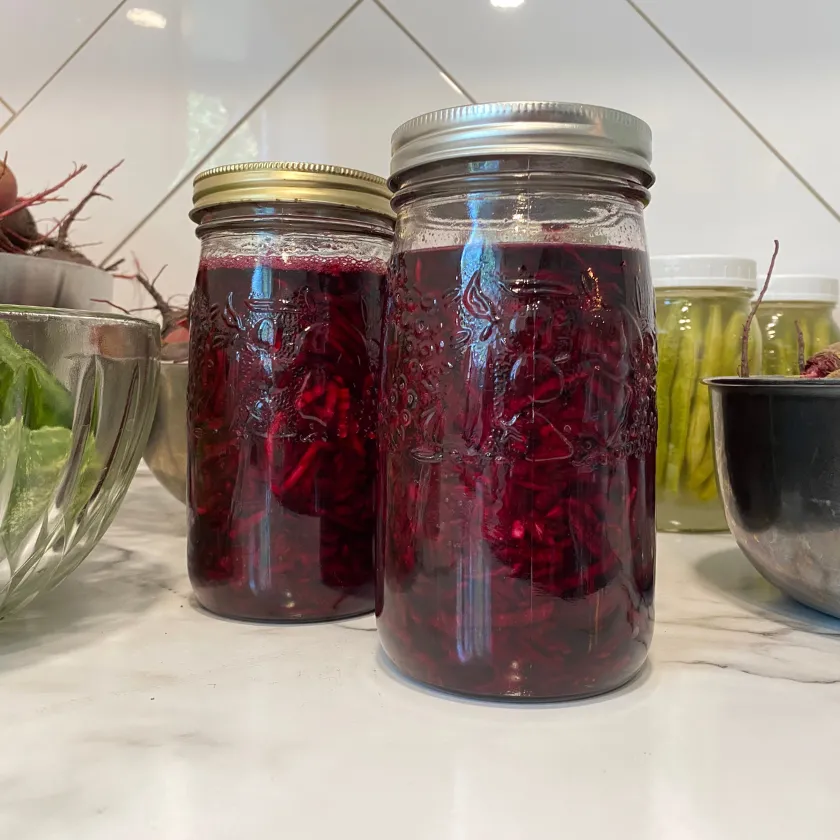
Move it to cold storage.
Once the vegetables have cultured and you are happy with the product, move it to the fridge or cold room, to enjoy at a later time. Keep in mind the fermentation process will never stop, but storing it in a cold location will slow it down. The flavours will continue to develop as time goes on.
Lacto-fermented vegetables can be stored in the fridge or cold room for months. Check them occassionally for mould, and burp the lids to relieve the carbon dioxide pressure.

Tips
Try larger batches.
If you have more than one jar of vegetables that you’d like to ferment, you don’t need to calculate the amount of salt for every single jar. Once you’ve calculated how much salt you need for the first jar of vegetables, you can add that same amount of salt to each jar after, as long as you are using approximately the same amount of vegetables and water. The salt brine should be between 2-3%, so if the weights for each jar vary a little – that is ok.Use non iodized salt.
Make sure your salt is simply sodium chloride – like Sea Salt. Avoid some table salts that have iodine and other additional ingredients to prevent clumping. Pink Himalayan Salt has naturally occurring iodine, but has not been artifically iodized. The natural levels of iodine in Pink Himalayan Salt are still safe to use for fermenting vegetables.Use fermenting weights, or a bag with water to help keep the vegetables submerged in the brine.
Sometimes it can be tricky to keep the vegetables from floating. You may choose to purchase glass or ceramic fermenting weights, or fill a small ziplock baggie with water and place it inside the top of your jar to keep the veggies submerged. This will allow the carbon dioxide to escape, and keep the bugs out as well.Protect the probiotics.
One of the many benefits of lacto-fermented foods is the gut-healing qualities of the lactobacillus (good bacteria). When you are ready to eat your fermented veggies, consider using it straight from the jar, as a side dish or topping. Cooking it will kill the probiotics.
If you enjoyed this tutorial, you may also like these:
Make Your Own Tea With These 10 Wild Plants
The 5 Most Important Things You Need To Know About Raising Chickens