Welcome back to Part 2 of the My Ford Excursion Front End Rebuild. In Part 1 I walked you through the process of replacing the Front Hub & Bearing. In this segment I’m going to take you through the process of replacing the Front Axle Dust & Vacuum seals. Now in order to access the axle to be able to pull it refer to Part1 of this whole process. The Hub & Bearing need to be removed in order to gain access to the axle to pull it from the axle tube. Once you have completed removal of the Hub & Bearing you can begin the process of replacing the Axle Dust & Vacuum Seals
Front Axle Dust & Vacuum Seal Replacement
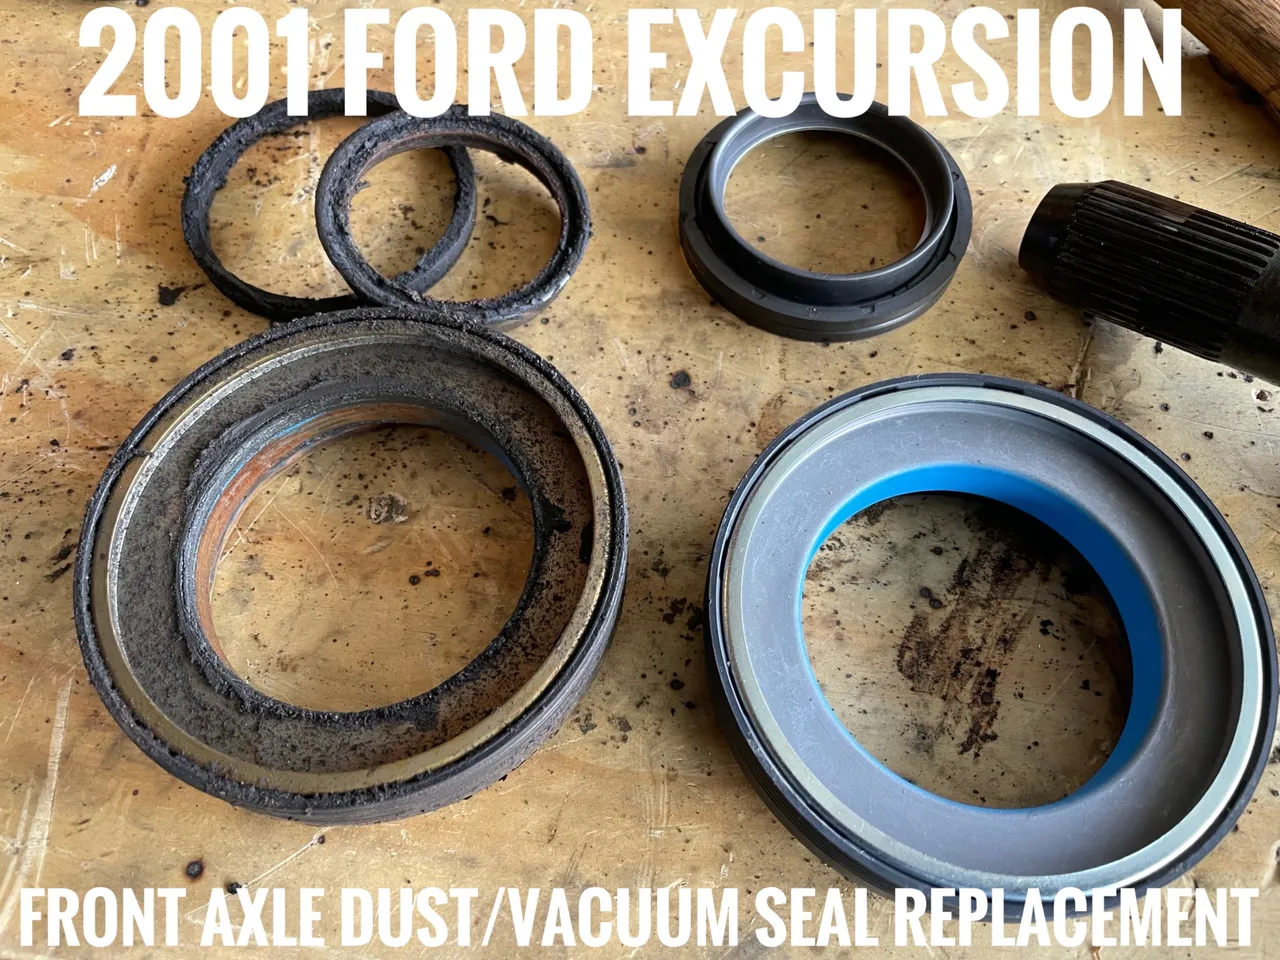
This process works for Ford F-250/350 model years 1999-2005 and Ford Excursions 2000-2005. In the 2005 F250/350 they changed the axle a bit and got rid of the leaf springs. So if you have a 2005 verify what axle you have because the process of installing these seals is different. I learned the hard way and ruined one of my vacuum seals.
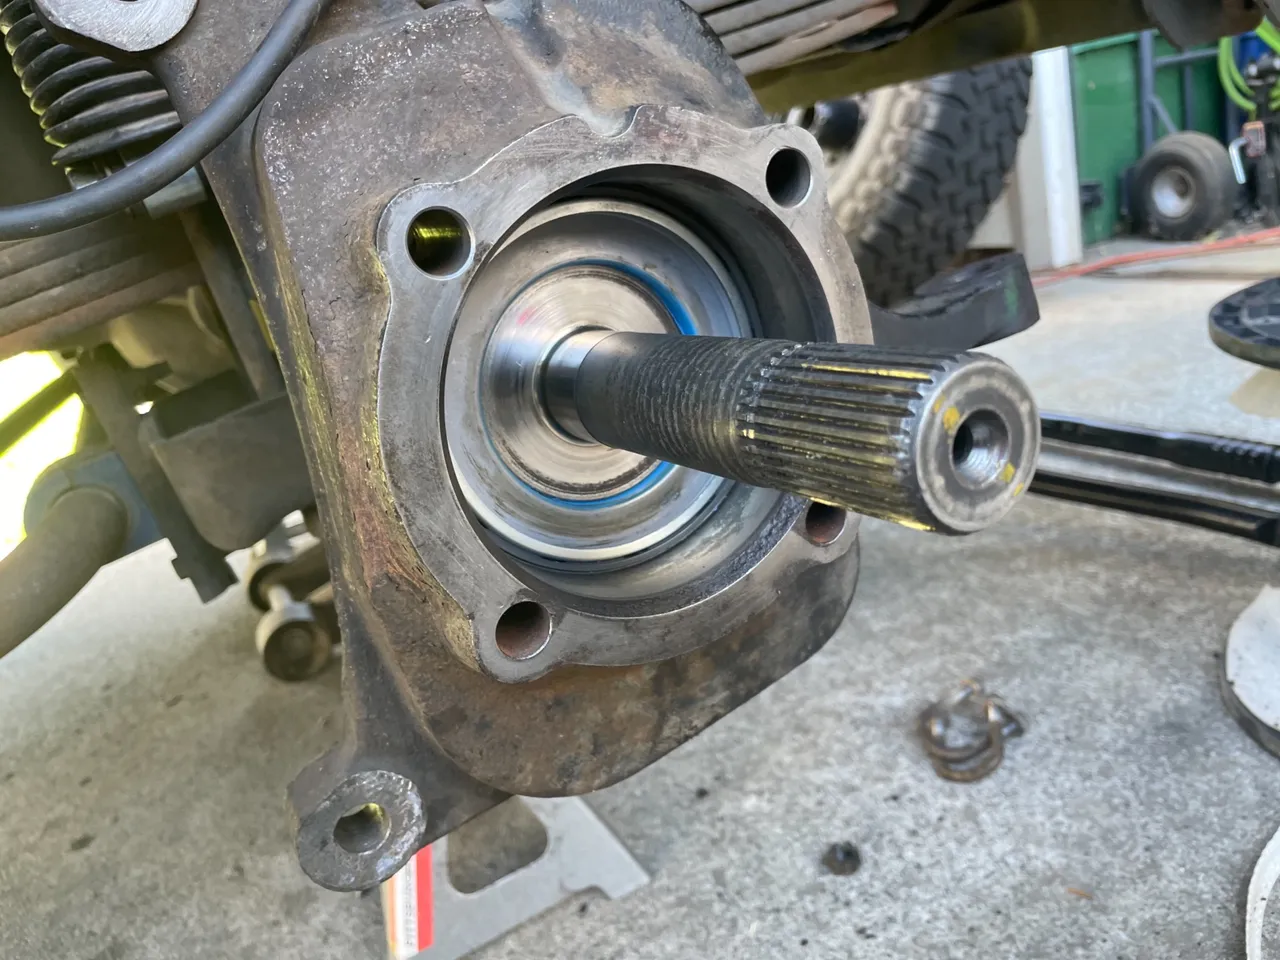
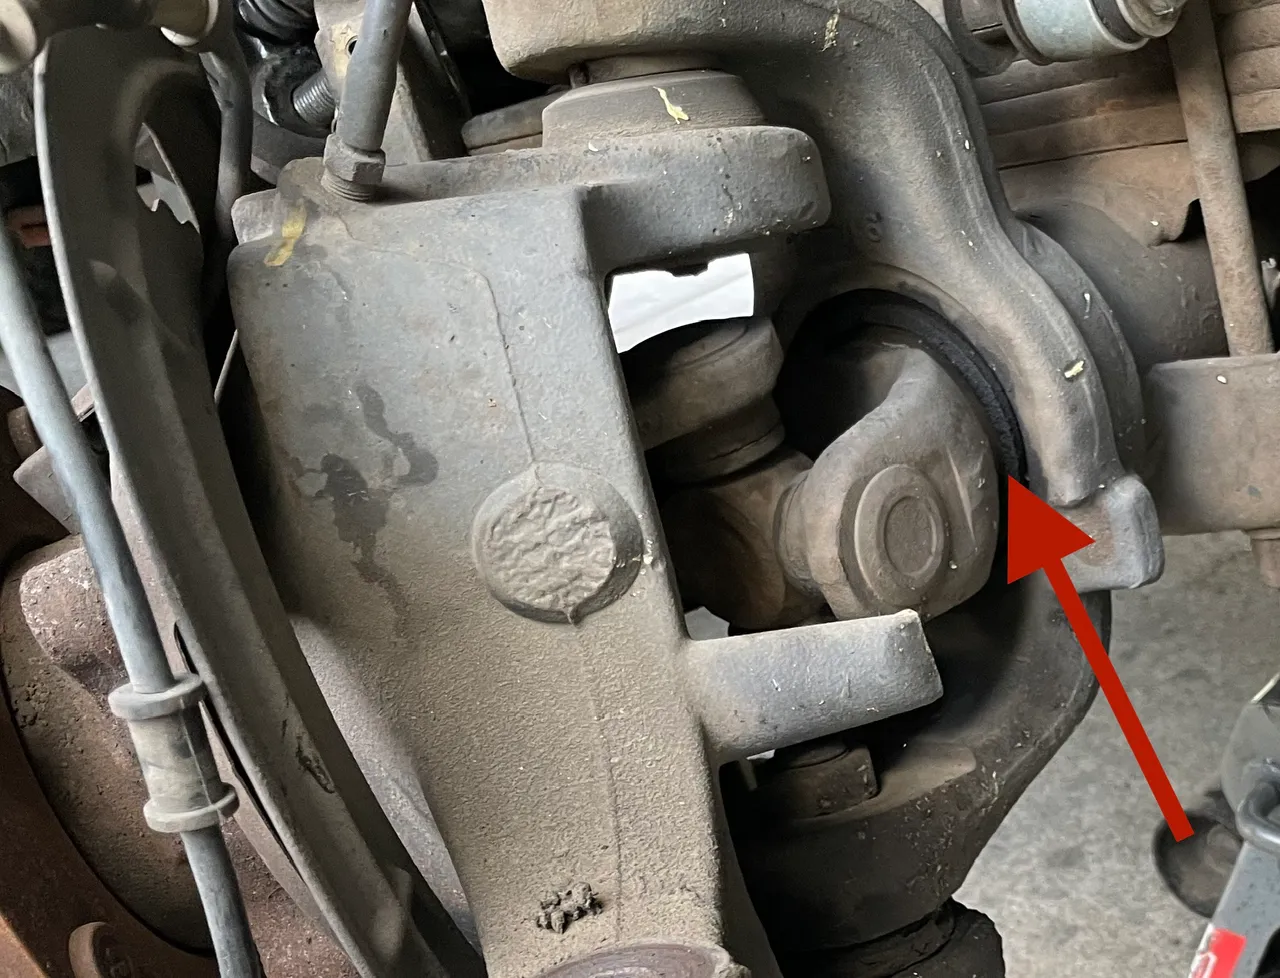
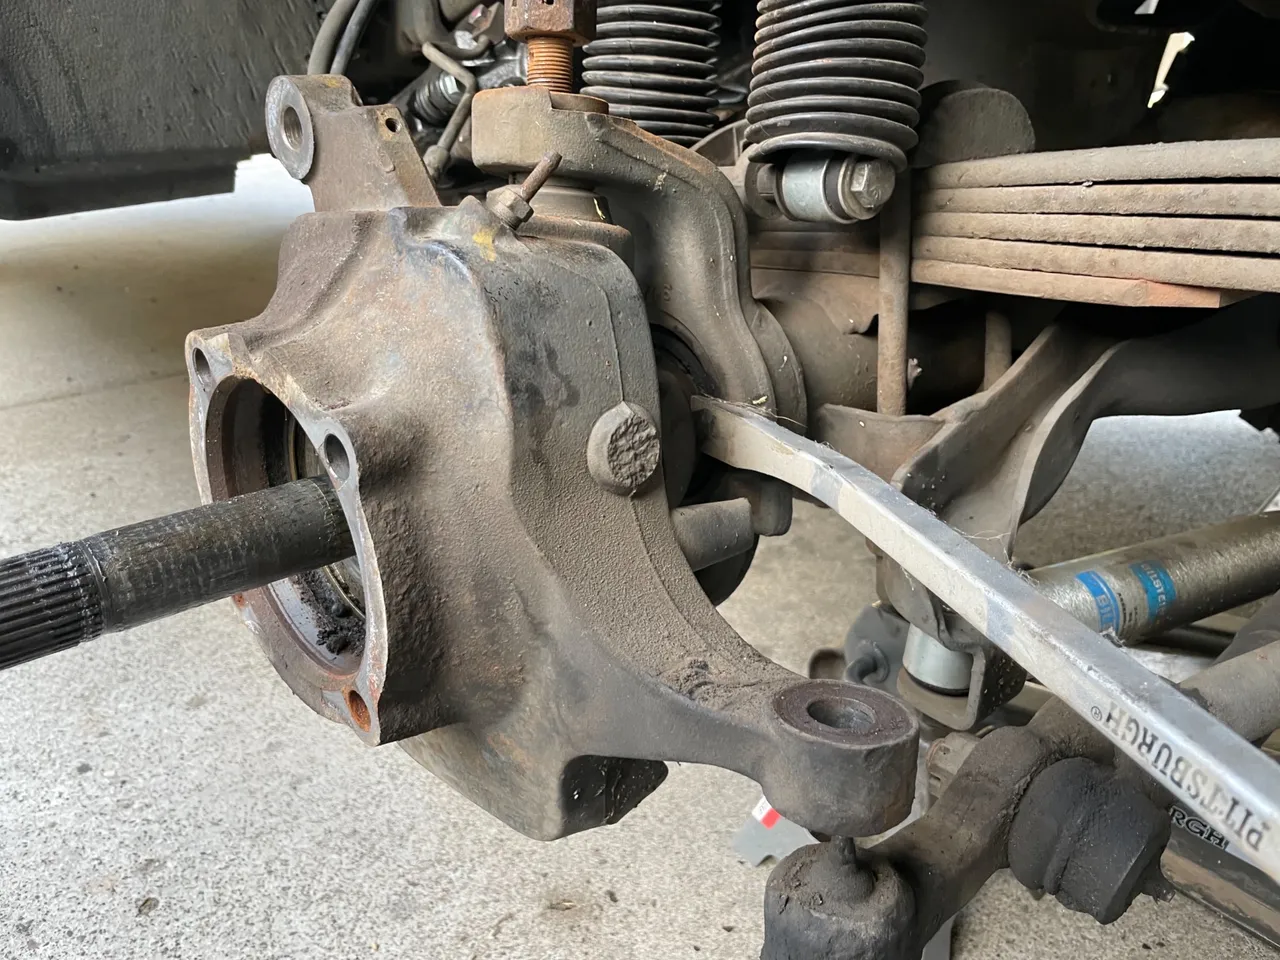
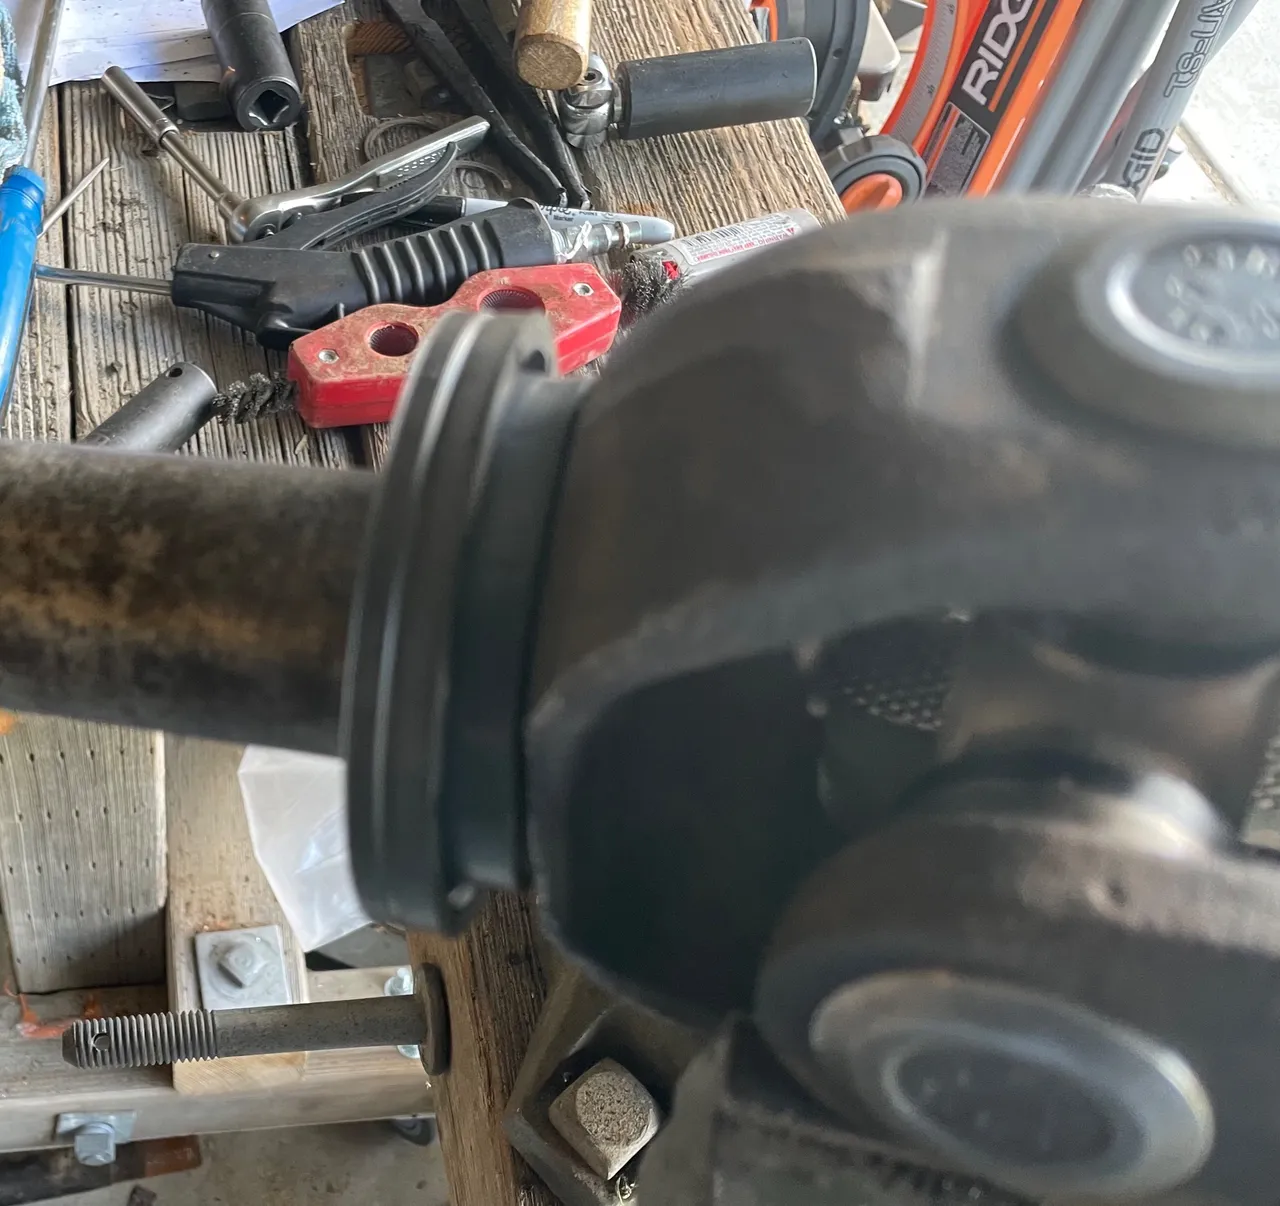
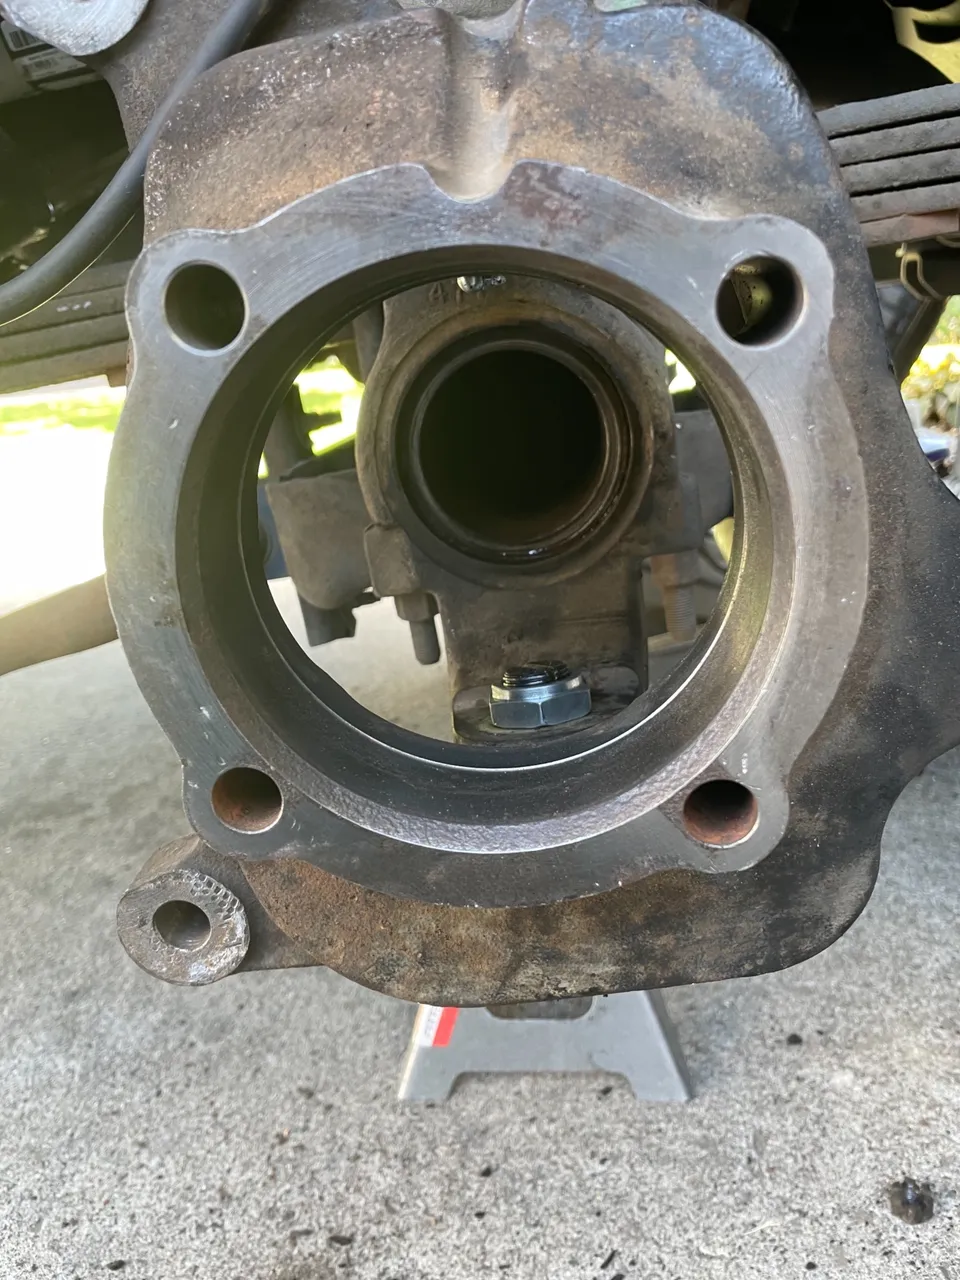
If you referred to Part 1 of this process then you already have the Hub & Bearing removed and this is what you should be seeing…
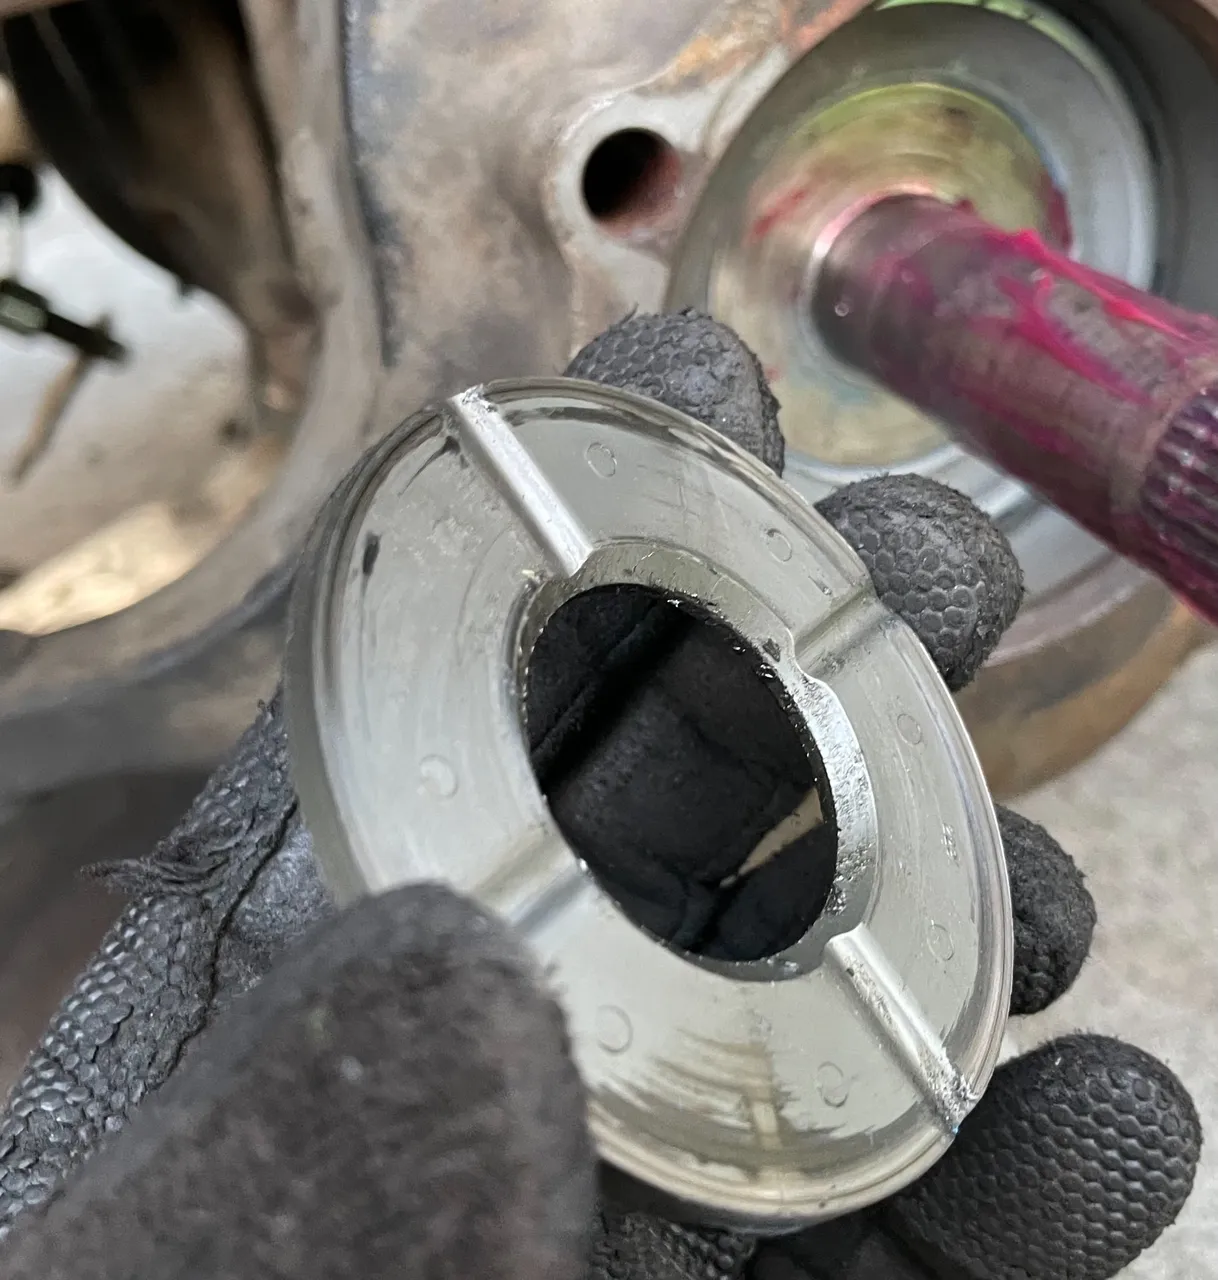
There is a plastic washer that sits on the outside of the vacuum seal. Make sure you don’t lose it. It has grooves in one side. Those groves face the seal or toward the vehicle. Remember that
To make things easier to pry out the axle, remove the tie rod from the outer knuckle
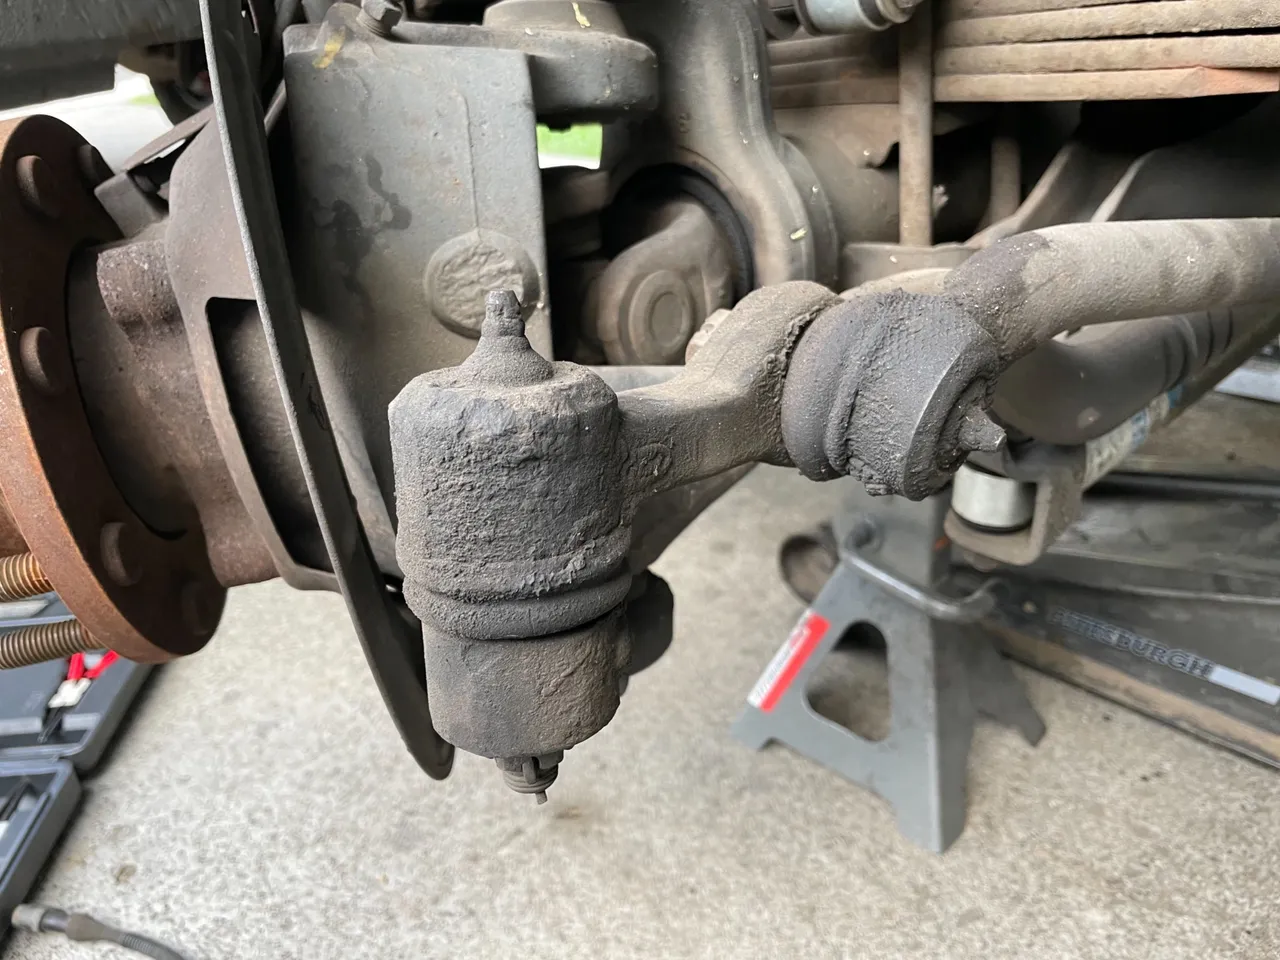
Pull the cotter pin from the tie rod end and remove the castle nut
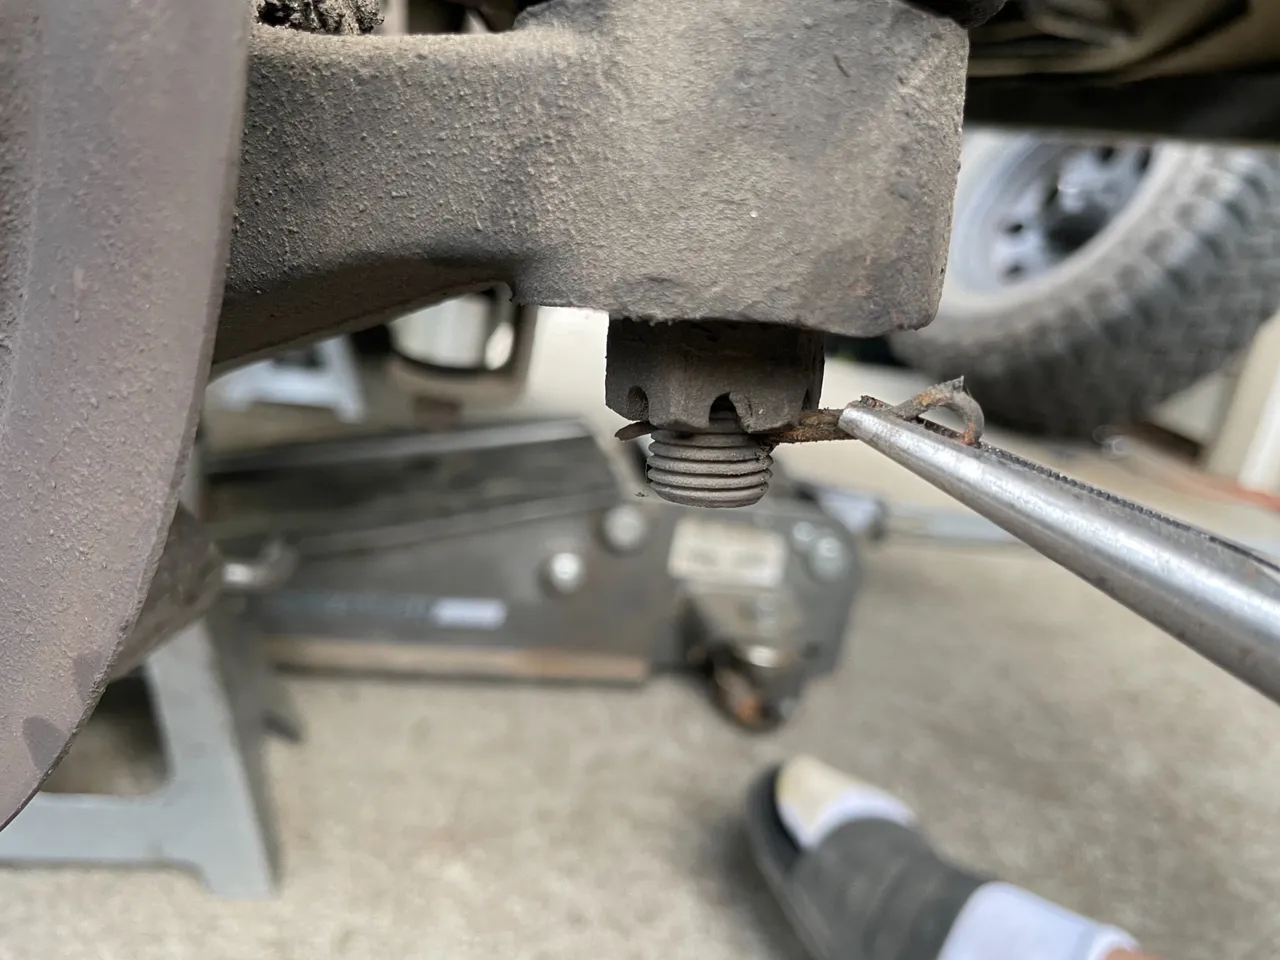
Then get out a hammer and take out some of your frustrations on it. Hit the knuckle right where the tie rod end joins with the outer knuckle

After a couple blows with a mini sledge hammer you should notice that it popped loose. Then with an upward swing hit the tie rod out of the hole and let it hang out for a bit.
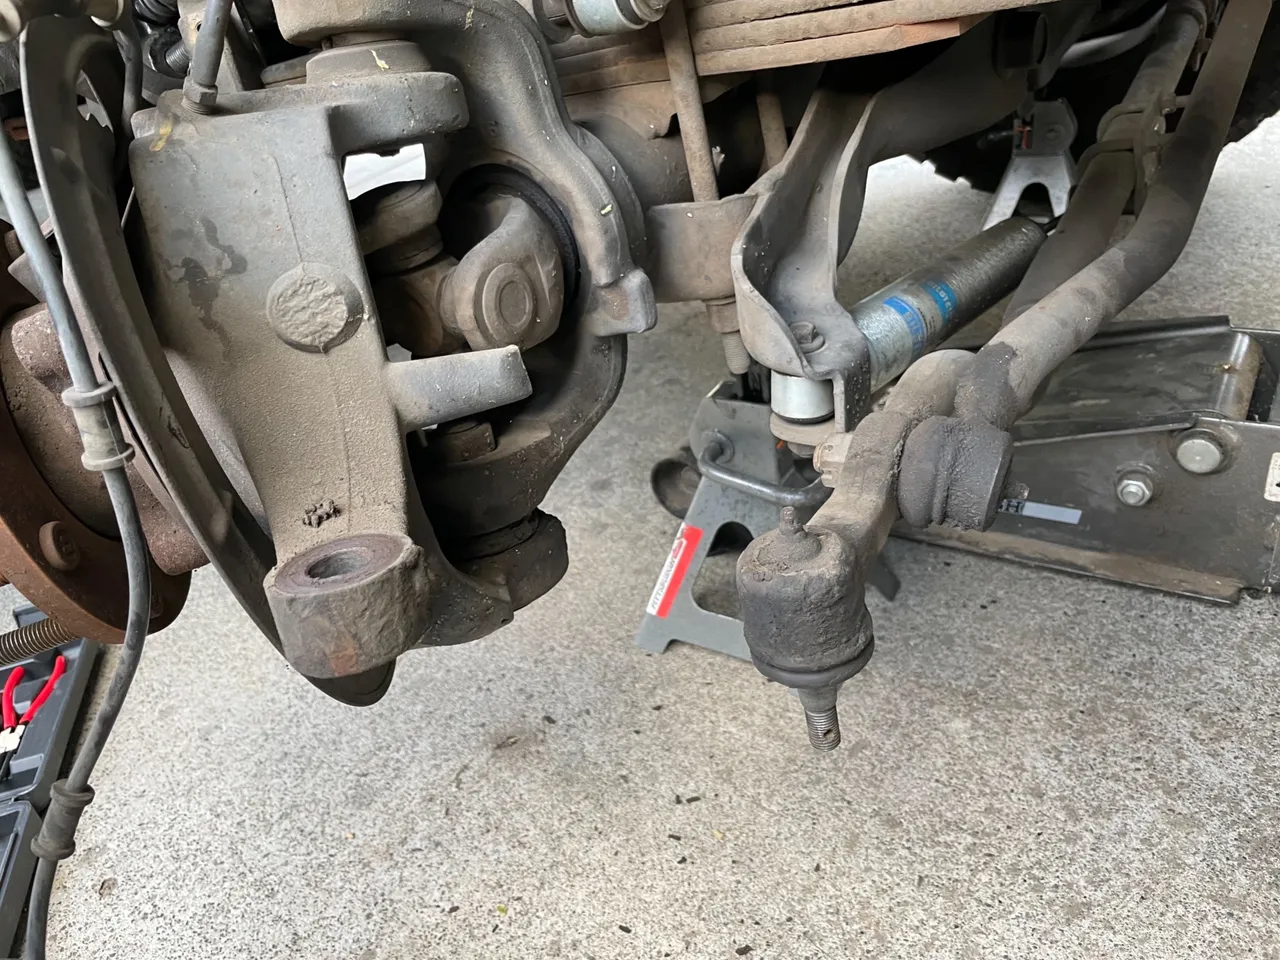
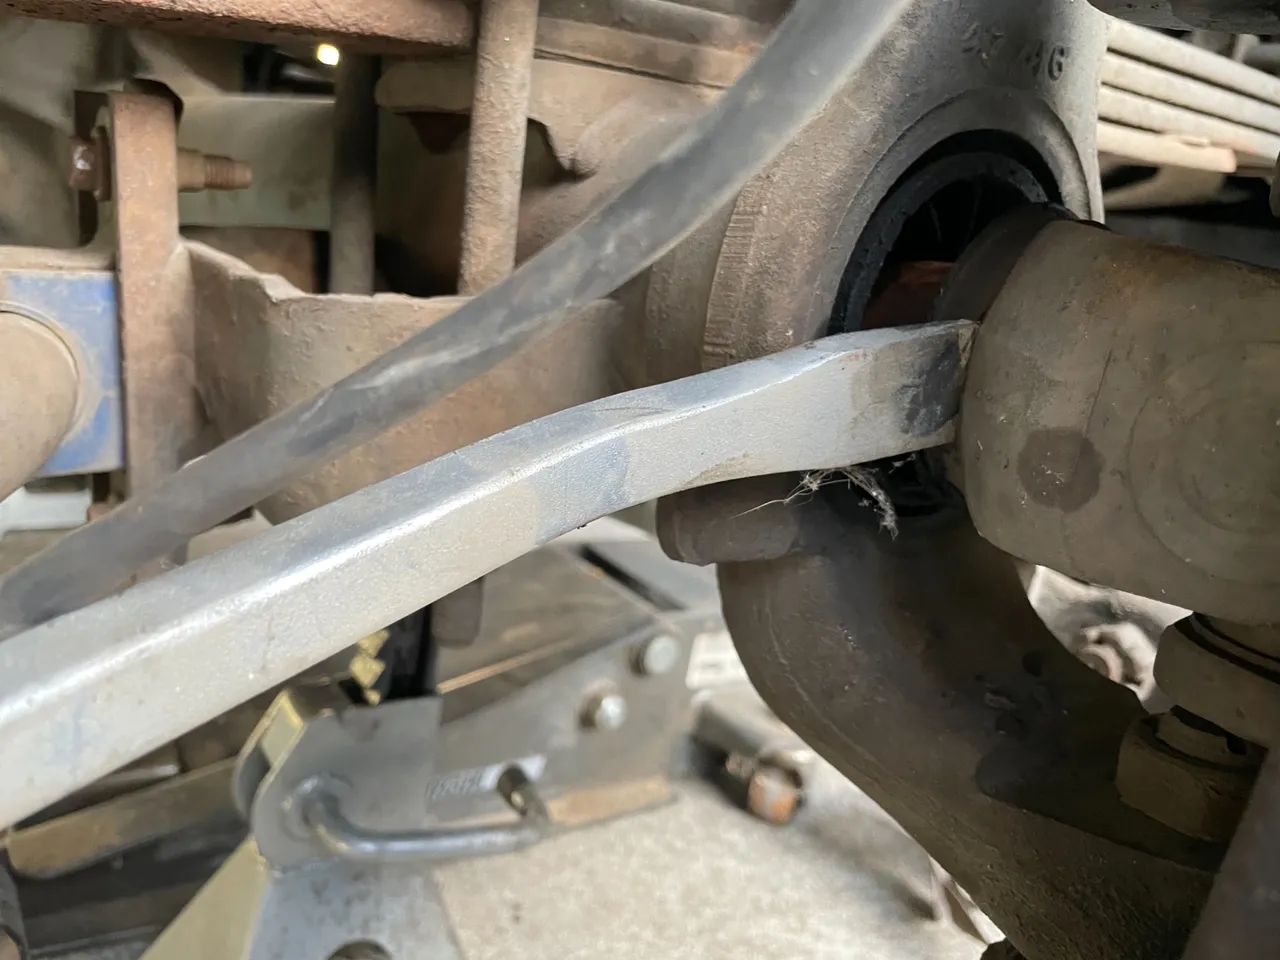
With the tie rod removed this allows the outer knuckle to turn freely without having to use the steering wheel. It makes it a ton easier to gain access to the U-joint in order to pry the axle out. Swing the steering knuckle to one side or the other and get yourself a pry bar.
Position your pry bar on the back side of the U-joint and pry against the axle tube.
It’s gonna take some force to get the axle to slide out. Make sure to straighten the outer knuckle so the axle can slide straight out. Pry from one side then pry from the other until the axle pops loose
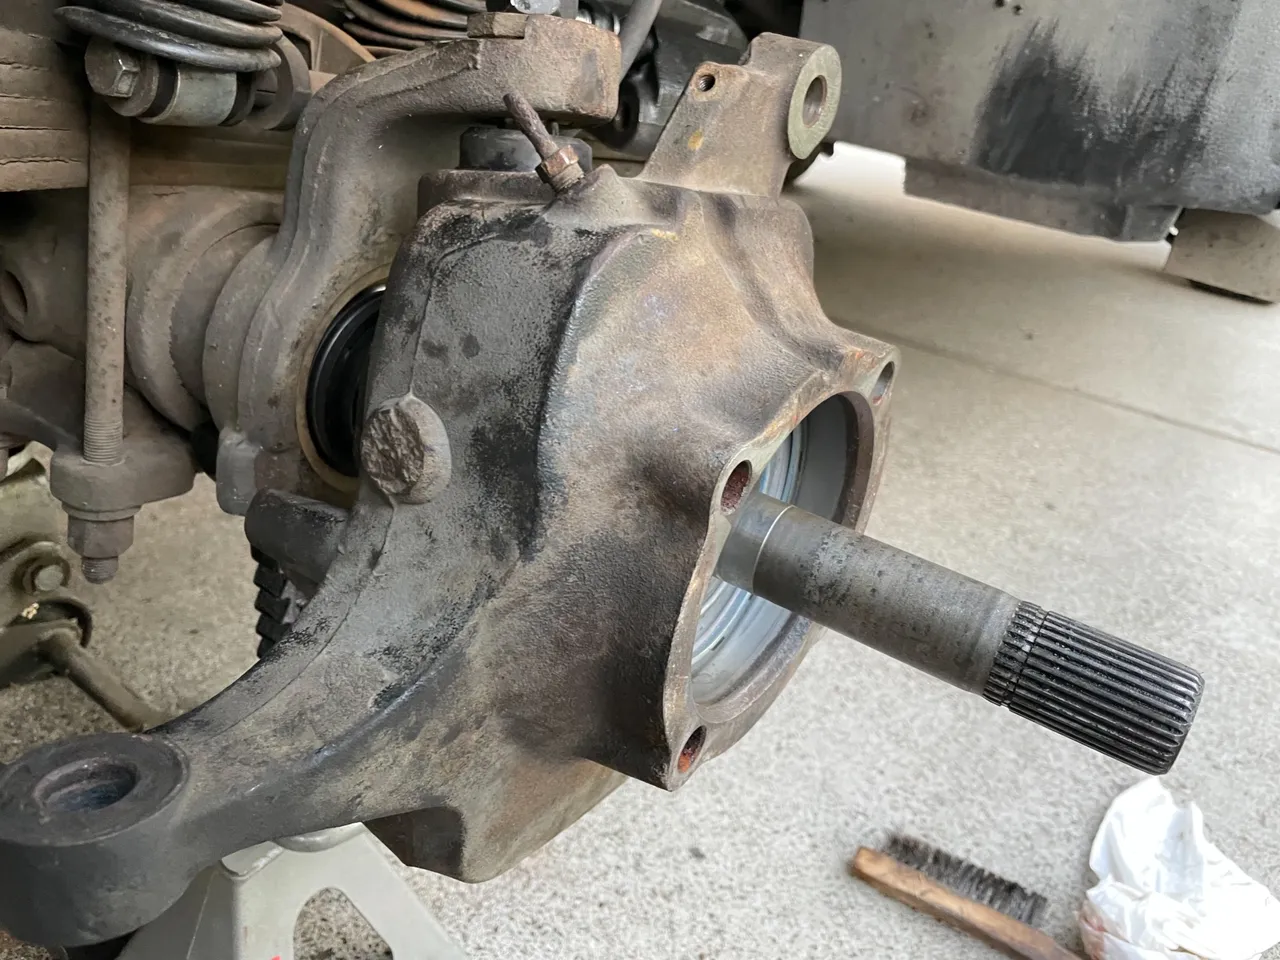
Now that the axle seals are broke loose from the outer knuckle and axle tube, it is ready to be slide out.
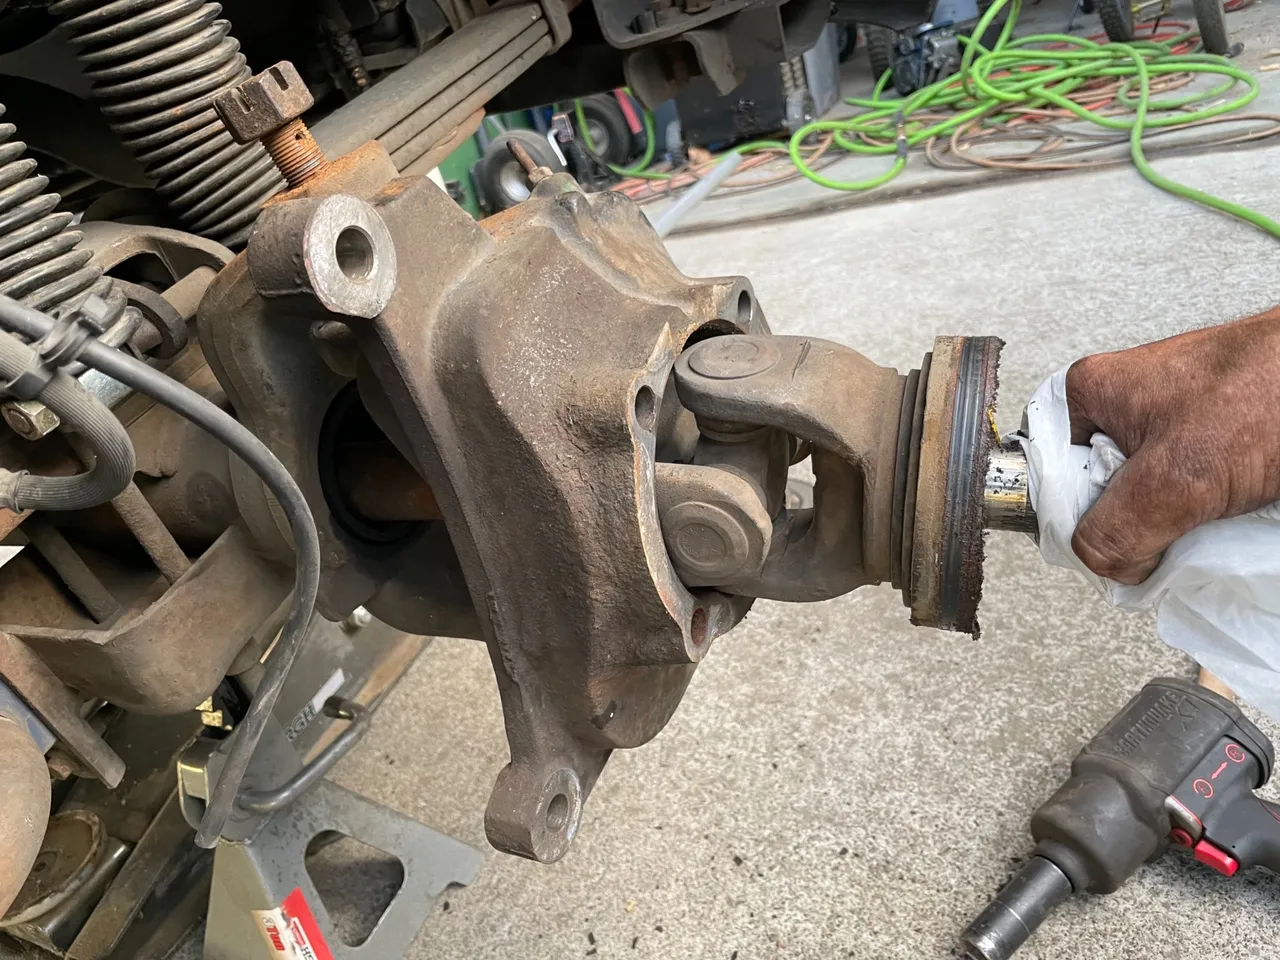
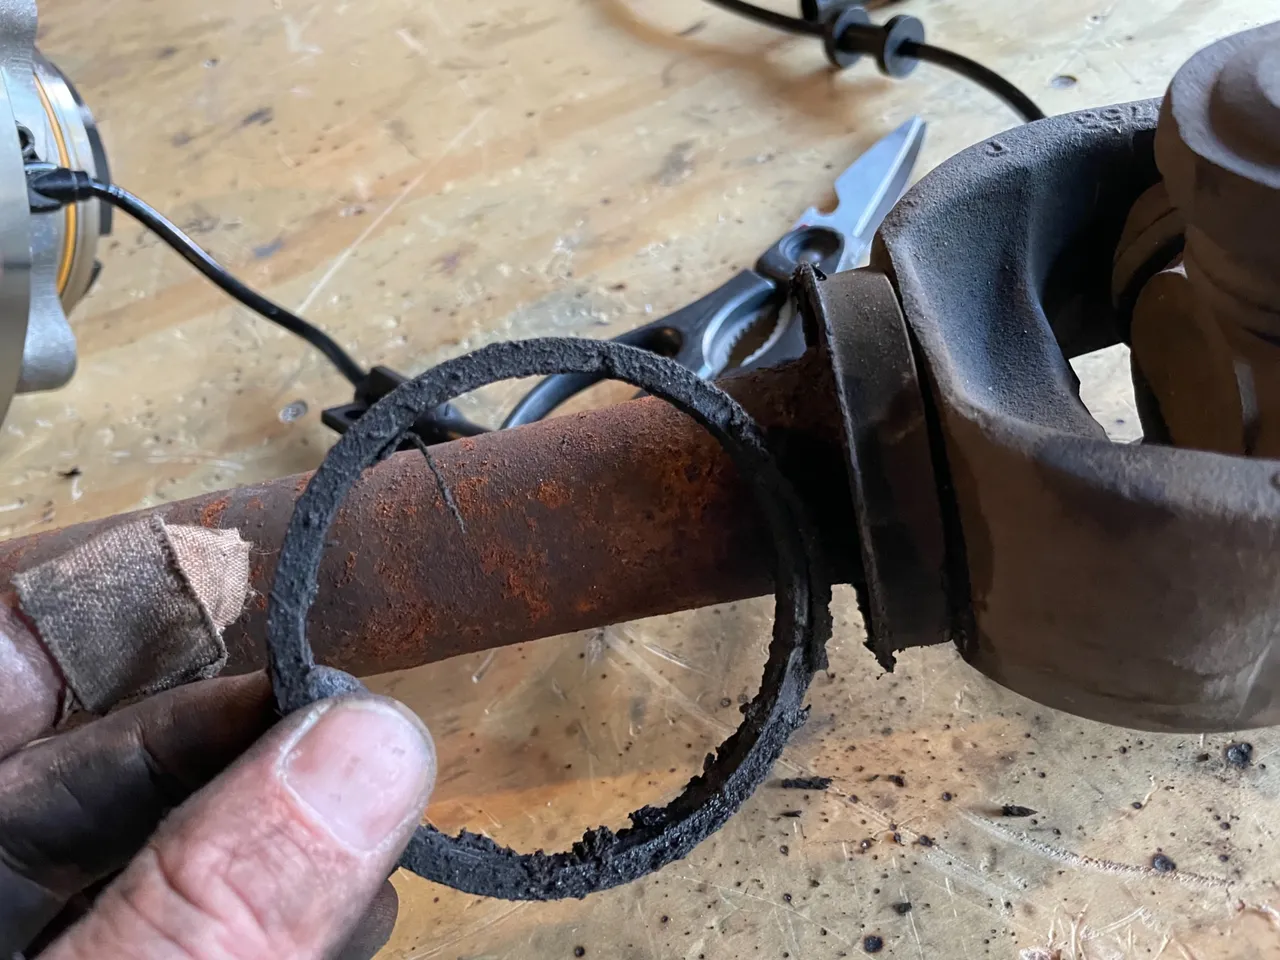
The dust seal keeps dirt and debris from getting into the axle tube. Well let’s just say mine was trashed. It’s not suppose to be a 2-piece seal but my old one sure was.
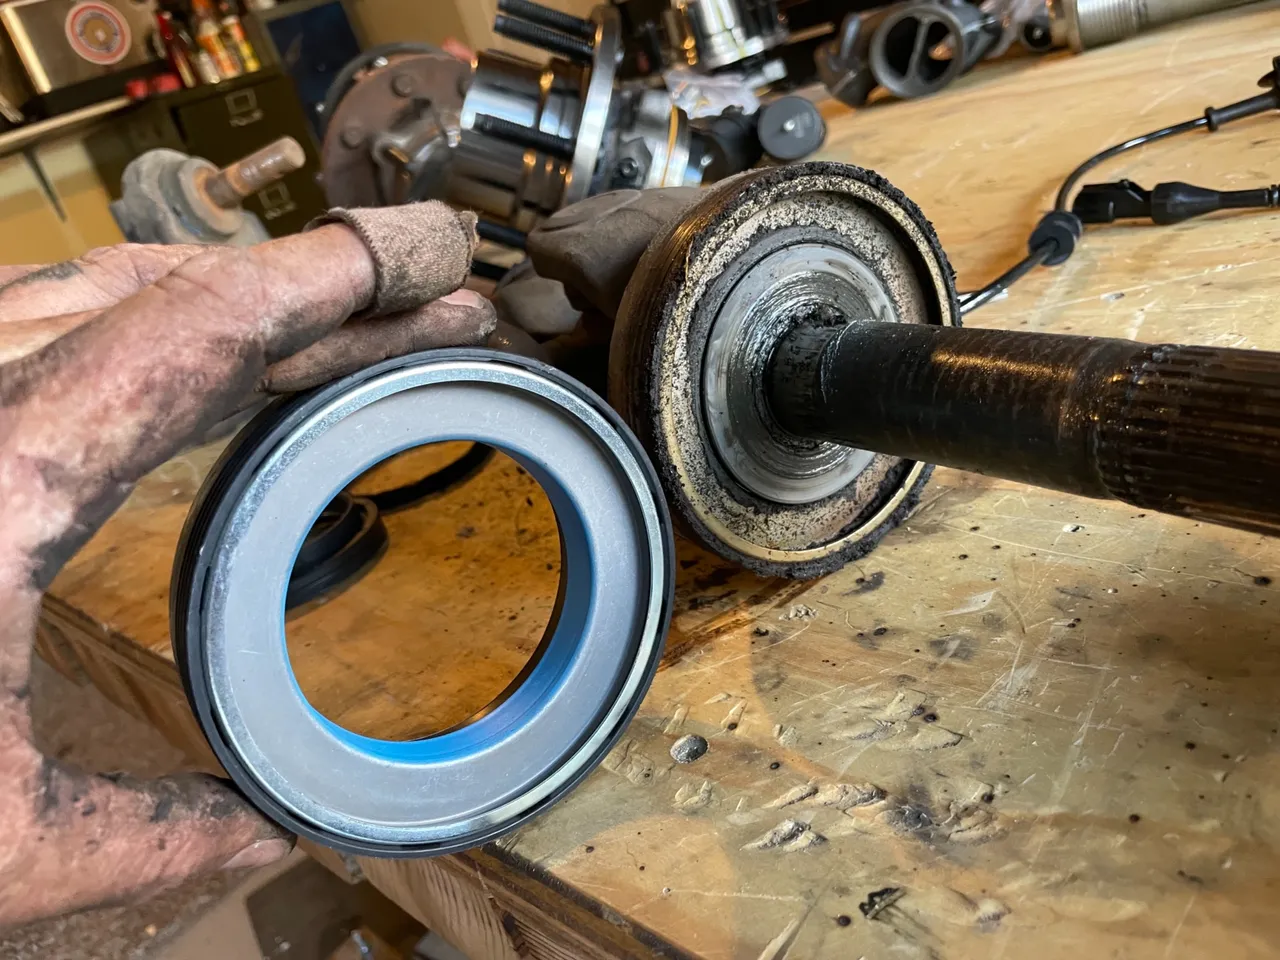
The vacuum seal is what is used to operate the auto locking hubs for 4-wheel drive. A flip of the switch on the dash and 4-wheel drive is engaged. If the seal is bad you won’t be able to engage 4-wheel drive from inside the cab. You would have to get out and manually lock the hubs in.
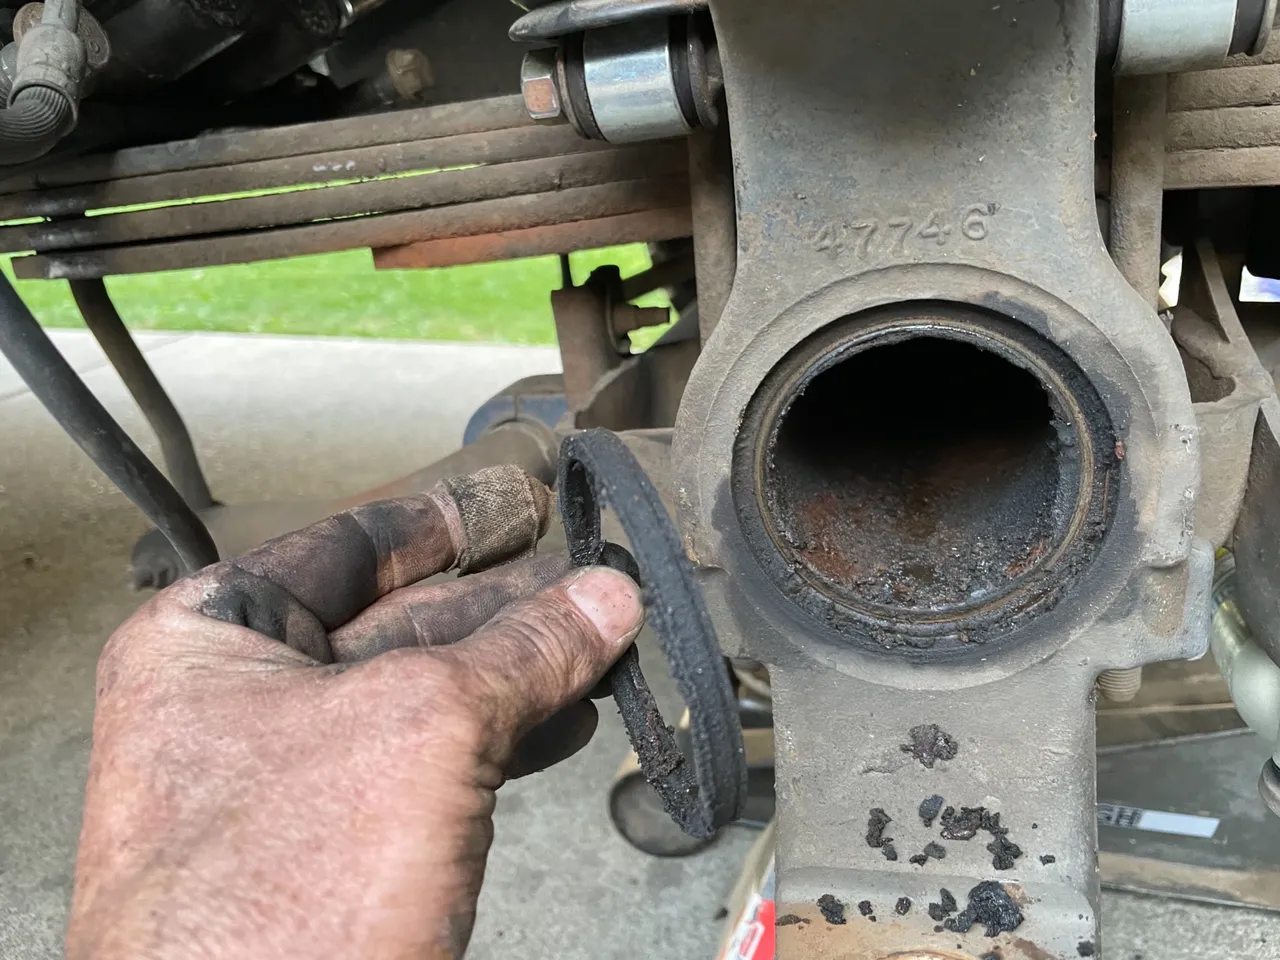
The dust seal can be simply pried off the axle with a screw driver. Mine was basically destroyed as you can see. It allowed all kinds of moisture and dirt to get into the axle tube. So I cleaned up my axle a bit before installing.

The vacuum seal is gonna take a bit more persuasion in order to remove. Having a vice is a huge help when doing this sort of stuff. Just use a hammer and start beating the crap out of it.
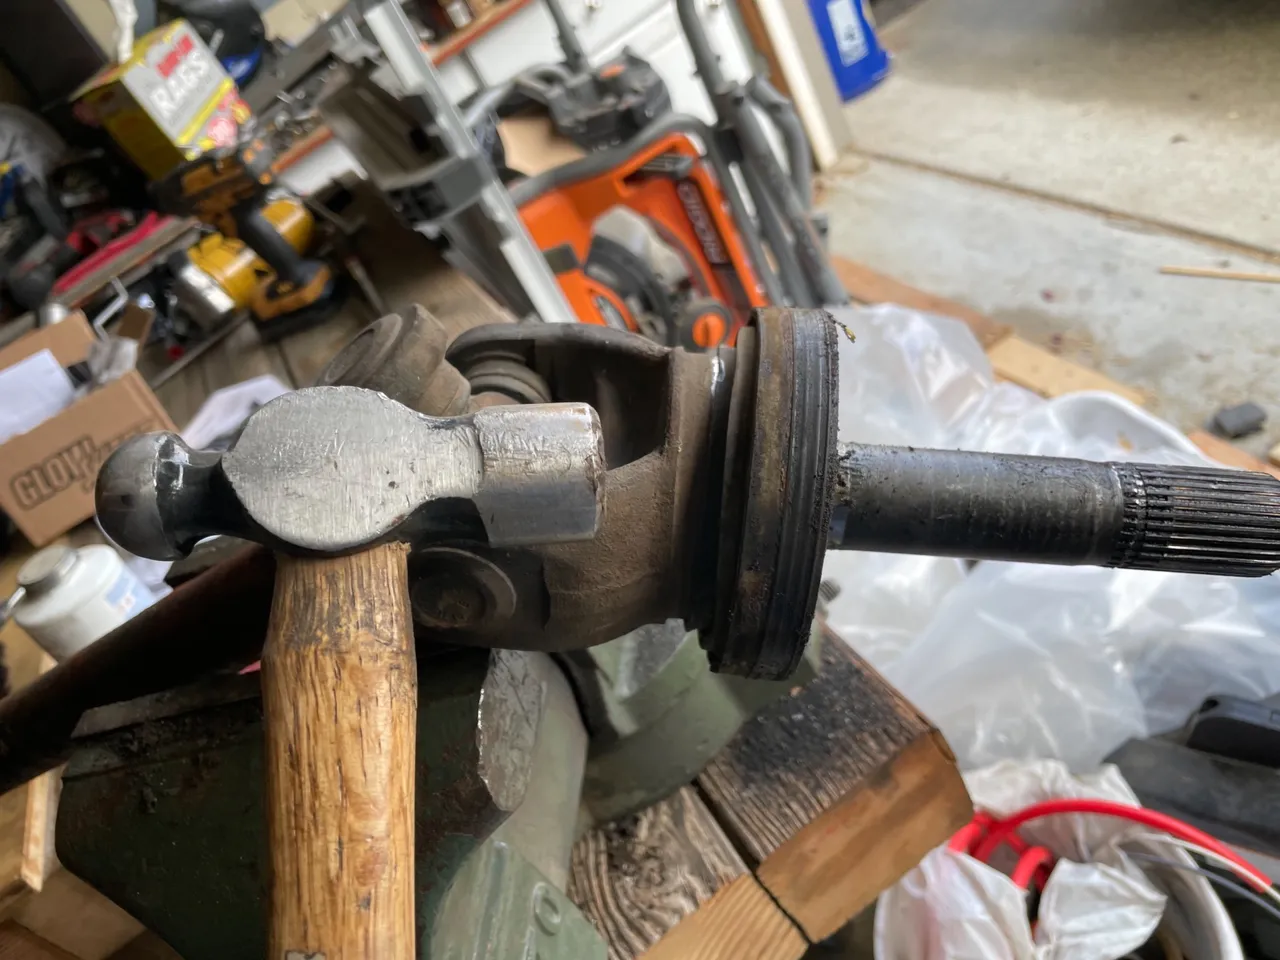
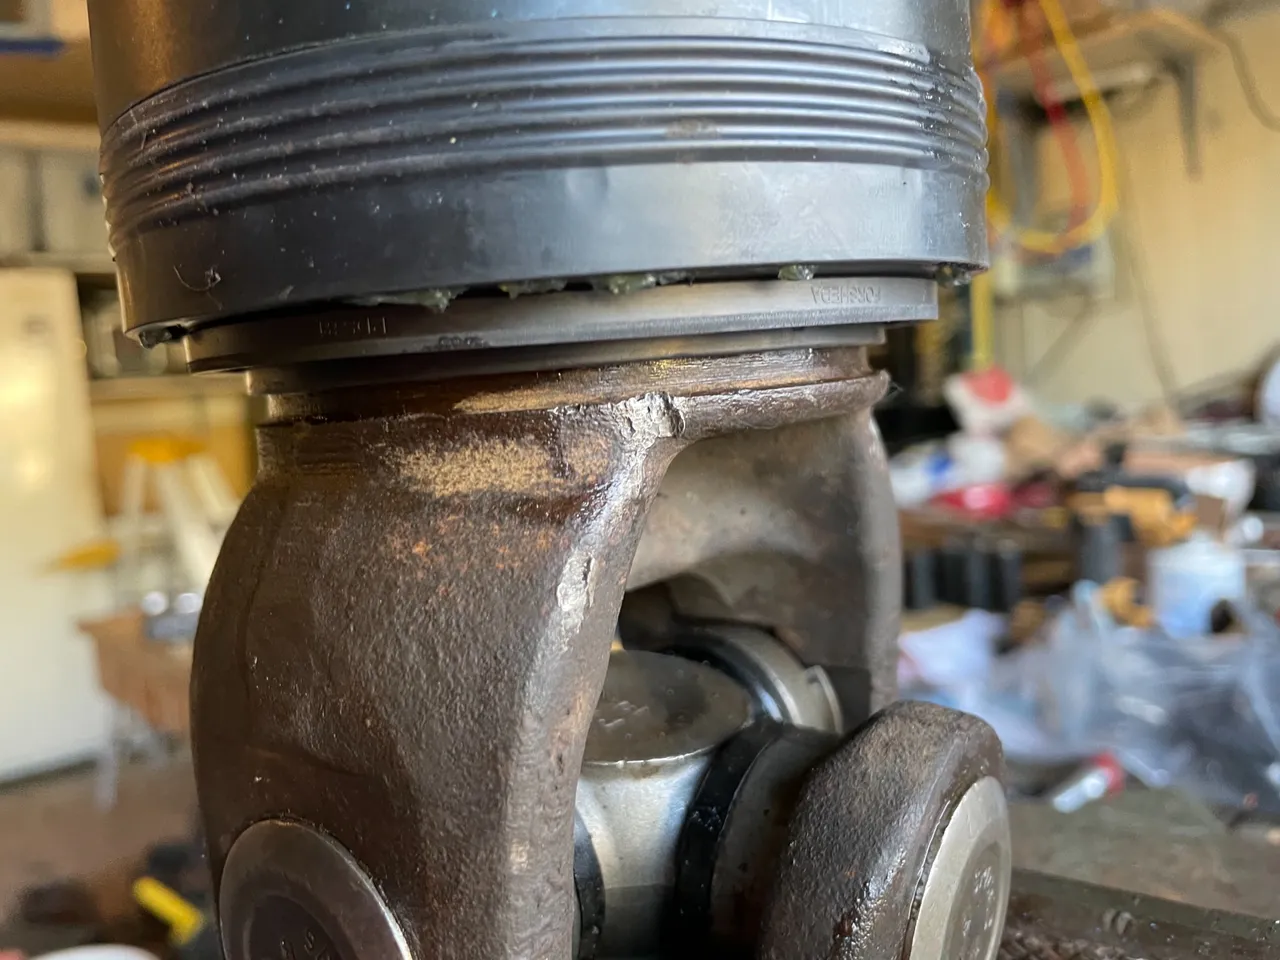
Now is a great time to change the axle U-joint. Actually a perfect time to do so. The axle is out, the seals are off so you might as well do it. I will cover the steps to do this in Part 3 of this series.
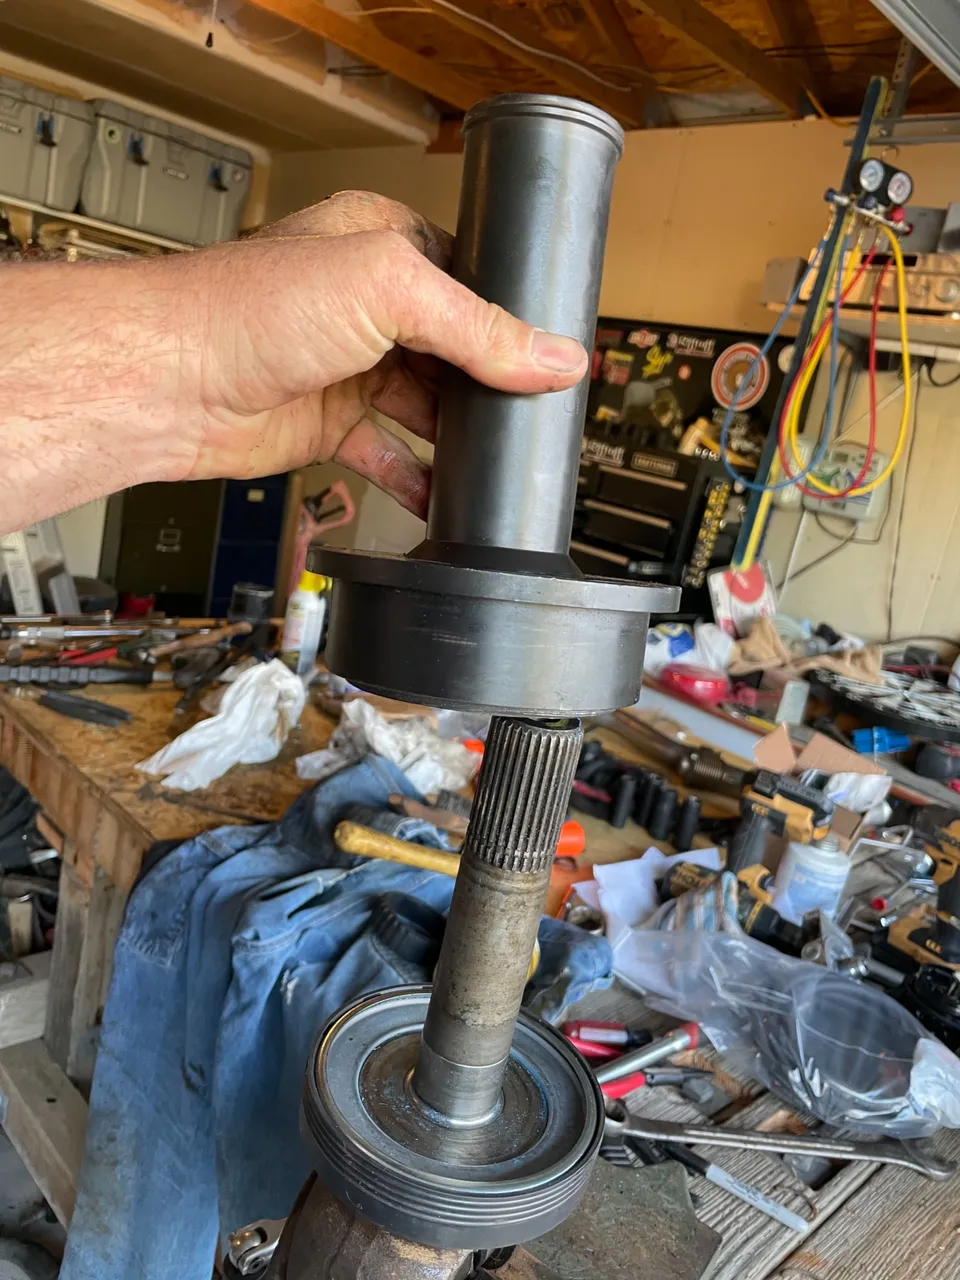
Once you get the old seals off, clean both of the seal’s mounting surface with a wire brush and wipe it off. Then apply a small bit of engine oil to help the seal slip on a little easier. To seat the dust seal I used a 1/2 drive extension and a small hammer. Gently working the seal onto the axle ensuring it goes on evenly. Double check the orientation of the seal before installing by taking a look at the other side.
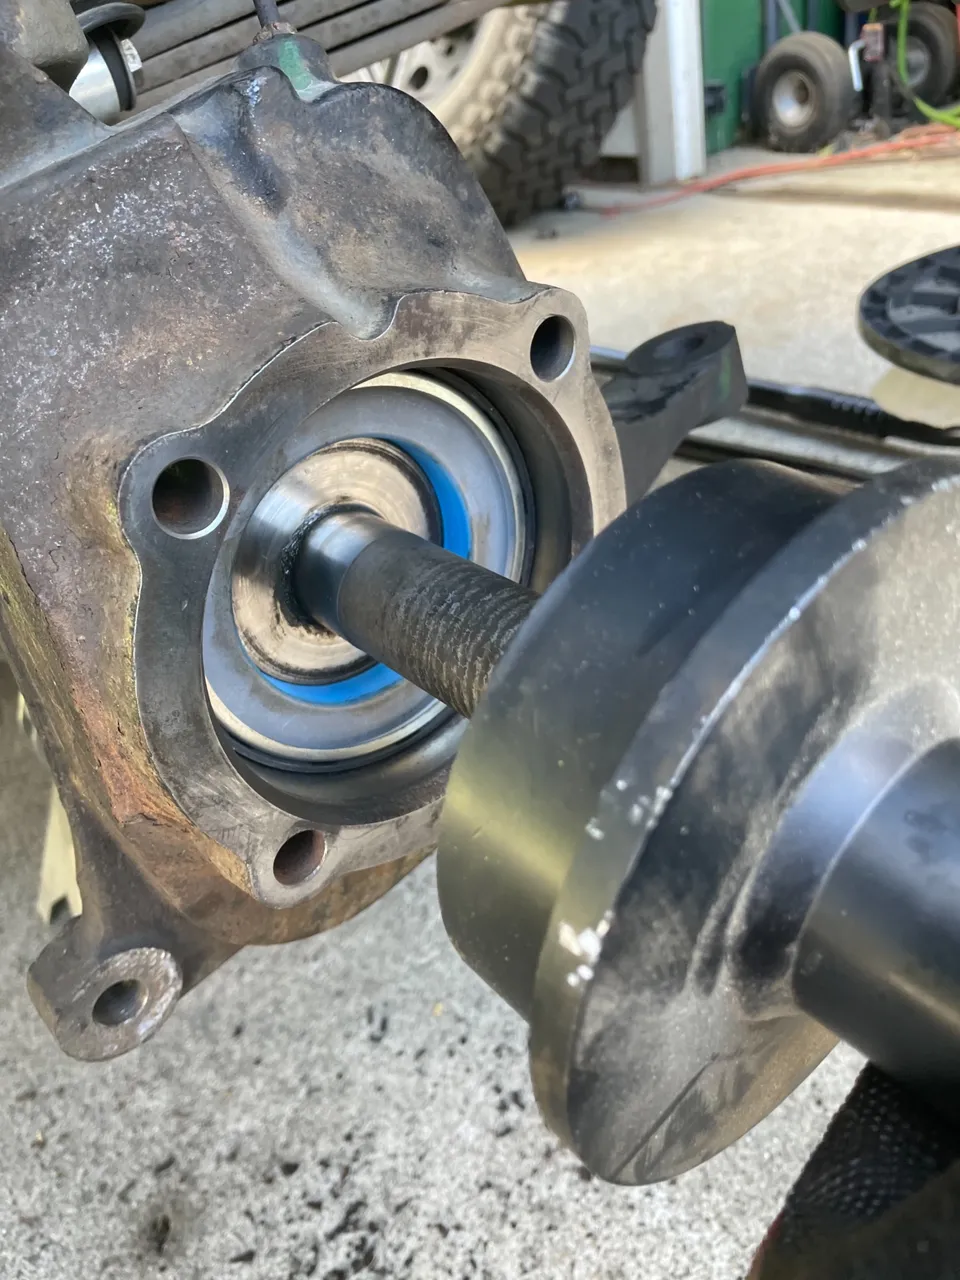
The seal should seat all the way down to the the yoke
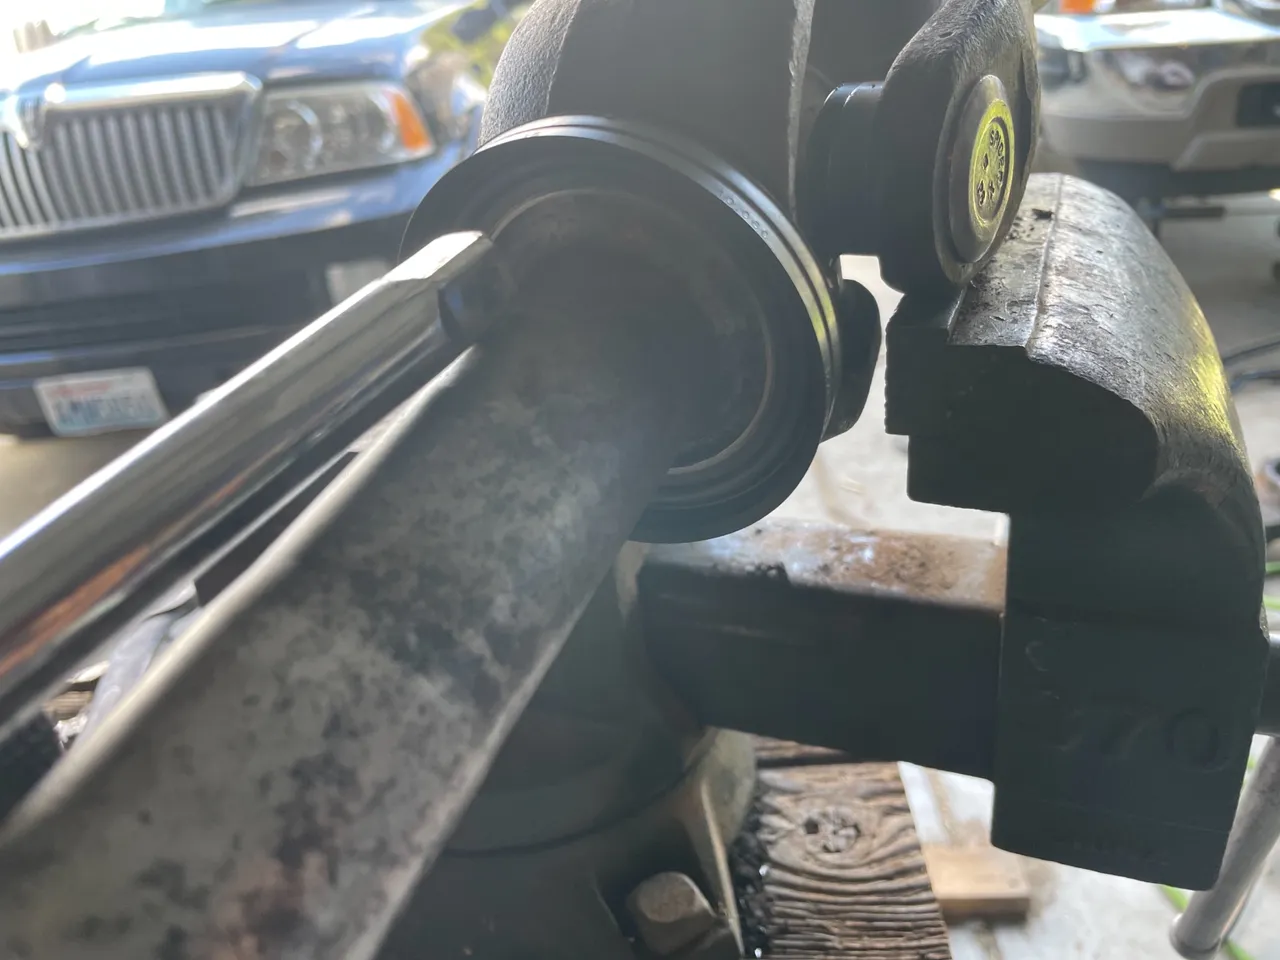
Now when it comes to installing the vacuum seal there is a special tool that it used in order to drive it on straight and to the proper depth.
LE-JX 6695 Axle Shaft Seal Installer Compatible with 1998-2004 Ford F-250 F-350 F-450 F550 Automotive Wheel Knuckle Vacuum Oil Seal Installer Tool it can be picked up on Amazon for around $60.
Position the axle in a vice and place the vacuum seal on the axle. The seal driver tool fits over the end of the axle and onto the seal
Then get that sledge hammer out again and start beating the snot out of it. It’s gonna take a lot of force to seat it all the way on the axle. There will be a distinct sound difference when hitting the back of the tool when the seal is seated all the way. After a few blows with the sledge hammer take a look at the seal and make sure it is getting driven on evenly.
Before reinstalling the axle make sure to use a wire brush and clean the surfaces that the seals contact. Clean them really good and wipe them down.
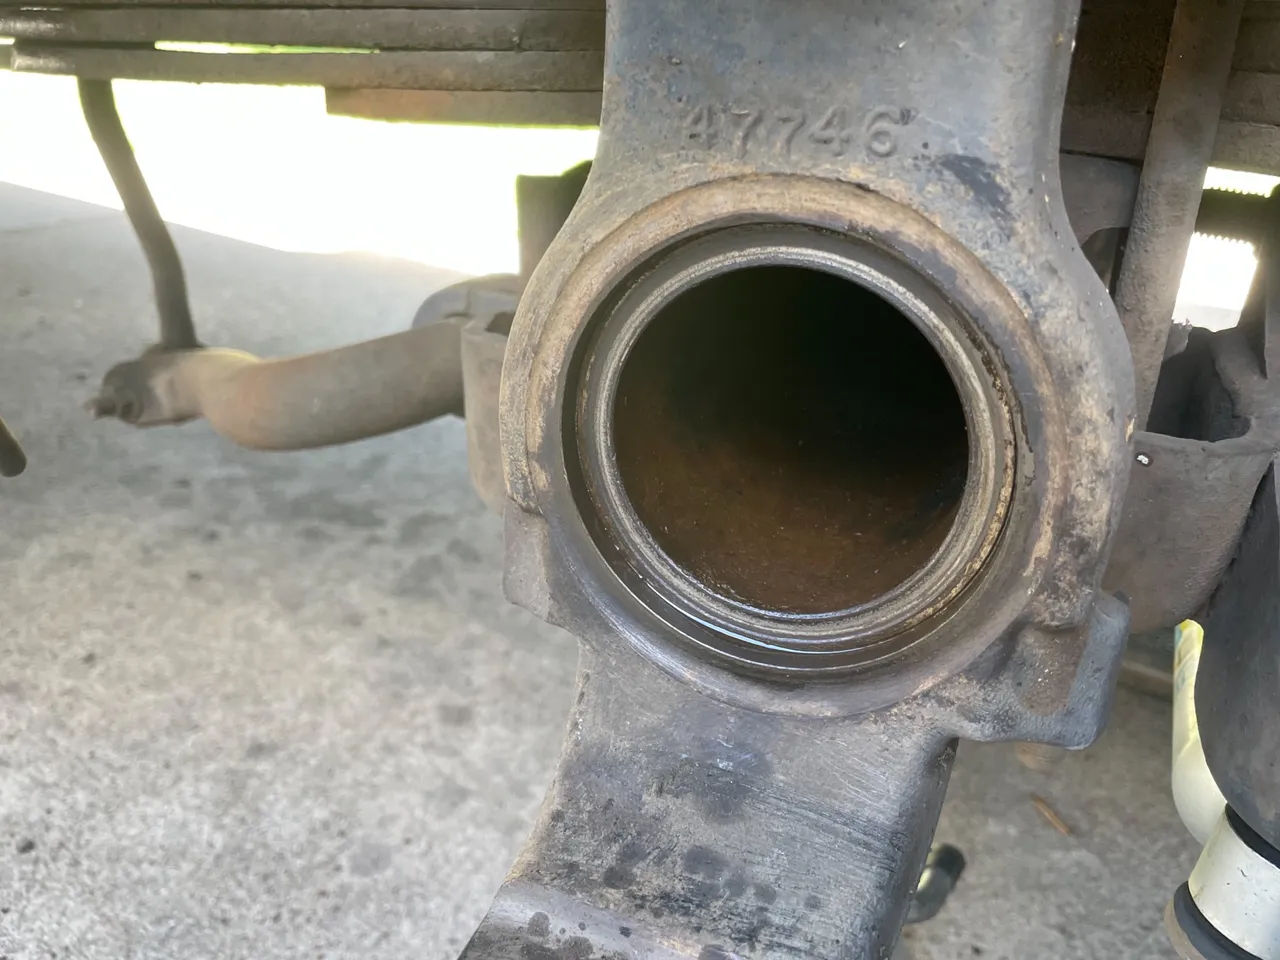
With both seals installed on the axle (and hopefully a new u-joint)and the seal surfaces cleaned, the axle is ready to be re-installed on the vehicle. Apply some grease to the inner end of the axle. Now don’t just go shoving it in with a bunch of force. On the inside of the axle tube there is an inner axle seal. You don’t want to mess that up. Gently push the axle in supporting the axle shaft as much as possible. Slowly rotate the axle and the splines of the axle will find their way into position. Now it will only go so far in until you need to use the seal driving tool again.
Place the seal driving tool over the end of the axle and bang away with your sledge hammer
You will know it is seated all the way when the seal driving tool is up against the outer knuckle all the way around

Once the seal is completely seated install the plastic washer with the grooves of the washer facing the seal. Then re-install the tie rod and torque the castle nut to 67 foot pounds and install the cotter pin. Now you are ready to put the rest of it back together. Refer to Part 1 (The Install) of this series to complete the install of your new Axle Dust & Vacuum seals.
Stay tuned for Part 3 of this series when I walk you through the steps of changing the Front Axle U-joints on a Ford F-250/350 1999-2005 or Ford Excursion 2000-2005.

Your Random
Dose of...